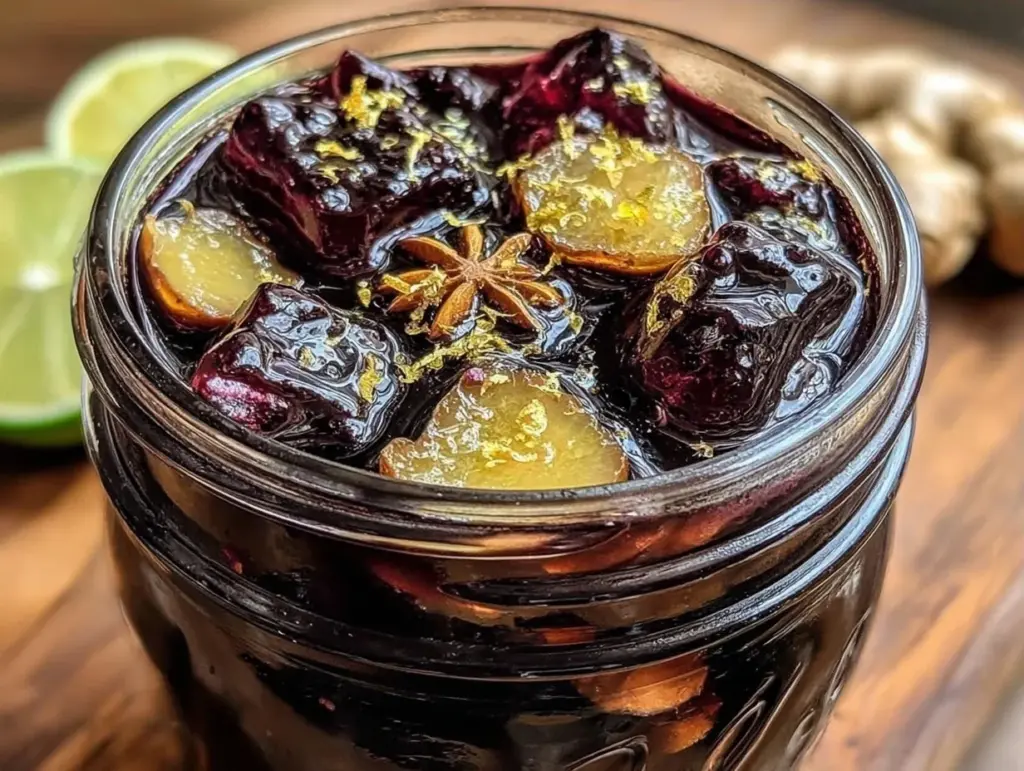
It was late November, and the air in my house had that specific, heavy chill that settles into your bones. My husband had just come down with the worst flu of the season—fever, body aches, the whole nine yards. I was hovering over him with water and fever reducers, feeling completely helpless. That’s when my mom called. She didn’t offer medical advice. She just said, “Did you make the syrup? The thick, dark kind?”
I hadn’t. I’d been buying the bottled stuff from the store, and let’s be real—it tasted like sugary water with a hint of berry. I felt foolish. So, while he slept, I went to the kitchen. I found some dried elderberries I’d bought on a whim months ago, some honey, and a few spices. I simmered it up, strained it, and poured it into a jar. The next morning, I gave him a tablespoon. It wasn’t magic—he still felt like garbage for two more days—but it was a tangible thing I could *do*. It felt like care in a spoon.
That winter, I made Immune-Boosting Elderberry Syrup with Honey every single week. By spring, I wasn’t just making it for him; I was making it for my kids before school, for my friends, and for myself. I’ve tested this recipe probably fifty times now, tweaking the spice ratios and the honey types until I landed on what I think is the perfect balance. It’s tart, it’s sweet, it smells like a cozy cabin, and it’s become the cornerstone of our family’s health routine.
If you’ve ever felt that same helpless panic when sickness hits your home, you need this in your kitchen. This isn’t just a drink; it’s a little bottle of peace of mind. I’m going to walk you through exactly how to make it, why the ingredients matter, and how to store it so it lasts all season long. Once you taste this homemade version, you’ll never go back to the store-bought stuff again. Trust me on this one.
Why You’ll Love This Syrup
Here’s the truth: most homemade remedies are either too medicinal to swallow or too sweet to be effective. This Immune-Boosting Elderberry Syrup with Honey hits that sweet spot. It’s versatile, it’s potent, and it actually tastes good enough to eat by the spoonful if you’re brave enough.
- It’s a Flavor Powerhouse — The tartness of the elderberries cuts through the sweetness of the honey perfectly. Add a cinnamon stick and some cloves, and it tastes like a gourmet hot toddy without the alcohol. I keep a bottle in the fridge, and honestly, my kids ask for it as a treat.
- It’s Soothing for Throats — When you’re sick, swallowing is the last thing you want to do. This syrup coats the throat. The honey provides natural antibacterial properties, and the warmth of the tea it’s mixed with feels like a hug from the inside out.
- It’s Shelf-Stable (Mostly) — Because of the high sugar content from the honey and the boiling process, this syrup keeps well in the fridge for up to three months. That means you can make a big batch in November and have it ready for the December rush.
- It’s Customizable — Love ginger? Add fresh ginger. Hate cloves? Skip them. This recipe is a canvas. You can adjust the spice profile to match your family’s palate.
- It’s Affordable — Dried elderberries are cheap in bulk. Honey is a pantry staple. Spices you probably already have. Compared to the cost of cold medicine or takeout when you’re sick, this is a no-brainer.
This is my go-to when the weather turns and I want to feel proactive about my family’s health. It’s simple, it’s effective, and it smells amazing while it’s cooking.
Key Ingredients for Immune-Boosting Elderberry Syrup with Honey
Let’s talk about what goes into this pot. I’ve tried shortcuts, and they don’t work. The quality of these ingredients matters because this is concentrated goodness.
Dried Elderberries
1 cup (approx. 3.5 oz / 100g) — This is the star. Use dried, not fresh. Fresh elderberries can be toxic if not cooked properly and lack the concentrated flavor. Look for organic dried berries; they’re plump, dark, and potent. Avoid anything that looks dusty or has bugs in it—stick to reputable brands like Mountain Rose Herbs or local co-op brands.
Raw Honey
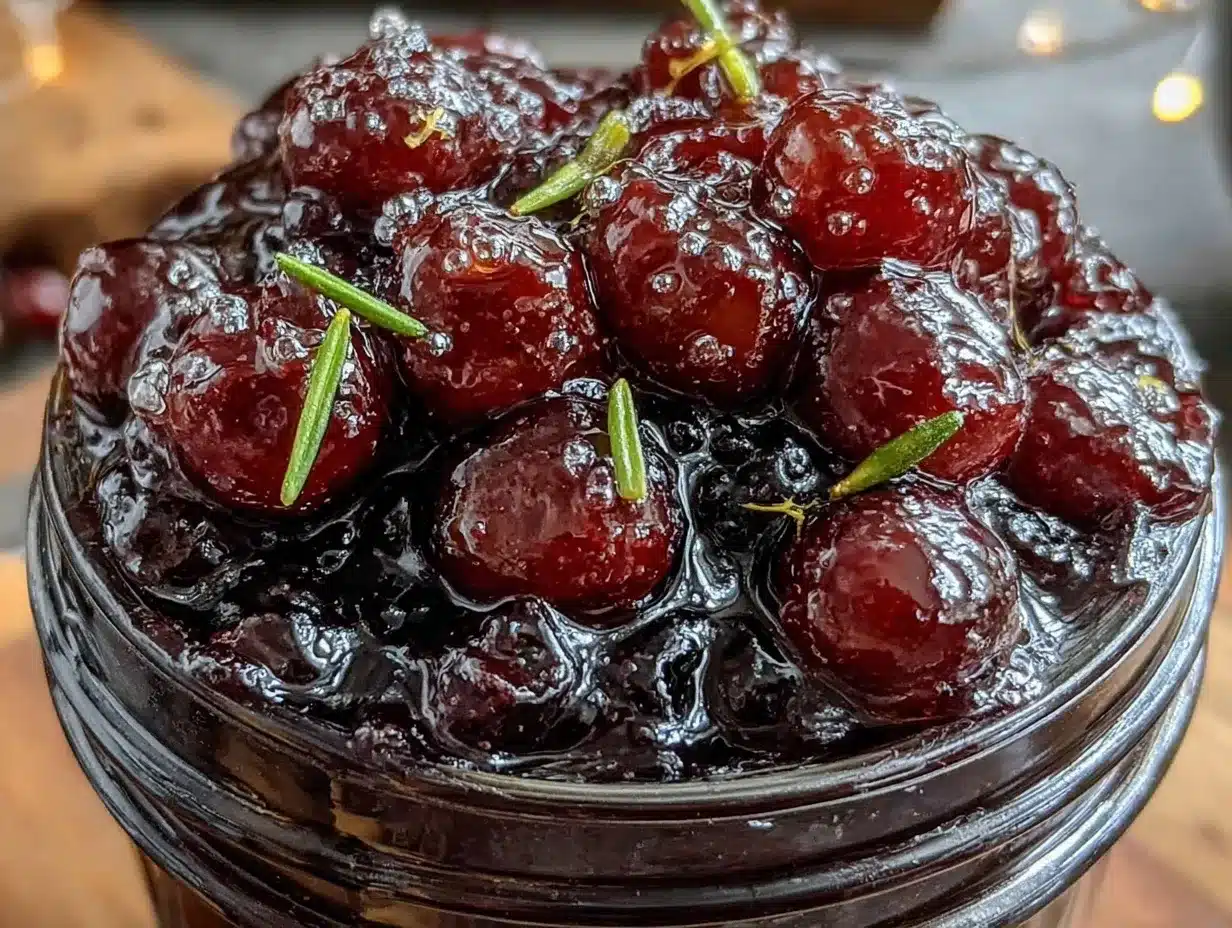
1 cup (approx. 12 oz / 340g) — Raw, unfiltered honey is non-negotiable here. You want those enzymes and antioxidants intact. Manuka honey is great but expensive; local wildflower or clover honey works beautifully. Note: If you’re making this for infants under 1 year, you must skip the honey and use maple syrup or just boil the water down, though the shelf life will be shorter.
Water
3 cups (720 ml) — Just good old-fashioned tap or filtered water. You’re extracting the flavor and nutrients from the berries, so you don’t need fancy mineral water.
Cinnamon Stick
1 large stick (or 1/2 tsp ground) — A cinnamon stick infuses slowly and gives a warm, woody note without making the syrup gritty. If you use ground cinnamon, strain it twice through cheesecloth, or you’ll get grit in every spoonful. I always use the stick.
Whole Cloves
1/2 teaspoon — Cloves add that deep, spicy backbone. Don’t skip them, but don’t overdo it. They’re strong. Two teaspoons will make it taste like a Christmas tree.
Black Peppercorns
1/4 teaspoon — This is my secret tip. A few cracked peppercorns add a subtle heat that wakes up the palate and aids digestion. It’s a tiny detail, but it makes the flavor profile more complex.
Optional: Fresh Ginger
1-inch piece, sliced — If you’re feeling extra sick or just love ginger, add this. It adds a zing that pairs wonderfully with the elderberries. I usually add it if I’m making a batch for cold season.
Tools Needed
You don’t need a fancy kitchen for this. Here’s what I use, and what you can swap out.
Medium Saucepan — I use a 3-quart stainless steel pot. It needs to be big enough to hold the water and berries without boiling over. Glass pots work too, but keep an eye on the heat.
Mesh Strainer — A fine-mesh metal strainer is essential. You need to catch all those tiny berry skins and seeds.
Cheesecloth or Nut Milk Bag — This is the game-changer. If you want a silky, clear syrup, strain it once through the mesh strainer, then once through cheesecloth or a nut milk bag. If you skip this, you’ll get berry bits in your tea, which some people don’t mind, but I prefer it smooth.
Glass Jar with Lid — A 16-ounce mason jar is perfect. Glass is best because the acidity of the berries and honey can interact with some plastics over time. Clean it thoroughly before storing.
Funnel — Makes transferring the hot syrup into the jar much less messy. I hate sticky countertops.
How to Make Immune-Boosting Elderberry Syrup with Honey
Let’s get cooking. This process is mostly hands-off, which is why I love it. You can make this while you’re working from home or helping the kids with homework.
Step 1: Combine and Simmer (20 minutes)
Add the dried elderberries, water, cinnamon stick, cloves, and peppercorns to your saucepan. If you’re using fresh ginger, add it now too. Bring the mixture to a boil over high heat. Once it boils, immediately reduce the heat to low. You want a gentle simmer, not a rolling boil. Cover the pot and let it simmer for 45 minutes to an hour. The liquid will reduce by about half, turning a deep, dark purple. The berries will burst and look shriveled. This is exactly what you want.
Tip: Don’t rush this step. The long simmer extracts the anthocyanins (the good stuff) from the skins. If you boil it too hard, you might evaporate too much liquid too quickly.
Step 2: Cool Slightly (10 minutes)
Turn off the heat. Remove the cinnamon stick and any large ginger pieces. Let the pot sit off the heat for about 10 minutes. This is important: you don’t want to add the honey while the liquid is boiling hot, as it can destroy some of the beneficial enzymes in the raw honey. Wait until it’s warm but not scalding.
Step 3: Strain the Syrup (10 minutes)
Place your mesh strainer over a large bowl. If you want ultra-smooth syrup, place cheesecloth over the strainer. Pour the berry mixture through. Use a spoon to press down on the berries and squeeze out every drop of liquid. This is the good stuff! Discard the solids (or compost them). If you’re using the cheesecloth method, gather the corners and gently squeeze the bag to extract the remaining juice.
Step 4: Mix with Honey (5 minutes)
Once the liquid is warm (around 100°F or 38°C, or just warm to the touch), stir in the raw honey. Whisk it vigorously until it’s completely dissolved. If the honey is very thick and cold, you can warm the strained liquid slightly before adding it, but keep it under 110°F to preserve the honey’s benefits.
Step 5: Bottle and Store
Use your funnel to pour the syrup into your clean glass jar. Seal it tightly. Let it cool to room temperature before putting it in the fridge. It will thicken slightly as it cools.
Total Time: About 1 hour 15 minutes, mostly waiting.
Expert Tips from My Kitchen
I’ve made this enough times to know where things can go wrong. Here’s how to avoid the pitfalls.
The Honey Temperature Rule
I learned this the hard way. The first time I made this, I added the honey while the liquid was still boiling. The syrup tasted flat. I did some research and found that heat above 118°F (48°C) starts to degrade the enzymes in raw honey. So, be patient. Let it cool. It’s worth it.
Don’t Skip the Cheesecloth
My first batch was gritty. I used just a mesh strainer, and while it caught the big bits, the tiny seeds and pulp got through. It wasn’t terrible, but it was annoying. Now, I always use the double-strain method. It takes five extra minutes, but the result is a silky, professional-grade syrup.
Adjusting Sweetness
Elderberries are naturally tart. If you prefer a sweeter syrup, you can add an extra quarter cup of honey. If you want it more medicinal and less sweet, stick to one cup. Taste it after mixing. It should be sweet enough to mask the tartness but not so sweet that it’s syrupy like pancake syrup.
Label and Date
Write the date on the jar with a permanent marker. It’s easy to forget when you made it, and you don’t want to guess. I keep a log in my kitchen notebook now.
Recipe Variations
Once you’ve nailed the basic version, here’s how to mix it up.
Spicy Ginger Kick
Add 2 inches of fresh ginger root, sliced thin, during the simmer. This adds a warming heat that’s great for chest congestion. I love this version in winter.
Citrus Zest
Add the zest of one orange or lemon after you strain the berries. Stir it in with the honey. The citrus oils brighten the flavor and add Vitamin C. It’s refreshing and complex.
Apple Cider Version
Replace half the water with unsweetened apple cider. This adds natural sweetness and a tart apple note. It pairs beautifully with the cinnamon. Just note that this version may have a shorter shelf life due to the lower acidity.
Non-Honey Option
For those avoiding honey, use pure maple syrup. Add it after straining, just like the honey. The flavor will be more robust and earthy, which works well with the spices. Note: Maple syrup doesn’t have the same preservative qualities as honey, so this batch will last only 2-3 weeks in the fridge.
Adults Only (Hot Toddy Style)
While the syrup itself is alcohol-free, it’s perfect for making hot toddies. Mix 2 tablespoons of syrup with hot water and a shot of bourbon or whiskey. It’s a classic for a reason. I also have a recipe for blackberry bourbon lemonade if you want to explore more berry-forward drinks.
Serving & Storage
How to Serve
As a Tonic: Take 1 tablespoon daily during cold and flu season for prevention. As a Remedy: Take 1 tablespoon every 2-3 hours when you’re actively sick. In Tea: Mix 2 tablespoons into a cup of hot herbal tea. In Water: Stir into cold water for a refreshing, tart drink in the summer.
Storage
Fridge: Store in an airtight glass jar in the refrigerator. It will keep for up to 3 months. The honey acts as a preservative, but the berries are fresh fruit, so err on the side of caution.
Freezer: Yes, you can freeze this! Pour the syrup into ice cube trays. Once frozen, pop the cubes into a freezer bag. This is great for portion control. You can grab a cube and toss it into hot water or tea. It keeps for up to 6 months.
Real Talk: This doesn’t freeze well in the jar because the liquid expands and can crack the glass. Always use ice cube trays or freezer-safe bags.
Nutrition Information
I’m not a nutritionist, but here’s the general breakdown per tablespoon (approx. 15ml) of the finished syrup.
| Nutrient | Amount |
|---|---|
| Calories | 45-50 |
| Carbohydrates | 11-12g |
| Sugars | 10-11g |
| Fat | 0g |
| Protein | 0g |
| Sodium | 1mg |
My Take: This is sweet, so it’s not exactly “diet food.” But it’s natural sugar from honey and berries, not refined white sugar. It’s packed with antioxidants and anti-inflammatory spices. Think of it as a health boost, not a candy bar. If you’re watching your sugar intake, use it sparingly or opt for the maple syrup version with less sweetener.
Final Thoughts
Making Immune-Boosting Elderberry Syrup with Honey is one of those simple acts of self-care that pays off in the long run. It’s not about curing every illness—it’s about giving your body the best support you can while you’re at home, resting and recovering. It’s comforting, it’s delicious, and it makes you feel capable.
I hope this recipe becomes a staple in your home, just like it has in mine. Feel free to tweak the spices to your liking. Make it yours. If you try it, I’d love to hear how you like it. Drop a comment below with your favorite spice addition!
Happy cooking, and stay healthy!
FAQs
Can I use fresh elderberries instead of dried?
I don’t recommend it. Fresh elderberries contain cyanogenic glycosides, which can be toxic if not cooked thoroughly. Dried elderberries are safer and more concentrated in flavor. If you forage your own, you must boil them for at least 30 minutes, but buying dried is the safer, easier bet.
How long does this syrup last?
In the fridge, it lasts up to 3 months. If you notice any mold, off-smell, or fermentation (bubbles), throw it out. The high sugar content preserves it, but it’s still natural fruit juice, so it’s not immortal.
Can I give this to children?
Yes, but not for infants under 1 year old due to the honey. For toddlers and up, you can give them 1/2 to 1 teaspoon daily. It’s a great way to get them to take a natural immune boost without the taste of medicine.
Why is my syrup cloudy?
Cloudiness usually means you didn’t strain it enough. If you want a clear, jewel-toned syrup, use the cheesecloth or nut milk bag method. Cloudiness doesn’t mean it’s bad—it’s still safe to drink—but it’s less pretty.
Can I make this in a slow cooker?
You can! Combine berries, water, and spices in the slow cooker. Cook on low for 6-8 hours. Then strain and mix with honey. It’s a great hands-off option if you’re busy all day.
What if I don’t have cloves?
You can skip them. The cinnamon and peppercorns will still provide a warm, spicy flavor. It won’t be exactly the same, but it will still be delicious. Don’t let missing one spice stop you from making it.
Pin This Recipe!
Immune-Boosting Elderberry Syrup with Honey
- Total Time: 1 hour 15 minutes
- Yield: Approximately 16 servings 1x
Description
A homemade, tart, and sweet elderberry syrup infused with cinnamon, cloves, and peppercorns, sweetened with raw honey. This soothing remedy is designed to support immune health and coat the throat during cold and flu season.
Ingredients
- 1 cup dried elderberries (approx. 3.5 oz / 100g)
- 1 cup raw, unfiltered honey (approx. 12 oz / 340g)
- 3 cups water
- 1 large cinnamon stick (or 1/2 tsp ground cinnamon)
- 1/2 teaspoon whole cloves
- 1/4 teaspoon black peppercorns
- 1-inch piece fresh ginger, sliced (optional)
Instructions
- Combine dried elderberries, water, cinnamon stick, cloves, peppercorns, and optional ginger in a medium saucepan.
- Bring the mixture to a boil over high heat, then immediately reduce heat to low to maintain a gentle simmer.
- Cover and simmer for 45 minutes to 1 hour until the liquid reduces by half and turns a deep purple.
- Remove from heat and let cool for about 10 minutes. Remove the cinnamon stick and large ginger pieces.
- Strain the mixture through a fine-mesh strainer lined with cheesecloth or a nut milk bag into a bowl. Press on the solids to extract all liquid.
- Once the liquid is warm (around 100°F/38°C, not boiling), stir in the raw honey until completely dissolved.
- Pour the syrup into a clean glass jar using a funnel.
- Let cool to room temperature before sealing and refrigerating.
Notes
Do not add honey while the liquid is boiling hot, as heat above 118°F degrades the enzymes in raw honey. For infants under 1 year, substitute honey with maple syrup or omit sweetener entirely. Store in the refrigerator for up to 3 months or freeze in ice cube trays for up to 6 months.
- Prep Time: 10 minutes
- Cook Time: 55 minutes
- Category: Beverage
- Cuisine: American
Nutrition
- Serving Size: 1 tablespoon
- Calories: 45
- Sugar: 10
- Sodium: 1
- Carbohydrates: 11
Keywords: elderberry syrup, immune boost, honey remedy, natural cold medicine, homemade syrup, elderberry recipe, flu season


