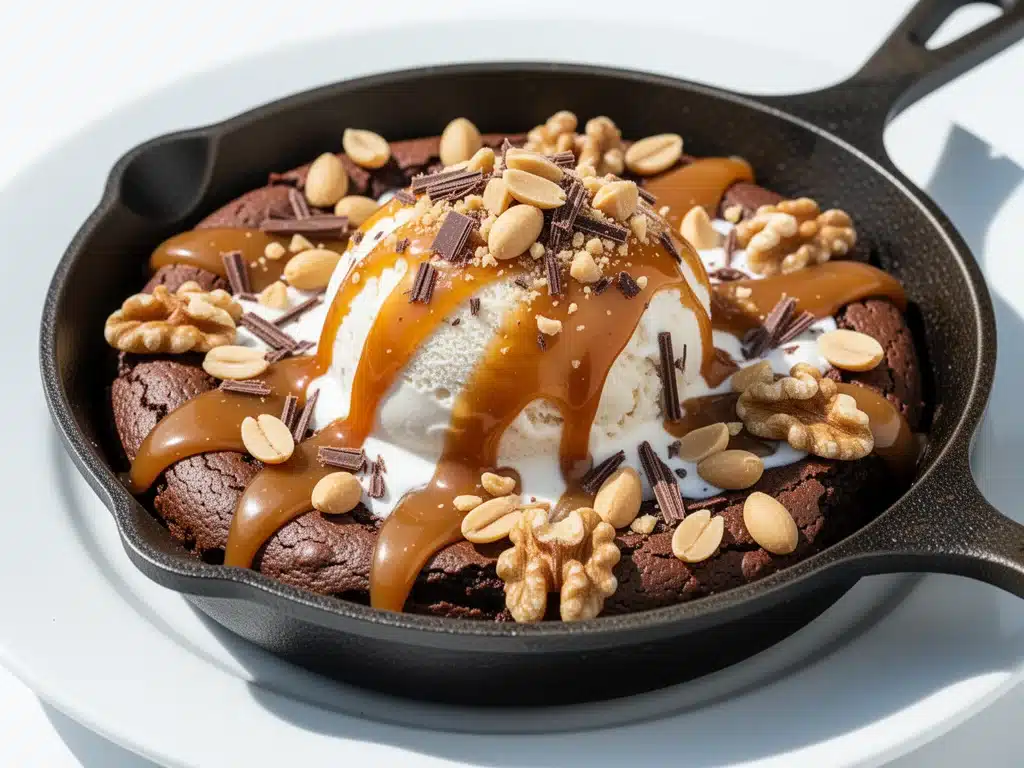
I’ll never forget the look on my brother-in-law’s face. It was last year’s Super Bowl, and the living room was packed. I had spent hours prepping wings, sliders, and those fancy cheese boards everyone pretends to like. But then I pulled this skillet out of the oven. It was still bubbling, smelling like melted chocolate and warm sugar, and I just plopped it in the center of the coffee table.
For the next twenty minutes, nobody cared about the game. Nobody even cared about the wings. Everyone was just… eating. Straight from the skillet. With their fingers. With napkins draped over their knees like it was fine dining.
That’s when I realized something important. For game day, you don’t need complicated appetizers. You need something that feels indulgent, easy to share, and absolutely irresistible. This Game Day Loaded Brownie Sundae Skillet is exactly that. It’s a dessert that acts like an appetizer—grab-and-go, messy in the best way, and guaranteed to disappear before halftime.
I’ve made this for three Super Bowls now, and honestly, it’s the only dessert I bring anymore. The best part? It’s ridiculously simple. You don’t need to be a baker. You don’t need fancy equipment. You just need a skillet, a few pantry staples, and about 30 minutes. If you can melt chocolate and scoop ice cream, you can make this. And once you do, your guests will ask for the recipe before they even finish their first bite.
Why You’ll Love This Brownie Sundae Skillet
There are a lot of desserts out there, but few hit the sweet spot between “comfort food” and “party centerpiece” like this skillet brownie sundae. Here’s why it has become my go-to for every gathering, from tailgates to movie nights:
- Zero Stress Cooking — Seriously, if you can use a microwave or a stovetop, you can make this. I’ve made this while watching the game, stirring occasionally with one hand and holding a beer with the other. It’s that easy.
- Five Ingredients Max — I’m not exaggerating. You don’t need a dozen weird baking supplies. Just brownies, ice cream, chocolate sauce, whipped cream, and sprinkles. That’s it. Five things. You probably have half of them right now.
- The “Wow” Factor — Serving dessert straight from a cast-iron skillet looks rustic and impressive. It’s photogenic (perfect for those Pinterest shots), but it’s also practical. No plating required. Just pass around spoons.
- Customizable for Everyone — Some people love nuts; some hate them. Some want extra chocolate; some want fruit. By serving it family-style, everyone can build their own sundae exactly how they like it. No arguments, no dietary clashes.
- Leftover Friendly — Okay, let’s be real: there are rarely leftovers. But if there are, they keep well in the fridge for two days. Just reheat the skillet briefly before serving. It’s like getting a second game day for the price of one.
This isn’t just a dessert; it’s a solution. It solves the problem of “what do I bring to the party?” and the problem of “how do I get everyone to share?” simultaneously. It’s warm, it’s sweet, and it brings people together. Literally.
Ingredients You’ll Need
Here’s the thing about this recipe: it’s designed to use what you already have. I’m not asking you to go to three different stores for obscure ingredients. Let’s break down what you need and why.
The Base: Brownies
Brownie mix (1 box) — Yes, box mix. Don’t judge me. For a game day crowd, convenience wins. But here’s the secret: use your favorite brand. If you love Betty Crocker, use that. If you prefer Duncan Hines, go for it. Just make sure to bake them slightly underdone. We want them fudgy, not cakey. They’ll continue cooking in the skillet.
Butter (2 tablespoons) — This goes into the skillet before the brownies. It adds richness and helps the edges get slightly crispy. Use real butter, not margarine. The flavor difference is noticeable when everything else is simple.
The Cold Contrast: Ice Cream
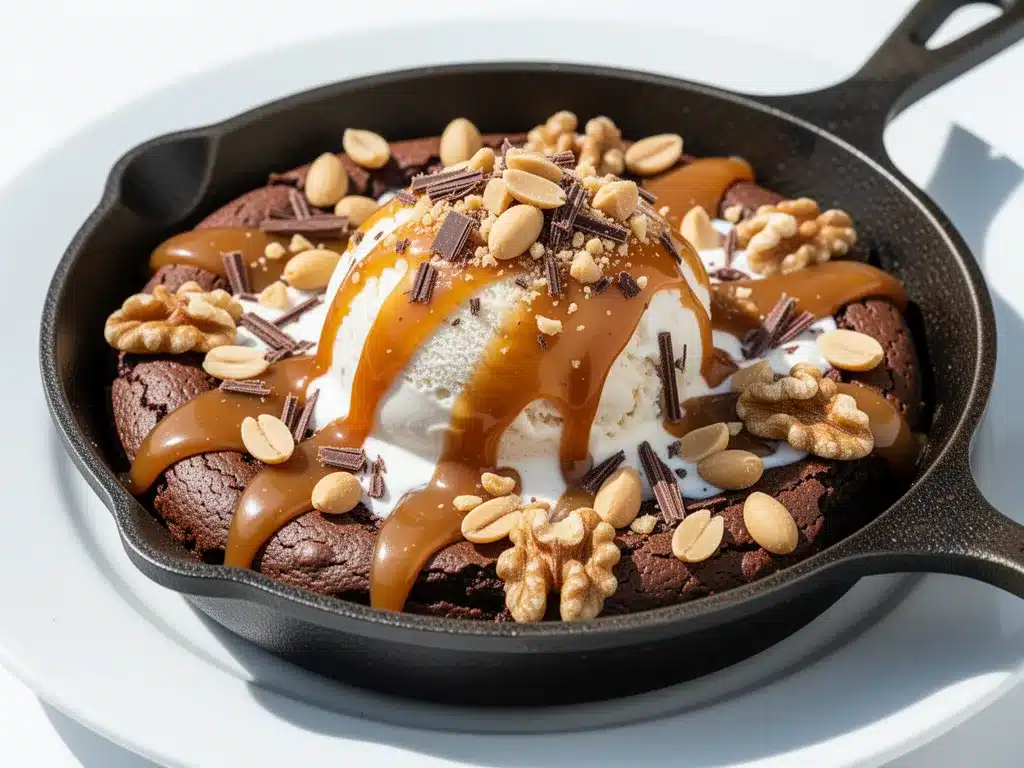
Vanilla ice cream (2 quarts) — This is non-negotiable. Vanilla is the canvas. It’s mild enough to let the chocolate shine but creamy enough to balance the heat. If you’re feeling fancy, swap half for chocolate ice cream, but vanilla is the classic for a reason. Let it sit on the counter for 10 minutes before serving so it’s scoopable but still cold.
The Saucy Layer
Chocolate syrup (1 bottle) — The thick, dark kind. Not the syrupy stuff for pancakes. You want that dense, gooey chocolate drizzle. Hershey’s is the standard, but any brand works. Warm it up slightly in the microwave for 15 seconds if it’s too thick to drizzle easily.
Caramel sauce (1/2 cup, optional) — I know the title says five ingredients, but if you have caramel, add it. It adds a salty-sweet depth that elevates everything. If you don’t have it, skip it. The brownie is still great.
The Toppings
Whipped cream (1 can or homemade) — Aerosol whipped cream is perfect for game day. It’s fast, it’s fluffy, and no one will know if it’s homemade or from a can. If you’re making it from scratch, use heavy cream and a little vanilla extract.
Chocolate sprinkles (1 small container) — These are for the visual pop and the texture crunch. They’re cheap, they’re fun, and kids love them. If you don’t have sprinkles, crushed cookies or chopped nuts work too.
Mini marshmallows (1/2 cup, optional) — If you want to lean into the “sundae” vibe, toss in a handful of mini marshmallows. They’ll get slightly warm and chewy in the skillet.
Equipment Needed
You don’t need a fancy kitchen to pull this off. Here’s what I actually use:
- 10-12 inch Cast Iron Skillet — This is the star of the show. It holds heat well and looks beautiful on the table. If you don’t have cast iron, an oven-safe skillet or even a large baking dish works, but cast iron gives those crispy edges I love.
- Mixing bowls — For mixing the brownie batter. Any size works.
- Spatula — To spread the brownies evenly. Silicone is best so you don’t scratch the pan.
- Scoops — Ice cream scoops are great, but two sturdy spoons work too. You’ll need them to portion the ice cream into the skillet.
- Measuring cups and spoons — Standard stuff. I usually eyeball the toppings, but measure the brownie mix according to the box.
Pro Tip: If your skillet isn’t oven-safe (some cheap non-stick pans aren’t), just bake the brownies in a regular pan, then transfer them to your serving dish. But for the best experience, use a skillet that goes from oven to table.
How to Make It: Step-by-Step
Alright, let’s get this done. I’m walking you through exactly how I do it, including the little tricks that keep it from being a mess.
Step 1: Bake the Brownies (15-20 minutes)
Preheat your oven to 350°F (175°C). Prepare the brownie mix according to the box directions. Here’s the crucial part: reduce the baking time by 2-3 minutes. You want the brownies to be slightly underbaked. They should still be a bit gooey in the center. If you bake them until they’re fully set, they’ll be dry when they hit the hot skillet. Transfer the batter to your skillet (if oven-safe) or a baking pan.
Step 2: Warm the Skillet (5 minutes)
Once the brownies are baked and cooling slightly, place the skillet over low heat on the stove for about 2-3 minutes. You’re not trying to melt them; you’re just taking the chill off so the brownies are warm when they meet the ice cream. This step creates that perfect hot-and-cold contrast.
Step 3: Spread the Brownies
Take the warm skillet out of the heat. Use your spatula to spread the brownies into an even layer. If they’re too firm to spread, just break them into chunks and press them down. We’re aiming for a rustic, uneven look, not a perfect square. The unevenness helps the ice cream melt into the nooks and crannies.
Step 4: Add the Ice Cream
Now for the fun part. Scoop mounds of vanilla ice cream directly onto the warm brownies. Don’t be shy—use a lot. I usually go for 6-8 large scoops, distributed evenly. The heat from the brownies will start to melt the bottom of the ice cream immediately, creating a sauce. Let it sit for 2-3 minutes so the melting begins.
Step 5: Drizzle and Top
Drizzle the chocolate syrup generously over the ice cream and brownies. Don’t just do a few lines; cover it. Then, add dollops of whipped cream. Finally, shower it with chocolate sprinkles. If you’re using caramel, drizzle that on top too. The visual should look indulgent and messy. It’s supposed to look like a dessert explosion.
Step 6: Serve Immediately
Place the skillet on a trivet or heat-safe board on the coffee table or dining table. Hand out spoons (or just let people dig in). The goal is to get everyone eating while the ice cream is still cold and the brownies are still warm. If you wait too long, it just becomes a bowl of chocolate soup.
Expert Tips & Tricks
Here’s everything I’ve learned from making this dozens of times. These tips will save you from my mistakes.
- Underbake Your Brownies — This is the #1 mistake people make. Overbaked brownies = dry skillet. You want fudgy. When in doubt, pull them out early.
- Warm the Skillet, Not the Brownies — Don’t put the brownies back in the oven to warm them. Just warm the empty skillet first, then add the brownies. This prevents burning.
- Use High-Quality Ice Cream — Since there’s not much else, the ice cream quality matters. Cheap ice cream with lots of air will melt too fast and taste watery. Spend the extra dollar on a good brand.
- Drizzle, Don’t Pour — When adding chocolate sauce, use a zigzag motion. It looks prettier and ensures you get sauce in every bite. If you just pour it, you might get one giant chocolate puddle.
- Keep It Moving — This dessert doesn’t sit well. If you’re serving a large crowd, make two skillets. One for the early birds, one for the stragglers. Nobody wants warm, melted ice cream.
Common Mistake: Adding the ice cream before the brownies are warm. The contrast is key. Cold ice cream on cold brownies is just… sad. Warm brownies make the magic happen.
Variations & Substitutions
Once you’ve nailed the basic version, here’s how you can mix it up. I’ve tried all of these, and they all work.
The “Fudgie” Version
Add a layer of fudge sauce or Nutella between the brownie layer and the ice cream. It makes it even richer. Great for chocolate lovers.
The “Crispy” Version
Sprinkle crushed potato chips or pretzels on top before adding the whipped cream. The saltiness cuts through the sweetness perfectly. It sounds weird, but trust me.
The “Fruity” Version
Add sliced strawberries or raspberries between the brownies and ice cream. The tartness balances the heavy chocolate. I like this version in the summer.
Dietary Modifications
Gluten-Free: Use a gluten-free brownie mix. Most major brands have GF options now. Everything else is naturally GF.
Dairy-Free: Use dairy-free brownie mix (most are egg/dairy free, check the box), dairy-free ice cream (coconut or almond milk based), and dairy-free chocolate sauce. Top with coconut whipped cream.
Vegan: Use a vegan brownie mix (like Horizon or homemade), vegan ice cream, and vegan toppings. It’s surprisingly delicious.
Serving & Storage
How to Serve
I usually serve this straight from the skillet at the dinner table—it looks rustic and stays warm. But here are other ways I’ve enjoyed it:
- Game Day: Place it in the center of the coffee table with a stack of napkins. It’s finger food.
- Date Night: Serve in individual ramekins for a more intimate feel. Or share one small skillet for two.
- Movie Night: Make it in a baking dish and pass it around the couch. No plates needed.
Storage Instructions
Refrigerator: Store leftovers in an airtight container for up to 2 days. The brownies will firm up, and the ice cream will freeze solid. Let it sit on the counter for 15 minutes before serving to soften.
Reheating: Warm the skillet in the oven at 300°F for 5-10 minutes before serving. Add fresh ice cream on top after reheating the brownies. Do not try to reheat the ice cream.
Freezing: This doesn’t freeze well. The ice cream texture changes, and the brownies get hard. Make it fresh or store in the fridge for up to 2 days.
Pro tip: If you’re meal-prepping, bake the brownies a day ahead. Store them in the fridge. When it’s game day, just warm the skillet and add the ice cream. Saves time without sacrificing quality.
Nutrition Information
I’m not a nutritionist, but here’s the breakdown if you’re tracking. This is definitely a treat, so keep portions in mind.
Per Serving (based on 8 servings):
- Calories: 450
- Protein: 6g
- Carbs: 55g
- Fiber: 2g
- Sugar: 40g
- Fat: 22g
- Saturated Fat: 12g
- Cholesterol: 45mg
- Sodium: 250mg
What’s Good: It’s filling! The combination of fat and sugar keeps you satisfied. Plus, brownies have some cocoa, which has antioxidants.
What to Know: It’s high in sugar and calories. This is dessert, not a snack. Enjoy a reasonable portion and savor it. If you want to lighten it up, use sugar-free syrup and light ice cream, but it won’t taste the same.
Final Thoughts
So that’s my go-to Game Day Loaded Brownie Sundae Skillet! I’ve probably talked your ear off at this point, but when you make a recipe this often, you have a lot to say about it.
This has saved my game day parties more times than I can count. It’s my answer to “what’s for dessert?” when I’m tired, don’t want takeout, and still want something that tastes really good. My guests are happy, my family is happy, and I’m happy because I’m not stressed about cooking.
Make it yours! Try different add-ins, swap in your favorite ice cream flavors, adjust the toppings. The best recipes are the ones you adapt to your family’s tastes. If you make this, drop a comment and let me know what you think! I love hearing how recipes turn out in your kitchen. And if something doesn’t work, tell me that too—I’m here to help troubleshoot.
Happy cooking! And I hope your kitchen smells half as good as mine does right now.
Frequently Asked Questions
Can I make this ahead of time?
You can prep the brownies ahead, but don’t assemble it until right before serving. The ice cream will melt if you let it sit too long. I usually bake the brownies the night before, store them in the fridge, and then assemble them on game day. Just warm the skillet for 5 minutes before adding the ice cream.
What if I don’t have a cast iron skillet?
No problem! Use any oven-safe skillet, a baking dish, or even a large casserole dish. The presentation won’t be as rustic, but the taste will be the same. Just make sure the dish can go from oven to table if you want to serve it warm.
Can I use homemade brownies?
Absolutely! In fact, homemade brownies are great. Just make sure they’re fudgy. If your recipe makes cakey brownies, add a little extra oil or butter to the batter to make them denser. You want them to hold up to the ice cream without falling apart.
Why did my ice cream melt too fast?
Either the brownies were too hot, or the ice cream was too soft. Make sure the brownies are just warm, not piping hot. And keep the ice cream in the freezer until the last minute. If it’s already soft, it’ll melt instantly on contact.
Can I add nuts?
Yes! Chopped walnuts or pecans are classic. Sprinkle them on top with the sprinkles. If you’re allergic to nuts, just skip them or use seeds like pumpkin seeds for crunch.
How many people does this serve?
This recipe serves about 6-8 people, depending on how hungry they are. For a game day crowd, I usually make two skillets to be safe. It’s better to have a little left over than to run out!
Pin This Recipe!
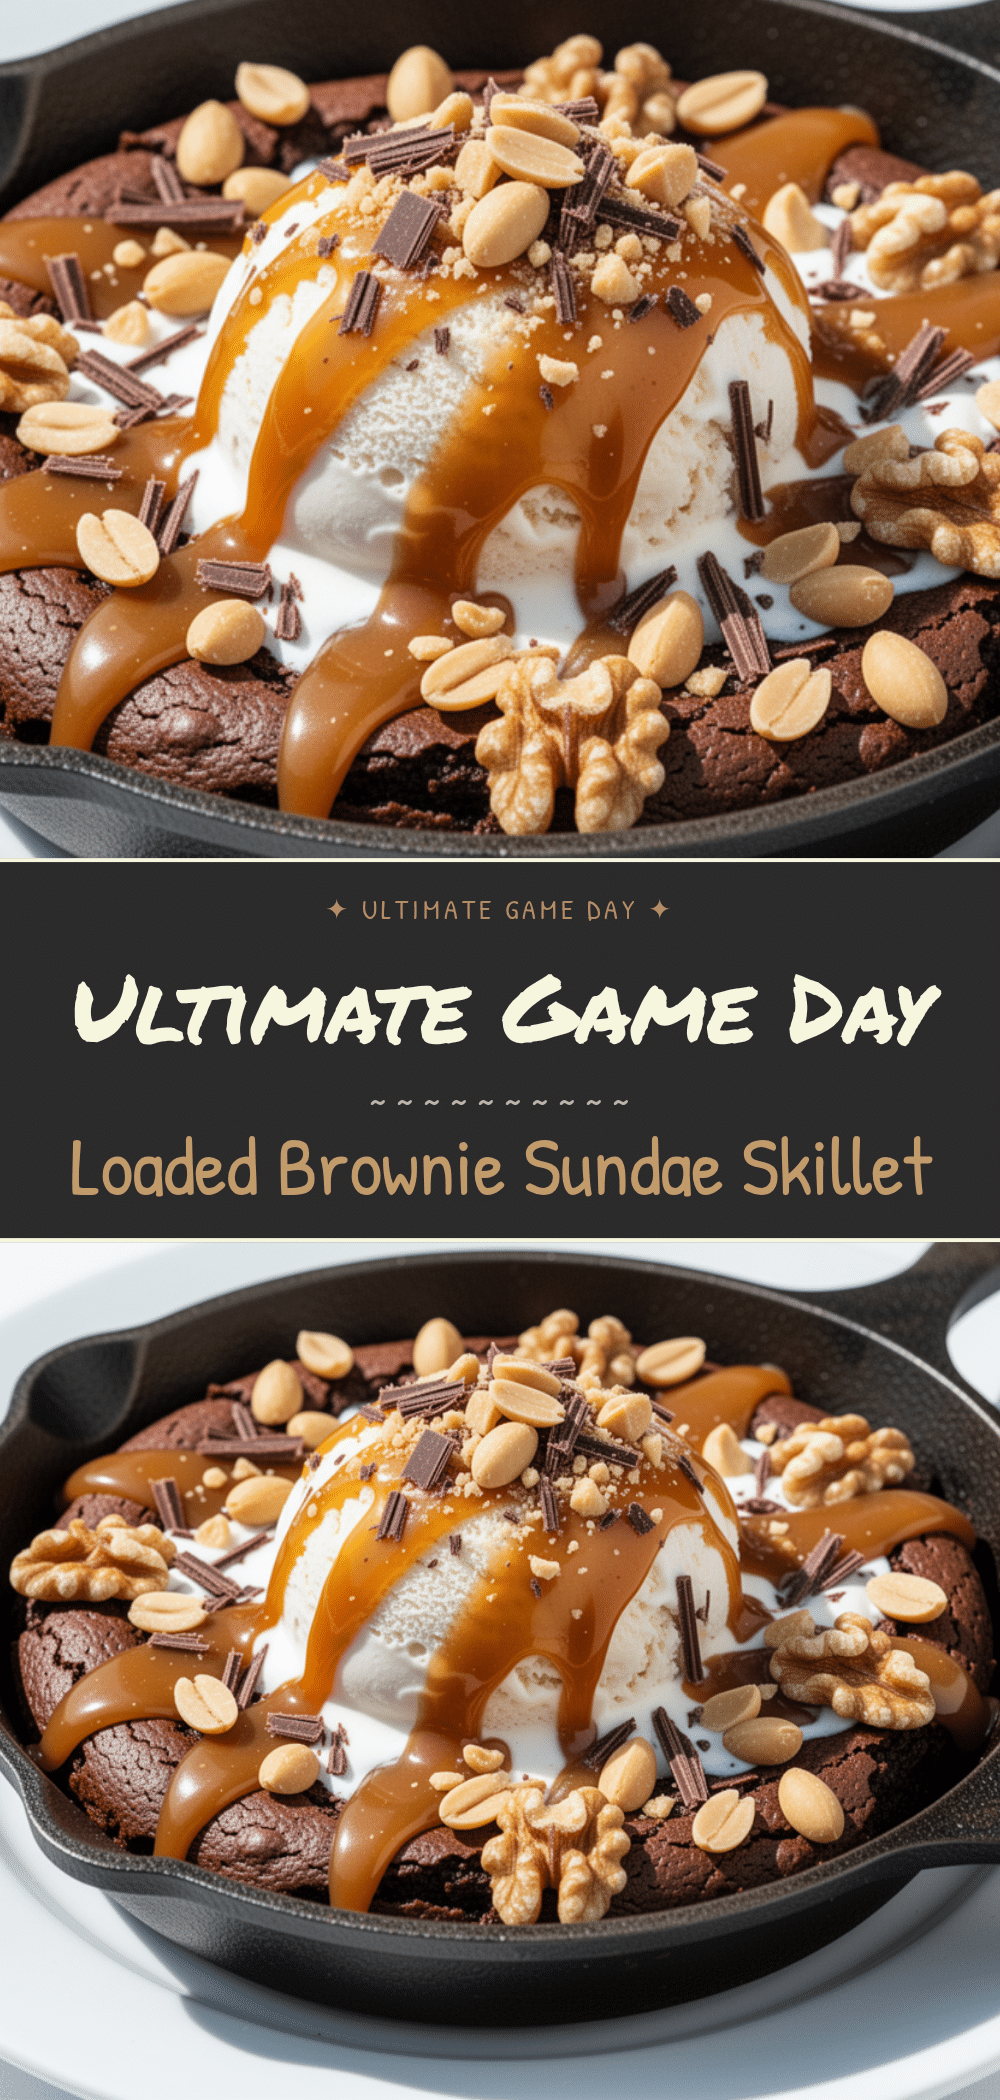
Game Day Loaded Brownie Sundae Skillet
- Total Time: 35 minutes
- Yield: 8 servings 1x
Description
A simple, indulgent 5-ingredient dessert skillet featuring warm fudgy brownies, vanilla ice cream, chocolate syrup, whipped cream, and sprinkles. Perfect for sharing at game days or parties.
Ingredients
- 1 box brownie mix
- 2 tablespoons butter
- 2 quarts vanilla ice cream
- 1 bottle chocolate syrup
- 1 can whipped cream
- 1 small container chocolate sprinkles
- 1/2 cup caramel sauce (optional)
- 1/2 cup mini marshmallows (optional)
Instructions
- Preheat oven to 350°F (175°C). Prepare brownie mix according to box directions, but reduce baking time by 2-3 minutes to keep them fudgy.
- Bake brownies and let them cool slightly.
- Place a 10-12 inch cast iron skillet over low heat on the stove for 2-3 minutes to warm it up.
- Spread the warm brownies into an even layer in the skillet.
- Scoop 6-8 large mounds of vanilla ice cream directly onto the warm brownies.
- Let sit for 2-3 minutes to allow the bottom of the ice cream to melt slightly.
- Drizzle chocolate syrup generously over the top. Add dollops of whipped cream and shower with chocolate sprinkles.
- Serve immediately while brownies are warm and ice cream is cold.
Notes
Ensure brownies are slightly underbaked for a fudgy texture. Warm the skillet before adding brownies to create a hot-and-cold contrast. Do not reheat the ice cream; add fresh ice cream if reheating leftovers.
- Prep Time: 15 minutes
- Cook Time: 20 minutes
- Category: Dessert
- Cuisine: American
Nutrition
- Serving Size: 1/8 of the skillet
- Calories: 450
- Sugar: 40
- Sodium: 250
- Fat: 22
- Saturated Fat: 12
- Carbohydrates: 55
- Fiber: 2
- Protein: 6
Keywords: brownie skillet, game day dessert, easy dessert, 5 ingredient recipe, brownie sundae, cast iron dessert, party dessert


