
Last Tuesday, I was standing in my kitchen at 6:45 PM, staring into the open refrigerator with the same hollow look in my eyes that I’m sure you’ve had before. My husband had texted ten minutes earlier saying he’d be late, my toddler had just finished a meltdown over a missing sock, and the only thing in the fridge was a sad, lonely head of cauliflower and half a block of cheddar. I was about to order pizza—the cheap kind that arrives soggy and costs $25—for the third time that week. Then I saw it. The cauliflower. And I thought, “What if I didn’t turn this into soup again?”
I’ve made cauliflower soup. I’ve roasted it until it was basically charcoal. I’ve even tried that weird steaming thing in the microwave. But I’d never tried to actually bind it into something solid. Something you could cut into squares, load up with bacon and cheese, and eat with your hands while watching TV. So, in a moment of desperate culinary creativity, I threw some egg, some cream cheese, and that cheddar into a food processor, pressed it into a baking dish, and waited. When it came out golden and crispy, I cut it into bars, topped them with more cheese and crispy bacon bits, and took a bite. It tasted like a loaded baked potato had a baby with a mozzarella stick. And it took 30 minutes.
That’s when I discovered Loaded Baked Cauliflower Bars. I made them the next night, then the night after. My kids, who usually negotiate with me for three days straight to eat a single broccoli floret, devoured them. My husband asked if I’d secretly hired a chef. I didn’t tell him it came from a head of vegetable I was trying to use up before it went bad. This recipe has become my secret weapon for those nights when I want something that feels indulgent but actually has some veggies in it. It’s crispy, it’s cheesy, it’s loaded with flavor, and it’s stupidly easy. If you’re tired of the same old chicken and rice rotation, trust me on this one.
Why You’ll Love This Recipe
I know what you’re thinking. “Cauliflower bars? Really?” But hear me out. Once you try these, you’ll never look at cauliflower the same way again. Here’s why this recipe has completely changed our weeknight dinner game:
- It’s Actually Crispy — Most cauliflower recipes end up soggy. Not this one. By squeezing out the water and using a high heat bake, you get these golden, crispy edges that crunch just like a real potato bar. I’ve made this at least a dozen times, and the texture is consistently perfect.
- Kid-Approved Magic — My picky eater, who usually refuses to eat anything green, asks for “the cheesy squares” now. It’s basically a vegetable in disguise, but tastes like a treat. I’ve served these to friends who didn’t even know they were eating cauliflower until I told them.
- Zero Food Waste — Cauliflower is one of those veggies that goes bad fast if you buy it just for one recipe. This uses a whole head, so there’s nothing going in the trash. It’s budget-friendly and eco-friendly.
- Meal Prep Friendly — These bars reheat beautifully. I make a big batch on Sunday, store them in the fridge, and just pop them in the oven or microwave during the week. They stay moist and cheesy, not dry or rubbery.
- Gluten-Free Friendly — No flour, no breadcrumbs, just cauliflower, cheese, and egg. If you’re avoiding gluten, this is a safe, delicious bet that doesn’t taste like cardboard.
So basically, it’s crispy, cheesy, easy, and secretly healthy. What more could you want from a weeknight dinner?
Ingredients You’ll Need
Here’s the best part: you probably have most of this already. This isn’t a recipe that requires a trip to a specialty store. It’s pantry-friendly with just a few fresh additions.
For the Cauliflower Base
Cauliflower (1 large head, about 2-2.5 lbs / 900-1100g) — You want a fresh, firm head. If the leaves are yellow or it feels soft, skip it. Fresh cauliflower has a milder flavor and less water. You’ll need to chop it into florets first.
Eggs (2 large) — These are the binder. They hold the cauliflower together so you can cut it into bars. Don’t try to skip these, or you’ll end up with a mushy mess.
Cream Cheese (4 oz / 115g, softened) — This is the secret ingredient. It adds richness and helps bind the mixture, plus it gives that creamy, tangy flavor that mimics a baked potato. Use full-fat, please. Light cream cheese won’t work as well.
Shredded Cheddar Cheese (1 cup / 100g) — Sharp cheddar has the best flavor. I use a block and shred it myself because pre-shredded cheese has anti-caking agents that prevent it from melting smoothly. But honestly, if you’re in a rush, pre-shredded works fine too.
Bacon (4 slices, cooked and crumbled) — This is for the inside mix-in. You want salty, smoky bacon bits. If you’re avoiding pork, you can use turkey bacon or just skip it, but the flavor profile changes. I’m not sorry for using real bacon.
Garlic Powder (1 teaspoon) — And onion powder (1 teaspoon). These add depth without the moisture of fresh garlic, which could make the bars soggy. Don’t skip these spices.
For the Topping

Extra Shredded Cheddar (½ cup / 50g) — For that gooey, melted top layer.
Green Onions (2-3, sliced) — For garnish. They add a fresh, oniony bite that cuts through the richness. You can use chives if you prefer, but green onions look nicer.
Sour Cream (optional, for serving) — I always serve these with a dollop of sour cream. It’s like a loaded baked potato. Drizzle it on right before eating.
Hot Sauce (optional, for serving) — If you like a kick, a few dashes of Frank’s RedHot or your favorite hot sauce is amazing. It adds a tangy heat that balances the cheese.
Equipment Needed
You don’t need fancy gadgets for this. Here’s what I actually use:
Food Processor — This is the game-changer. You can grate cauliflower by hand, but it takes forever and your arm will hurt. A food processor with the shredding blade makes quick work of it. If you don’t have one, a box grater works, but it’ll take 10-15 minutes of elbow grease.
Cheesecloth or Clean Kitchen Towel — You need to squeeze the water out of the cooked cauliflower. A cheesecloth is ideal, but a clean, thin cotton towel works too. Just make sure it’s clean! I’ve used old t-shirts before.
9×9 inch Baking Dish — A square dish works best for cutting into bars. You can use a round cake pan, but then you’ll have rounds, not bars. Or you can use a sheet pan and just scoop it up with a spoon.
Mixing Bowl — For combining the ingredients. Any size works.
Peeler or Knife — To trim the cauliflower stem.
How to Make It: Step-by-Step
Alright, let’s make these bars! I’m walking you through exactly how I do it, including the little tricks I’ve picked up so you don’t end up with soggy cauliflower.
Step 1: Prep the Cauliflower (5 minutes)
Remove the leaves and trim the stem off the cauliflower head. Cut it into large florets. You don’t need them uniform, just big enough to fit in your food processor. If you’re grating by hand, do this now—it’s tedious, so get some music on.
Step 2: Cook the Cauliflower (10 minutes)
Place the florets in a pot of boiling salted water. Cook for 8-10 minutes until they’re very tender. You want them soft enough that you can mash them easily with a fork. Don’t undercook them, or they’ll stay crunchy and not bind well. Drain them in a colander and let them cool for 5 minutes. This step is crucial—you don’t want to burn your hands squeezing the water out.
Step 3: Squeeze Out the Water (5 minutes)
This is the most important step. Wrap the warm cauliflower in your cheesecloth or towel and squeeze it as hard as you can. You want to remove as much moisture as possible. I’m talking really tight. If you skip this, your bars will be watery and fall apart. You’ll be shocked at how much water comes out. This is why cauliflower bars work and steamed cauliflower doesn’t.
Step 4: Mix the Base (5 minutes)
In a large bowl, combine the squeezed cauliflower, softened cream cheese, eggs, shredded cheddar, cooked bacon, garlic powder, onion powder, salt, and pepper. Mix it all together until it’s well combined. It will look like a thick, cheesy dough. Taste it and adjust seasoning if needed. It should taste pretty good on its own.
Step 5: Press into the Dish (2 minutes)
Grease your 9×9 baking dish with cooking spray or butter. Press the cauliflower mixture into the dish, spreading it out evenly. You want it to be about ½ inch thick. Press it down firmly so it’s compact. This helps it hold together when you cut it.
Step 6: Bake (20 minutes)
Preheat your oven to 400°F (200°C). Bake the base for 20 minutes until the top is set and lightly golden. It should feel firm to the touch. If it’s still jiggly, give it another 5 minutes.
Step 7: Add Toppings and Broil (3 minutes)
Remove the dish from the oven. Sprinkle the extra shredded cheddar evenly over the top. Turn your oven to broil. Put the dish back in for 2-3 minutes, watching it closely, until the cheese is melted and bubbly and slightly browned. Broilers vary, so don’t walk away! You want golden spots, not a charcoal briquette.
Step 8: Cool and Cut (10 minutes)
Let the bars cool in the pan for at least 10 minutes. This is hard, I know, but it’s essential. If you cut them right away, they’ll fall apart. They need to set. After 10 minutes, lift them out of the pan (use parchment paper if you lined the pan) and cut into squares. Serve warm with sour cream and green onions.
Expert Tips & Tricks
Here’s everything I’ve learned from making these dozens of times. These tips will save you from my mistakes.
Squeeze Like Your Life Depends On It
I can’t stress this enough. The moisture is the enemy of crispy bars. If your mixture looks wet after squeezing, squeeze it more. I’ve had failures where the bars were soggy, and it was always because I didn’t squeeze hard enough. Use a towel you don’t mind getting dirty.
Don’t Skip the Cooling Time
It’s tempting to cut into them right when they come out of the oven. Resist. The structure needs time to set. If you rush this, you’ll get a cheesy mess. Set a timer for 10 minutes. Use that time to chop the green onions.
Use Sharp Cheddar
Mild cheddar tastes bland. Sharp or extra-sharp cheddar has a robust flavor that stands up to the cauliflower. If you can’t find sharp, mix in some Parmesan for extra umami.
Parchment Paper is Your Friend
Line your baking dish with parchment paper, leaving an overhang on the sides. This makes it super easy to lift the whole block out of the pan to cut it. It also makes cleanup a breeze.
Freezing Instructions
These freeze well! Let them cool completely, then wrap them tightly in plastic wrap and foil. They’ll keep for up to 3 months. Thaw in the fridge overnight and reheat in the oven at 350°F until warm.
Variations & Substitutions
Once you’ve nailed the basic version, here’s how you can mix it up. I’ve tried all of these.
Jalapeño Popper Version
Add 1 diced jalapeño (seeds removed for less heat) to the mixture. Use pepper jack cheese instead of cheddar. Top with bacon. This is spicy, creamy, and incredible.
Bacon Ranch Version
Add 2 tablespoons of ranch seasoning mix to the base. Top with ranch dressing drizzle instead of sour cream. My kids love this one.
BBQ Chicken Version
Add 1 cup of shredded cooked chicken to the base. Use BBQ sauce instead of sour cream for serving. Sprinkle with cheddar and bacon. It’s like a BBQ chicken bar.
Vegan Version
This is trickier, but possible. Use vegan cream cheese, vegan cheddar, and skip the bacon (or use tempeh bacon). Use flax eggs instead of regular eggs. The texture won’t be exactly the same, but it’s still tasty.
Gluten-Free
This recipe is naturally gluten-free. Just make sure your bacon and cheese don’t have added gluten (rare, but check labels if you’re celiac).
Serving & Storage
How to Serve:
I usually serve these straight from the pan at the dinner table. It looks rustic and stays warm. But here are other ways I’ve enjoyed them:
- Appetizer — Cut them smaller for a party appetizer. Serve with ranch dip.
- Lunch — These are great cold or room temperature for lunch. I pack them in my lunchbox sometimes.
- Side Dish — Serve them alongside grilled chicken or fish for a complete meal.
Storage Instructions:
Refrigerator: Store in an airtight container for up to 4 days. They’ll firm up in the fridge, which is normal.
Reheating: Best method: Oven at 350°F for 10-15 minutes. Microwave works too, but it can get soft. Heat in 30-second intervals.
Freezing: As mentioned above, freeze for up to 3 months. Thaw and reheat in the oven.
Nutrition Information
I’m not a nutritionist, but here’s the breakdown if you’re tracking.
Per Serving (based on 12 bars):
- Calories: 180
- Protein: 12g
- Carbs: 6g
- Fiber: 2g
- Fat: 12g
- Sodium: 350mg
What’s Good: High in protein, low in carbs, good source of calcium.
What to Know: Higher in fat due to cheese and cream cheese. Sodium can be high depending on bacon.
Final Thoughts
So that’s my Loaded Baked Cauliflower Bars! I know I’ve talked your ear off, but when you make a recipe this often, you have a lot to say about it. This has saved weeknight dinners more times than I can count. It’s my answer to “what’s for dinner” when I’m tired, don’t want takeout, and still want something that tastes really good. My kids are happy, my husband’s happy, and I’m happy because I’m not stressed about cooking.
Make it yours! Try different cheeses, add different veggies, adjust the spice level. The best recipes are the ones you adapt to your family’s tastes. If you make this, drop a comment and let me know what you think! I love hearing how recipes turn out in your kitchen. And if something doesn’t work, tell me that too—I’m here to help troubleshoot.
Happy cooking! And I hope your kitchen smells half as good as mine does right now.
Frequently Asked Questions
Can I use frozen cauliflower?
You can, but it will have more water. You’ll need to thaw it completely and squeeze it even harder than fresh cauliflower. I prefer fresh because it’s easier to control the moisture, but frozen works in a pinch.
Why did my bars fall apart?
Usually, this means there was too much moisture. Did you squeeze the cauliflower enough? Also, did you let them cool completely before cutting? They need time to set. If you’re still having trouble, add an extra egg to the mixture next time.
Can I make these ahead of time?
Yes! You can prep the mixture and press it into the dish, then cover and refrigerate for up to 24 hours. When you’re ready to cook, just add the extra cheese and bake as directed. You might need a few extra minutes in the oven since it’s cold.
Are these keto-friendly?
Yes! They’re low-carb and high-fat, making them perfect for keto. Just make sure your bacon and cheese are keto-approved (no added sugars).
Can I use a different cheese?
Definitely. Mozzarella for stretch, Gouda for flavor, or even a Mexican blend. Just make sure it’s a cheese that melts well. Avoid hard cheeses like Parmesan as the main cheese, as they don’t melt as smoothly.
Pin This Recipe!
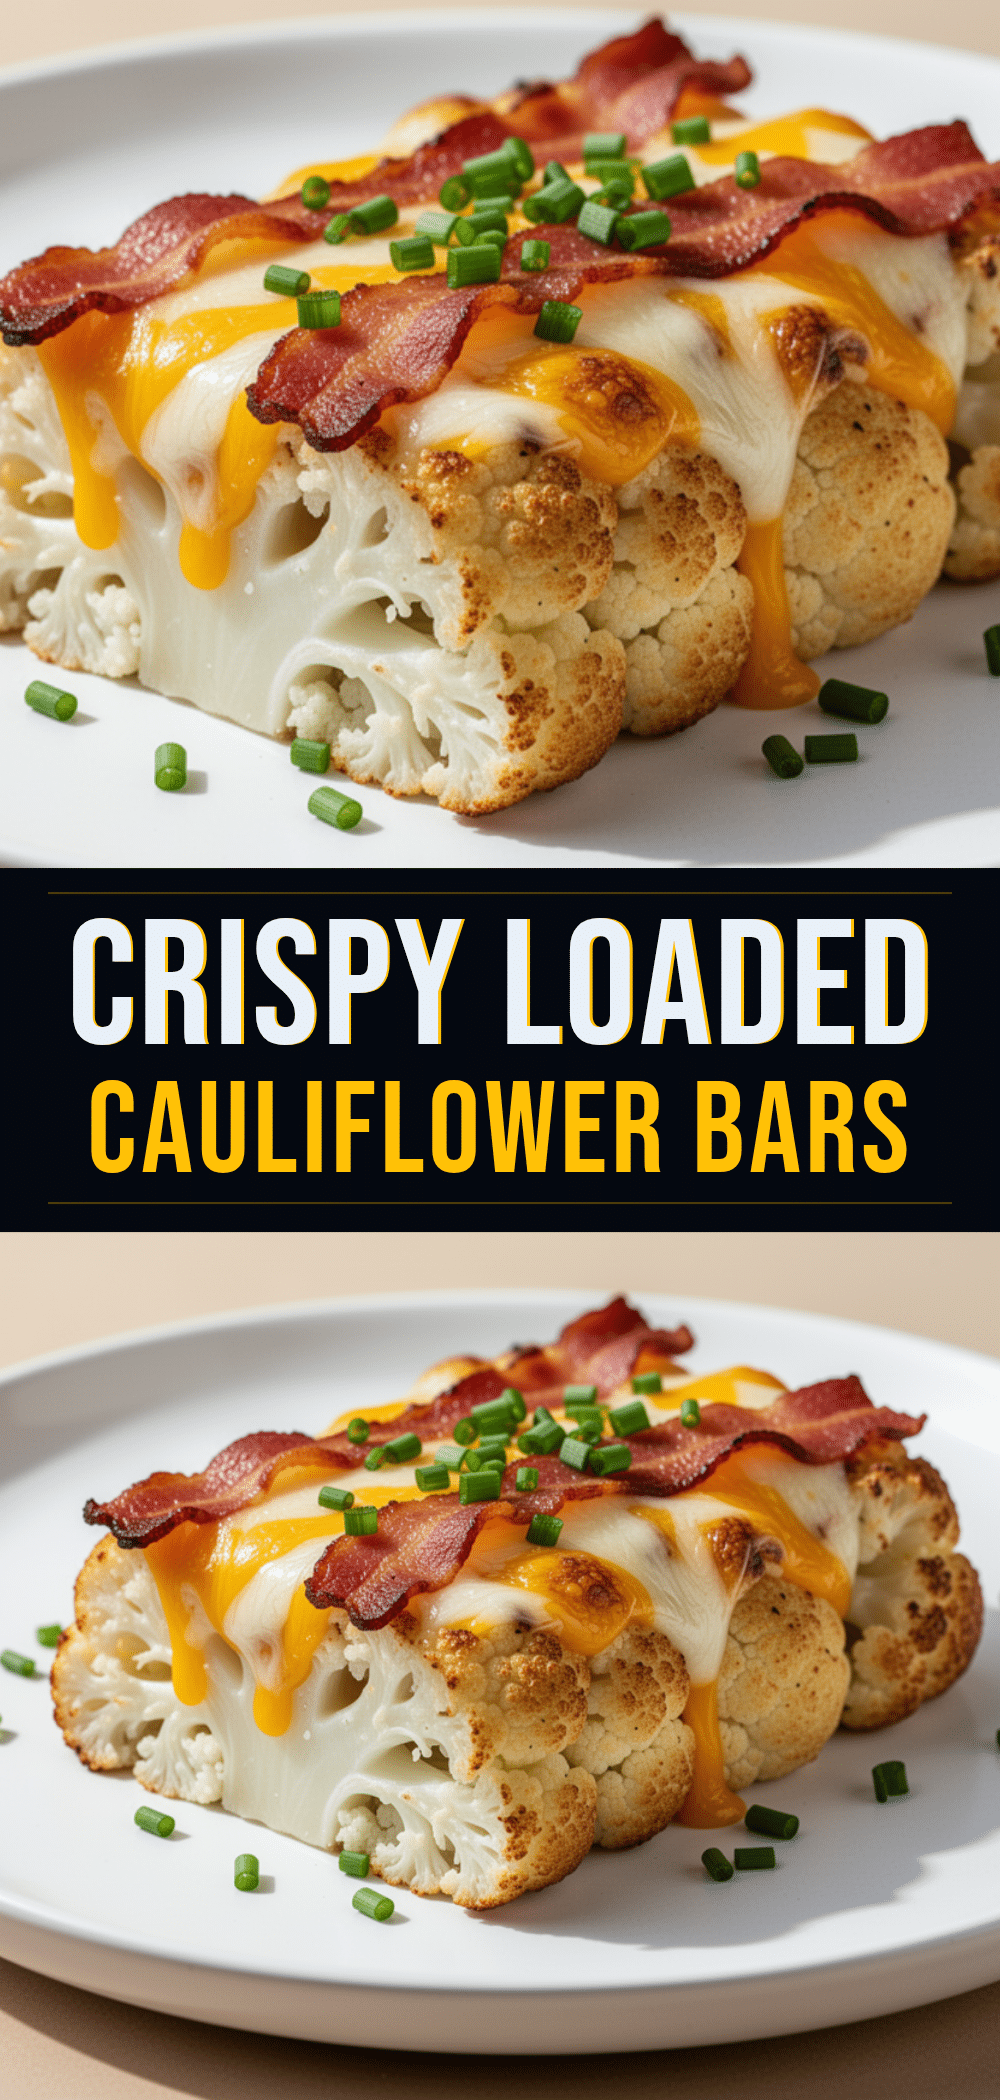

Loaded Baked Cauliflower Bars: Easy Weeknight Dinner
- Total Time: 45 minutes
- Yield: 12 servings 1x
Description
Crispy, cheesy, and kid-approved cauliflower bars that taste like loaded baked potatoes. This gluten-free, low-carb recipe is easy to make and perfect for weeknight dinners.
Ingredients
- 1 large head cauliflower (about 2–2.5 lbs / 900-1100g)
- 2 large eggs
- 4 oz (115g) cream cheese, softened
- 1 cup (100g) shredded sharp cheddar cheese
- 4 slices bacon, cooked and crumbled
- 1 teaspoon garlic powder
- 1 teaspoon onion powder
- Salt and pepper to taste
- ½ cup (50g) extra shredded cheddar cheese (for topping)
- 2–3 green onions, sliced (for garnish)
- Sour cream (optional, for serving)
- Hot sauce (optional, for serving)
Instructions
- Preheat oven to 400°F (200°C). Grease a 9×9 inch baking dish with cooking spray or butter.
- Remove leaves and trim the stem from the cauliflower. Cut into large florets.
- Place florets in a pot of boiling salted water and cook for 8-10 minutes until very tender. Drain and let cool for 5 minutes.
- Wrap the warm cauliflower in cheesecloth or a clean kitchen towel and squeeze out as much moisture as possible.
- In a large bowl, combine the squeezed cauliflower, softened cream cheese, eggs, 1 cup shredded cheddar, cooked bacon, garlic powder, onion powder, salt, and pepper. Mix until well combined.
- Press the mixture firmly into the prepared baking dish, spreading it out evenly to about ½ inch thickness.
- Bake for 20 minutes until the top is set and lightly golden.
- Remove from oven, sprinkle with the remaining ½ cup shredded cheddar, and broil for 2-3 minutes until cheese is melted and bubbly. Watch closely to prevent burning.
- Let the bars cool in the pan for at least 10 minutes to set.
- Lift out of the pan and cut into squares. Serve warm with sour cream and green onions.
Notes
Squeezing out the water from the cauliflower is the most critical step for crispy bars. Do not skip the cooling time before cutting, or the bars will fall apart. For best results, use sharp cheddar cheese. These can be frozen for up to 3 months.
- Prep Time: 15 minutes
- Cook Time: 30 minutes
- Category: Main Course
- Cuisine: American
Nutrition
- Serving Size: 1 bar
- Calories: 180
- Sugar: 3
- Sodium: 350
- Fat: 12
- Saturated Fat: 7
- Carbohydrates: 6
- Fiber: 2
- Protein: 12
Keywords: cauliflower bars, loaded baked potato, gluten-free, keto, low-carb, weeknight dinner, kid-friendly, vegetarian option


