It was 9:30 PM on a Thursday. I was staring at a mixing bowl that was roughly the size of a small bathtub, and I had exactly zero enthusiasm for making 48 cupcakes. My friend was coming over on Saturday for a casual girls’ night—just three of us—and I had promised, in my typical over-eager way, to bring dessert. But the reality was that I lived alone, my neighbors were quiet, and the idea of eating three dozen vanilla cupcakes by myself was less “celebration” and more “sugar coma.”
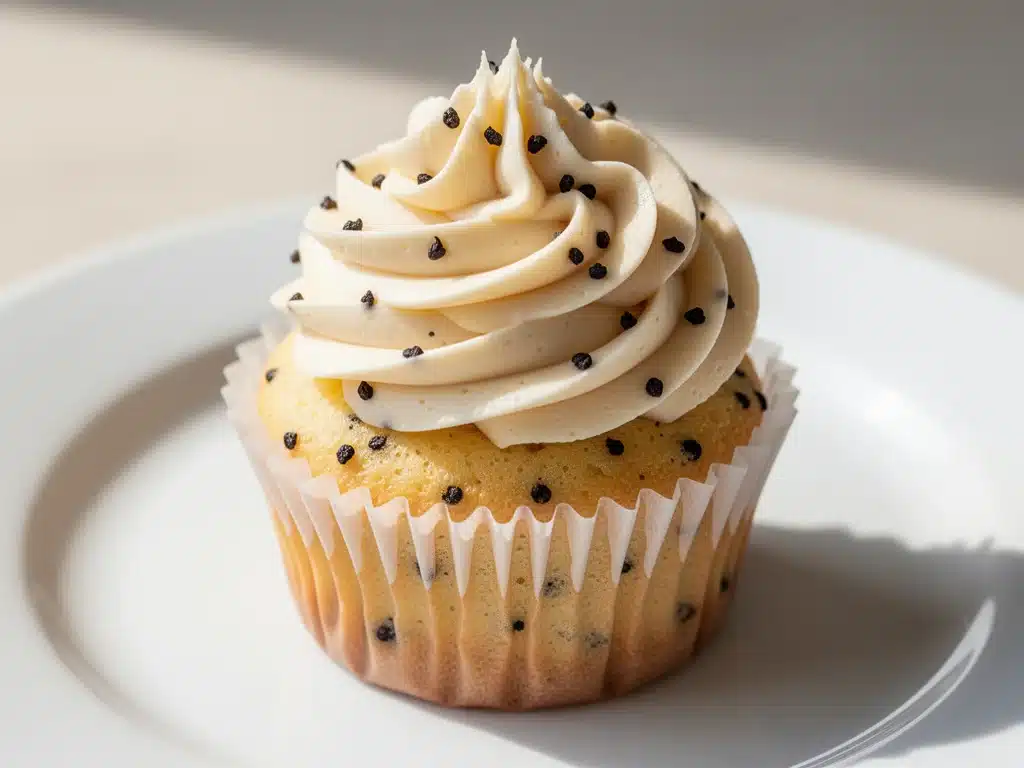
I’ve been in that situation a hundred times. You want to bake, you want to share, but you don’t want to be haunted by leftovers for two weeks. That night, I decided to break my own rules. I scaled everything down. I used my smallest saucepan for the buttercream. I lined just four spots in my muffin tin. And when those small batch vanilla bean cupcakes came out of the oven, golden and fragrant with real vanilla, I realized something important: I didn’t just make less food. I made better food.
Because the batch was small, I could actually control the oven temperature perfectly. Because the buttercream was made in a small bowl, it whipped up with more air and became impossibly light. And because I wasn’t stressed about preserving dozens of extras, I focused on making each one perfect. This recipe has become my secret weapon for last-minute gatherings, intimate dinner parties, or just when I need a little treat that doesn’t require a week to finish.
If you’ve ever felt guilty about baking a huge batch only to have half of it go stale in the freezer, this is your redemption arc. These small batch vanilla bean cupcakes with buttercream are designed for real life. They’re tender, they’re vanilla-forward (not just sweet), and they come together in under an hour. I’ve tested this method so many times that I can now make them in my sleep, but I still love the process. Let’s get into why this tiny batch is about to become your new favorite.
Why You’ll Love This Small Batch Recipe
There is a specific kind of joy in baking a recipe that yields exactly what you need and nothing more. No waste. No freezer burn. No debating with yourself whether you really want another cupcake at 10 PM. This small batch approach has completely changed how I think about dessert baking. Here’s why I keep coming back to this specific ratio:
Perfect Portion Control — Seriously, this makes just 4-6 cupcakes. If you’re feeding a small family or having a few friends over, this is the sweet spot. I don’t have to worry about freezing them or watching them dry out. It’s fresh, it’s now, it’s perfect.
Less Mess, More Fun — Baking is messy, but baking 48 cupcakes is a chore. This batch fits comfortably on my counter. I mix in one bowl, I bake in one pan, I frost in one session. The cleanup takes 5 minutes. That’s it.
Better Texture — I know this sounds counterintuitive, but smaller batches bake more evenly. There’s less mass to distribute heat, which means the cupcakes rise uniformly and stay moist. Plus, the buttercream is whipped in smaller quantities, so it incorporates air better and tastes lighter.
Real Vanilla Flavor — Because the batch is small, I can afford to use a whole real vanilla bean (or high-quality paste) without feeling like I’m wasting expensive ingredients. The vanilla flavor is intense and aromatic, not that artificial chemical taste you get in store-bought mixes.
Speed — From start to finish, this takes about 35-40 minutes. That’s faster than ordering takeout and waiting for delivery. I make these on weeknights all the time when I need a quick win in the kitchen.
This isn’t just a “scaled-down” recipe. It’s been developed from the ground up for small quantities, so the chemistry works perfectly. You’ll get cupcakes that taste like they came from a high-end bakery, but with the comfort of homemade.
Ingredients You’ll Need
Here’s the best part: you probably have most of this already in your pantry. The beauty of a small batch vanilla bean cupcake is that it relies on high-quality basics rather than a long list of obscure ingredients. I’m particular about three things here, and I’ll tell you exactly why.
Butter (½ cup / 115g, unsalted, softened) — This is the foundation. You need it softened to room temperature, meaning it should yield slightly to pressure but not be melted or greasy. If it’s too cold, your batter won’t mix evenly. If it’s too warm, your cupcakes will be dense. I take it out of the fridge about an hour before I start. Unsalted is best so you control the salt level.
Granulated Sugar (½ cup / 100g) — Standard white sugar. Don’t try to substitute with brown sugar here unless you want a caramel flavor. We want pure vanilla sweetness. Measure it correctly—spoon it into the cup and level it off. Don’t scoop and pack, or you’ll end up with too much sugar and dry cupcakes.
Vegetable Oil (2 tablespoons / 30ml) — Yes, oil in a butter cake? Hear me out. The oil keeps the crumb incredibly moist and tender, even after a day. It complements the butter without making it heavy. Canola or light olive oil work fine. Don’t use extra virgin olive oil unless you want an herbal taste.
Large Egg (1 large, room temperature) — Room temperature is non-negotiable. Cold eggs can cause your batter to curdle when mixed with the butter. I usually take the egg out while the butter softens. If you forget, crack it into a small bowl and let it sit in warm water for 5 minutes.
Vanilla Bean or Paste (1 teaspoon paste or ½ small bean, scraped) — This is the star. If you can find real vanilla bean paste, use it. You’ll see those little black specks, and the flavor is incredible. If you’re using a real bean, split it lengthwise and scrape out the seeds. Don’t skip this step. Extract works in a pinch, but it lacks the depth and visual appeal of real vanilla.
All-Purpose Flour (1 ½ cups / 190g) — Standard flour. Sift it if you want a lighter texture, but it’s not strictly necessary. I usually just whisk it in a bowl to aerate it before measuring.
Baking Powder (1 ½ teaspoons) — Make sure it’s fresh! Old baking powder is the #1 reason cupcakes don’t rise. If you’ve had it for more than 6 months, toss it and buy a new can.
Salt (½ teaspoon) — Enhances the vanilla flavor. Don’t skip it.
Whole Milk (3 tablespoons / 45ml) — Adds richness and helps bind the batter. Room temperature is best here too.
For the Buttercream:
Butter (½ cup / 115g, unsalted, softened) — Same as before, room temperature.
Powdered Sugar (2 cups / 240g) — Sifted! This is crucial. Unsifted powdered sugar leads to lumpy frosting. I sift it into my bowl every time.
Vanilla Bean Paste (1-2 teaspoons) — More vanilla is always better in buttercream. I use 2 teaspoons for a strong flavor.
Heavy Cream (1-2 tablespoons) — Adjusts consistency. Start with 1 tablespoon, add more if needed.
Salt (¼ teaspoon) — Cuts the sweetness. Essential.
Equipment Needed
You don’t need fancy gadgets for this. Here’s what I actually use, and what you can skip if you don’t have it.
Standard Muffin Tin — A regular 12-cup tin is fine. You’ll only use 4-6 spots, but the rest of the tin helps with heat distribution if you’re baking in a smaller oven. Line with paper liners for easy cleanup.
Mixing Bowls — One large bowl for the batter, one medium for the buttercream. I use stainless steel bowls because they’re durable and easy to clean.
Electric Hand Mixer — I use this for both the batter and the frosting. It makes the butter creamy and the frosting fluffy in minutes. You can use a whisk, but it takes longer and more arm strength.
Measuring Cups and Spoons — Standard stuff. Dry measures for flour and sugar, liquid measures for milk and oil.
Spatula — A silicone spatula is great for scraping the bowl and folding ingredients. I have a few, but any flexible spatula works.
Piping Bag or Spoon — For frosting, you can use a piping bag with a star tip for that bakery look, or just a spoon for a rustic, homemade vibe. I usually just use a spoon for small batches—it’s faster.
Small Saucepan (Optional) — If you’re making a larger batch of buttercream later, this comes in handy, but for 4-6 cupcakes, a bowl is fine.
How to Make It: Step-by-Step
Alright, let’s make this! I’m walking you through exactly how I do it, including the little tricks I’ve picked up over years of baking.
Step 1: Prep Your Oven and Pan (5 minutes)
Preheat your oven to 350°F (175°C). This is critical—ovens vary, but this is the sweet spot for these cupcakes. Line a muffin tin with paper liners. I usually line just 4-6 spots, but if your oven runs hot, lining the whole tin helps with even baking.
Step 2: Mix Dry Ingredients (2 minutes)
In a medium bowl, whisk together the flour, baking powder, and salt. I do this first because it ensures the leavening agent is evenly distributed. If you skip this, you might get pockets of baking powder that taste metallic. Set aside.
Step 3: Cream Butter and Sugar (3-4 minutes)
In a large bowl, beat the softened butter and granulated sugar together on medium-high speed. This is where the magic happens. You’re aiming for a pale, fluffy mixture that looks like whipped cream. This usually takes 3-4 minutes. Don’t rush it. The air you incorporate here is what makes the cupcakes light. Scrape down the sides of the bowl with a spatula to ensure everything is mixed.
Step 4: Add Wet Ingredients (2 minutes)
Add the egg, vegetable oil, and vanilla bean paste (or scraped seeds) to the butter mixture. Beat on medium speed until combined. The mixture might look slightly curdled at first—this is normal. It will come together in the next step. Scrape the bowl again.
Step 5: Combine Everything (2 minutes)
Add the dry ingredients and the milk to the butter mixture. Mix on low speed until just combined. Do not overmix! Overmixing develops gluten, which makes cupcakes tough. You want a smooth, thick batter. If there are a few small lumps of flour, that’s okay. Stop mixing as soon as you don’t see dry streaks.
Step 6: Fill and Bake (15-18 minutes)
Divide the batter evenly among the lined cups. Fill each about 2/3 full. I use an ice cream scoop for this—it ensures even sizing and saves time. Place in the oven and bake for 15-18 minutes. The cupcakes are done when a toothpick inserted into the center comes out clean or with just a few moist crumbs. They should also spring back when you gently press the top.
Step 7: Cool Completely (20-30 minutes)
Let the cupcakes cool in the pan for 5 minutes, then transfer them to a wire rack to cool completely. This is the hardest part—waiting. But if you frost warm cupcakes, the buttercream will melt and slide off. Trust me on this one.
Step 8: Make the Buttercream (5 minutes)
While the cupcakes cool, make the frosting. Beat the softened butter in a clean bowl until creamy. Add the sifted powdered sugar, vanilla paste, salt, and 1 tablespoon of heavy cream. Beat on medium-high for 2-3 minutes until fluffy and smooth. Add more cream if it’s too thick, or more sugar if it’s too thin. The consistency should be spreadable but not runny.
Step 9: Frost and Serve
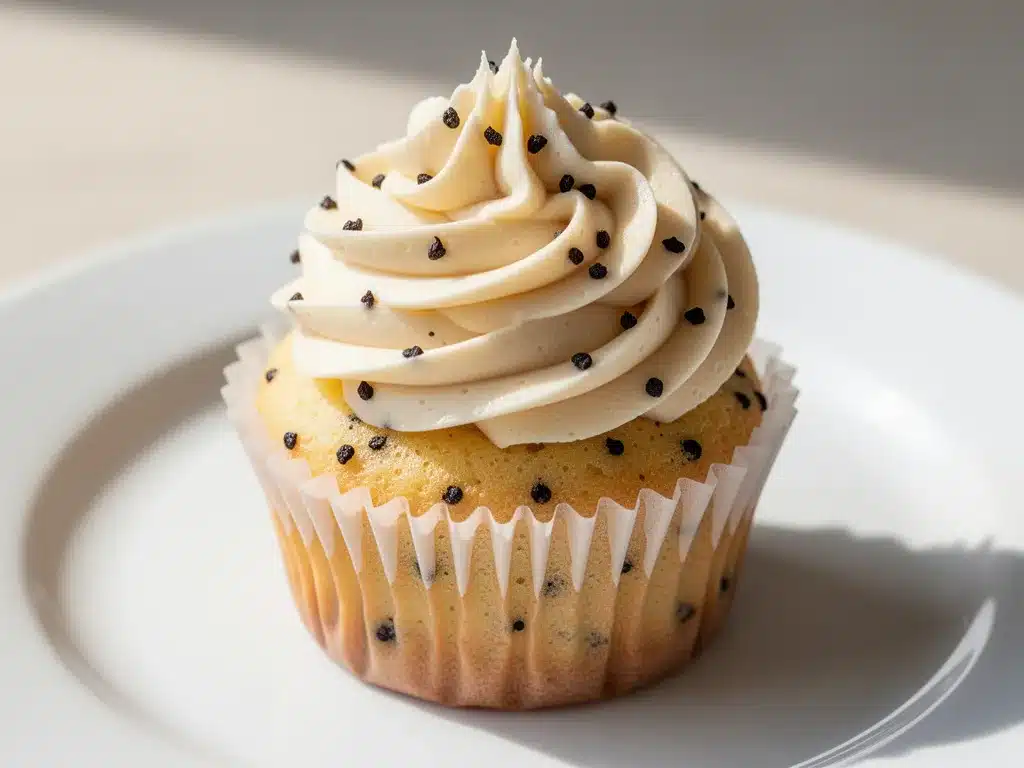
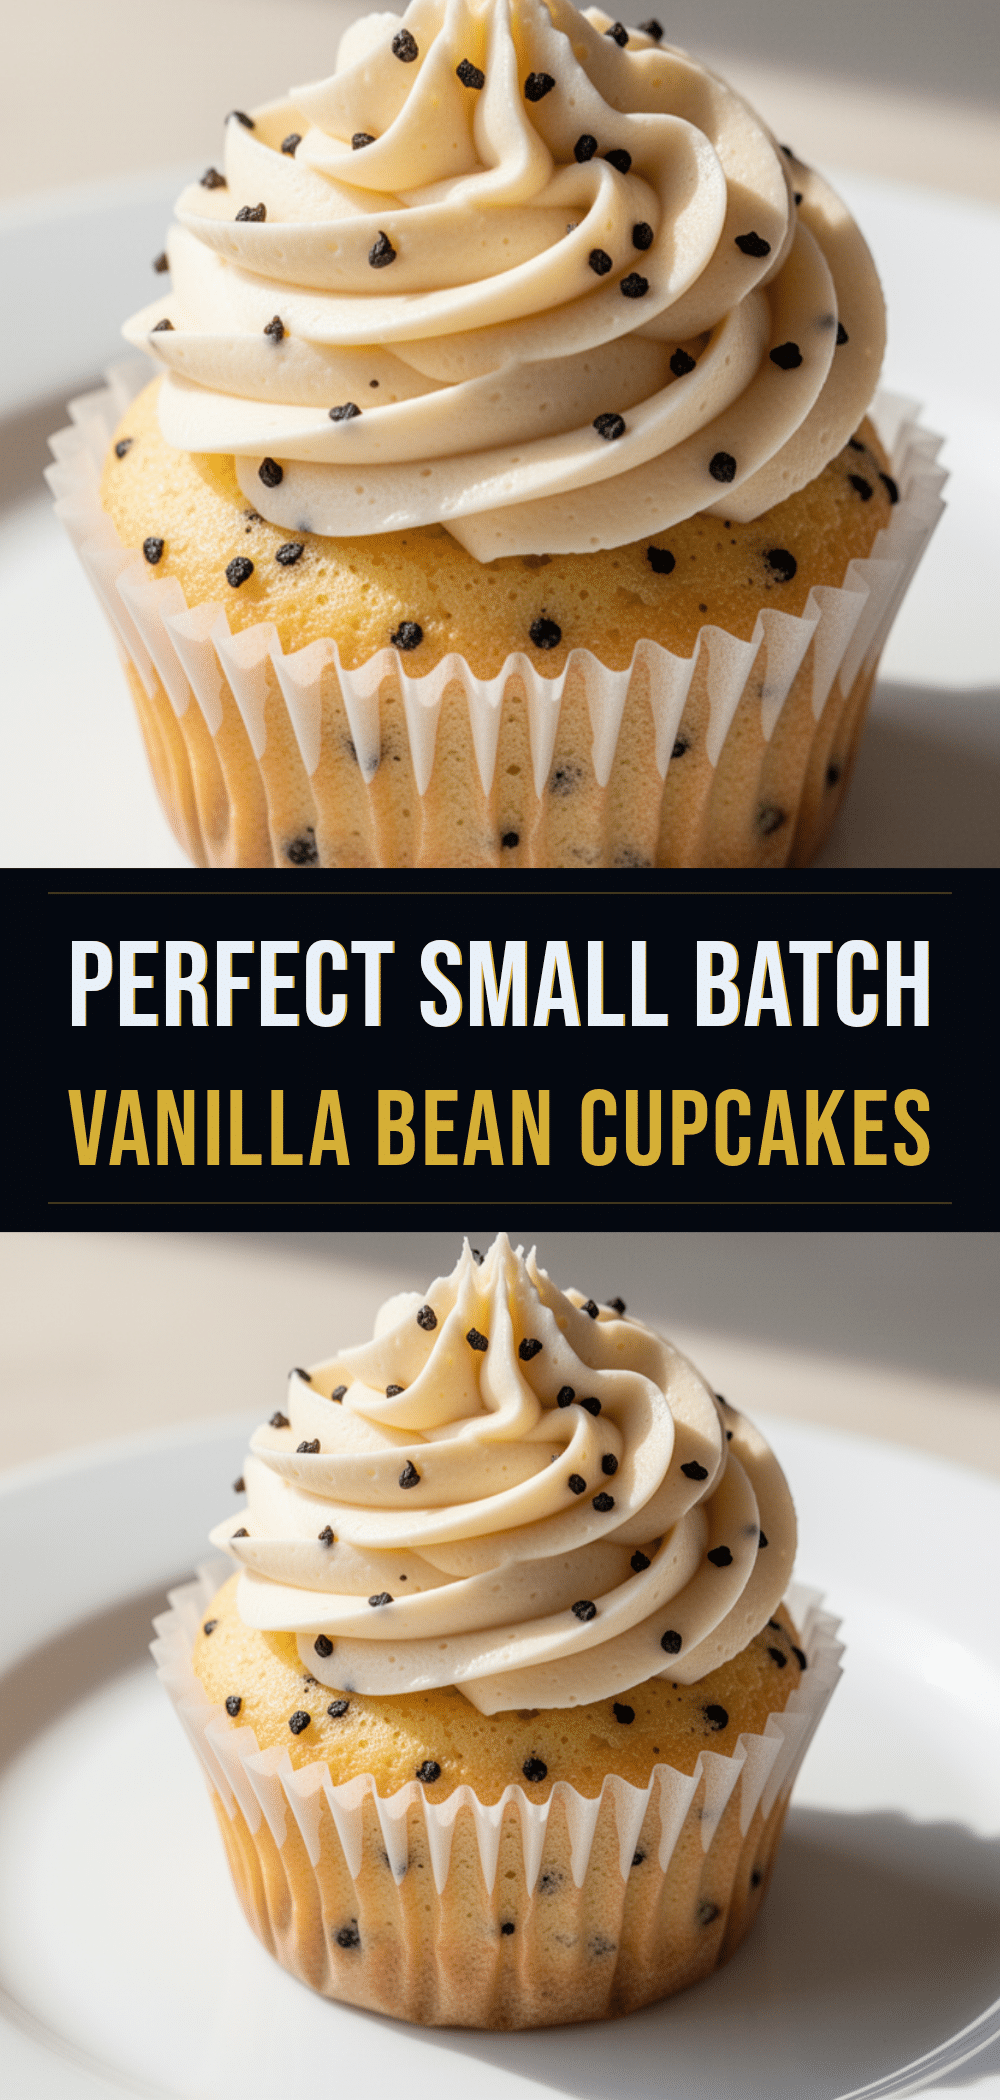
Once the cupcakes are completely cool, spread or pipe the buttercream on top. I usually just dollop a generous amount on top and swirl it with a spoon. It looks rustic and delicious. Enjoy immediately, or store in an airtight container.
Expert Tips & Tricks
Here’s everything I’ve learned from making this dozens of times. These tips will save you from my mistakes.
Room Temperature Everything
This is the golden rule of baking. Cold butter doesn’t cream properly. Cold eggs curdle the batter. Cold milk shocks the mixture. Take everything out of the fridge at least 30 minutes before you start. If you forget, the warm water trick works for eggs and milk.
Don’t Overmix the Batter
I’ve ruined cupcakes before by mixing too much. Once you add the flour, mix until just combined. A few lumps are better than a tough, dense cupcake. Think “fold” rather than “beat.”
Sift Your Powdered Sugar
I know it’s annoying, but unsifted powdered sugar creates lumps in your buttercream. Sifting ensures a silky-smooth frosting. If you’re in a hurry, you can press it through a fine-mesh sieve, but sifting is best.
Real Vanilla Makes a Difference
I used to use extract because it’s cheaper. But real vanilla bean paste or scraped seeds have a depth of flavor that extract just can’t match. The tiny black specks are also beautiful. It’s worth the extra cost for a small batch.
Cool Completely Before Frosting
I can’t stress this enough. Warm cupcakes melt buttercream. I’ve learned this the hard way with a messy, sliding disaster. Patience pays off.
Adjust Buttercream Consistency
Buttercream can be too thick or too thin depending on your kitchen’s temperature. If it’s too thick, add cream 1 teaspoon at a time. If it’s too thin, add more powdered sugar. Aim for a spreadable consistency that holds its shape.
Variations & Substitutions
Once you’ve nailed the basic version, here’s how you can mix it up. I’ve tried all of these.
Lemon Vanilla Cupcakes
Add the zest of one lemon to the batter. Swap the milk for buttermilk for a tangy twist. Add a tablespoon of lemon juice to the buttercream. Fresh and bright.
Chocolate Swirl
Mix 2 tablespoons of cocoa powder into the batter before baking. Or, swirl a teaspoon of chocolate ganache into the vanilla batter for a marble effect.
Gluten-Free
Use a 1:1 gluten-free flour blend. The texture is slightly different but still delicious. I’ve used Bob’s Red Mill and King Arthur, and both work well.
Dairy-Free
Use dairy-free butter sticks (not tub spreads) and almond milk or oat milk. The buttercream might be slightly less stable, but it tastes great.
Mini Cupcakes
Use a mini muffin tin and fill 3/4 full. Bake for 10-12 minutes. Perfect for parties and easier to eat.
Serving & Storage
How to Serve:
I serve these at room temperature. They taste best when the buttercream is soft and the cake is tender. Pair them with coffee or tea for an afternoon treat. I also love serving them with fresh berries on the side.
Storage:
Store leftover cupcakes in an airtight container at room temperature for up to 2 days. The buttercream might firm up in the fridge, so I prefer room temp storage for short-term. If you need to store them longer, freeze them un-frosted for up to 2 months. Thaw at room temperature and frost when ready to eat.
Reheating:
These are best fresh. If you need to warm them slightly, microwave for 10 seconds. Don’t overdo it, or the buttercream will melt.
Nutrition Information
I’m not a nutritionist, but here’s the breakdown if you’re tracking. This is per cupcake (based on 6 servings).
– Calories: 320
– Protein: 4g
– Carbs: 42g
– Fiber: 1g
– Sugar: 32g
– Fat: 16g
– Saturated Fat: 10g
– Cholesterol: 45mg
– Sodium: 180mg
Look, this is a treat. It’s sweet, it’s buttery, it’s delicious. It’s not a diet food. But it’s way better than store-bought, and you know exactly what’s in it. Enjoy a small portion and savor it.
Final Thoughts
So that’s my go-to small batch vanilla bean cupcake recipe! I’ve probably talked your ear off at this point, but when you make a recipe this often, you have a lot to say about it. This has saved me from so many baking disasters. It’s my answer to “what’s for dessert” when I don’t want to make a huge fuss but still want something special.
Make it yours! Try different vanilla beans, add some zest, or experiment with different frostings. The best recipes are the ones you adapt to your tastes. If you make this, drop a comment and let me know what you think! I love hearing how recipes turn out in your kitchen.
Happy baking! And I hope your kitchen smells half as good as mine does right now.
Frequently Asked Questions
Can I use vanilla extract instead of vanilla bean paste?
Yes, you can. Use 1-2 teaspoons of high-quality extract. The flavor will be slightly less intense, and you won’t see the black specks, but it will still taste great. I recommend using the best extract you can find.
Why did my cupcakes turn out dry?
This usually happens from overmixing the batter or overbaking. Make sure you mix until just combined and check them a minute or two before the timer goes off. Also, ensure your oven temperature is accurate—oven thermometers are cheap and helpful.
Can I freeze the cupcakes?
I recommend freezing them unfrosted. Wrap them tightly in plastic wrap and foil. They’ll last for up to 2 months. Thaw at room temperature and frost when ready to eat. Frosted cupcakes don’t freeze as well because the buttercream can become grainy.
How do I fix lumpy buttercream?
If your buttercream is lumpy, it’s usually because the powdered sugar wasn’t sifted or the butter was too cold. Beat it longer on medium-high speed. If it’s still lumpy, you can gently warm the bowl over a pan of warm water for a few seconds while beating, then chill it again.
Can I double this recipe?
Absolutely! Double everything and use a full muffin tin. The baking time might increase by 1-2 minutes. Keep an eye on them.
What if I don’t have a hand mixer?
You can use a whisk and a lot of elbow grease. It will take longer, but the result will be similar. Just make sure you cream the butter and sugar thoroughly to incorporate air.
Can I use cake flour instead of all-purpose flour?
Yes, cake flour will make them even more tender. If you use cake flour, you might need slightly less (about 1 ¼ cups). The texture will be lighter and finer.
Pin This Recipe!
Small Batch Vanilla Bean Cupcakes: Best Easy Buttercream
- Total Time: 35-40 minutes
- Yield: 4-6 servings 1x
Description
These small batch vanilla bean cupcakes yield 4-6 servings, perfect for intimate gatherings or solo treats. They feature a tender crumb, real vanilla bean flavor, and light, fluffy buttercream, coming together in under an hour.
Ingredients
- ½ cup (115g) unsalted butter, softened
- ½ cup (100g) granulated sugar
- 2 tablespoons (30ml) vegetable oil
- 1 large egg, room temperature
- 1 teaspoon vanilla bean paste or ½ small vanilla bean, scraped
- 1 ½ cups (190g) all-purpose flour
- 1 ½ teaspoons baking powder
- ½ teaspoon salt
- 3 tablespoons (45ml) whole milk, room temperature
- For the Buttercream: ½ cup (115g) unsalted butter, softened
- For the Buttercream: 2 cups (240g) powdered sugar, sifted
- For the Buttercream: 1-2 teaspoons vanilla bean paste
- For the Buttercream: 1-2 tablespoons heavy cream
- For the Buttercream: ¼ teaspoon salt
Instructions
- Preheat oven to 350°F (175°C). Line a muffin tin with paper liners.
- In a medium bowl, whisk together the flour, baking powder, and salt. Set aside.
- In a large bowl, beat the softened butter and granulated sugar on medium-high speed for 3-4 minutes until pale and fluffy. Scrape down the sides of the bowl.
- Add the egg, vegetable oil, and vanilla bean paste (or seeds) to the butter mixture. Beat on medium speed until combined.
- Add the dry ingredients and milk to the butter mixture. Mix on low speed until just combined. Do not overmix.
- Divide the batter evenly among the lined cups, filling each about 2/3 full.
- Bake for 15-18 minutes, or until a toothpick inserted into the center comes out clean. The cupcakes should spring back when gently pressed.
- Let cupcakes cool in the pan for 5 minutes, then transfer to a wire rack to cool completely.
- While cupcakes cool, beat the softened butter in a clean bowl until creamy.
- Add sifted powdered sugar, vanilla paste, salt, and 1 tablespoon heavy cream. Beat on medium-high for 2-3 minutes until fluffy. Adjust consistency with more cream or sugar if needed.
- Once cupcakes are completely cool, spread or pipe the buttercream on top. Serve immediately or store in an airtight container.
Notes
Ensure all ingredients are at room temperature for best results. Do not overmix the batter to avoid tough cupcakes. Sift powdered sugar for smooth buttercream. Cool cupcakes completely before frosting to prevent melting. Can be made gluten-free using a 1:1 gluten-free flour blend or dairy-free using plant-based butter and milk.
- Prep Time: 15 minutes
- Cook Time: 18 minutes
- Category: Dessert
- Cuisine: American
Nutrition
- Serving Size: 1 cupcake
- Calories: 320
- Sugar: 32
- Sodium: 180
- Fat: 16
- Saturated Fat: 10
- Carbohydrates: 42
- Fiber: 1
- Protein: 4
Keywords: small batch cupcakes, vanilla bean cupcakes, easy buttercream, mini cupcakes, homemade dessert, vanilla cupcakes


