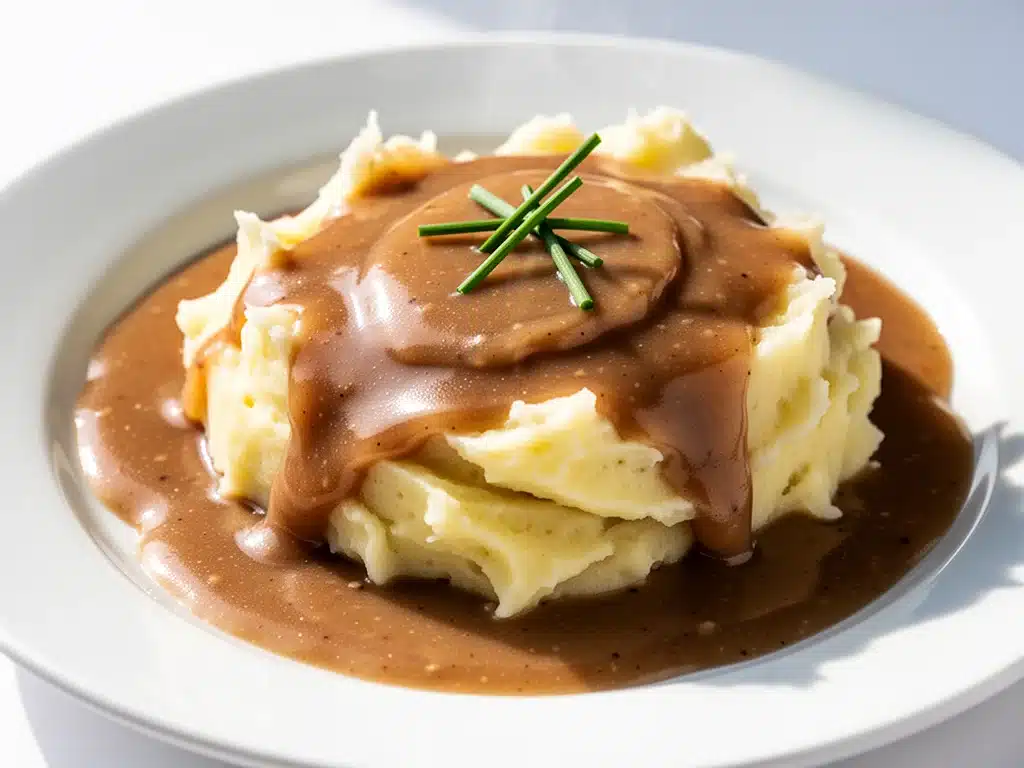
I have a confession to make. For the first twelve years of my marriage, I bought the powdered packet. You know the one—the little foil pouch that promises “rich flavor” but delivers something that tastes like salty cardboard mixed with regret. I thought I was being clever. I thought I was saving time. I thought gravy was just a condiment, something you dumped on mashed potatoes so they weren’t so dry.
Then came the Thanksgiving of 2019. My husband’s parents were coming over. His mom, a woman who can make a roux blindfolded while judging your life choices, walked into my kitchen, saw the foil packet on the counter, and just sighed. It wasn’t even a mean sigh. It was a tired sigh. The kind that says, “I’m sorry you had to learn this the hard way.” That night, we ate gravy that tasted like watered-down soy sauce. His dad didn’t say anything, but he didn’t ask for seconds. That silence was louder than any criticism.
I went to bed that night determined. I didn’t just want to make gravy; I wanted to make the kind of gravy that makes people close their eyes and moan. The kind that your whole family will crave, the kind that makes them ignore the turkey and go straight for the bowl. It turned out that making homemade gravy isn’t about fancy techniques or expensive ingredients. It’s about patience, heat control, and knowing exactly when to stop stirring.
Since that humiliating Thanksgiving, I’ve tested this foolproof homemade gravy recipe for mashed potatoes dozens of times. I’ve burned it, I’ve clumped it, I’ve made it too thick, and I’ve made it too thin. But I’ve also cracked the code. And now, every time I make this, my husband grabs the spoon before it even hits the stove. It’s rich, savory, deeply browned, and tastes like comfort wrapped in a warm blanket. If you’re tired of the packet stuff, let me show you how to do it right. It’s easier than you think, and the payoff is huge.
Why You’ll Love This Recipe
There are about ten reasons I keep making this gravy, but here are the big ones. This isn’t just a side dish; it’s the secret weapon that turns a mediocre dinner into a memorable one.
It Uses Drippings, Not Just Butter — Most recipes tell you to melt butter in a pan. That’s fine if you’re making a white sauce, but for dark, savory gravy, you need the fond (the brown bits) stuck to the bottom of your roasting pan. This recipe uses those meaty, flavorful drippings as the base. It’s liquid gold. If you’re making mashed potatoes, you’re already roasting something, so you’re getting the flavor for free.
Zero Lumps, Guaranteed — I’ve watched people struggle with roux for years. The clumps! The streaks of white flour! This method uses a specific whisking technique that ensures a silky, smooth texture every single time. No straining required. No whisking until your arm falls off. Just smooth, glossy gravy.
Scalable for Any Crowd — Whether you’re cooking for two or hosting a Thanksgiving feast for fifteen, this recipe scales up beautifully. I’ve made it in a tiny saucepan for weeknight meatloaf and in a massive Dutch oven for holiday dinner. The ratio stays the same, so you never have to guess.
Freezer-Friendly — Here’s the best part: this gravy freezes incredibly well. I make a double batch on Sunday, freeze half in portion-sized containers, and thaw it out for weeknight dinners. It tastes just as good as fresh. Seriously. I’ve done blind taste tests with my kids, and they can’t tell the difference.
Customizable Depth — Want it lighter? Use chicken stock and less butter. Want it darker and richer? Add a teaspoon of soy sauce or Worcestershire. This recipe is a canvas. You control the salt, the color, and the intensity. It’s your gravy, your rules.
This is my go-to when I need dinner to just work. No complicated techniques, no weird ingredients, just reliable, delicious food that makes everyone happy. Once you taste this, you’ll never go back to the packet again.
Ingredients You’ll Need
Here’s the best part: you probably have most of this already. This isn’t a recipe that requires a trip to three different specialty stores. It’s pantry-friendly, with a few key items that make all the difference.
Meat Drippings or Fat (3-4 tablespoons) — This is the foundation. If you’re roasting chicken, turkey, or beef, save those brown bits and the melted fat in the bottom of your roasting pan. If you’re pan-frying steak or chops, use the butter or oil from that pan. If you’re not cooking meat, substitute with unsalted butter. I prefer butter for the nutty flavor it adds to the roux.
All-Purpose Flour (3-4 tablespoons) — This is what thickens the gravy. You need equal parts fat and flour to make a roux. Use regular white flour; it’s neutral and creates that classic smooth texture. Don’t try to substitute with gluten-free flour here unless you’re experienced, as the texture changes.
Chicken or Beef Stock (2 cups) — This is the body of the gravy. Use low-sodium stock so you can control the salt level. I keep a carton of low-sodium chicken broth in the fridge at all times. If you’re making beef gravy, use beef stock. For poultry, chicken or turkey stock is perfect. Avoid “no-salt-added” if you’re not careful, as it can taste flat.
Hot Water (½ cup) — I know, hot water in gravy? Yes. Adding a splash of hot water to the roux before the stock helps break up the flour clumps instantly. It’s a trick my grandmother taught me, and it’s a game-changer for smoothness.
Worcestershire Sauce (1 teaspoon) — Optional, but highly recommended. It adds that deep, umami savory note that makes people ask, “What’s in this? It tastes so good.” It’s not fishy; it’s just rich. If you don’t have it, a dash of soy sauce works too.
Dijon Mustard (½ teaspoon) — Another secret weapon. It doesn’t make the gravy taste like mustard. It adds a tangy brightness that cuts through the richness. Again, optional, but it elevates the flavor profile significantly.
Salt and Black Pepper (to taste) — Always taste at the end. Stock varies in saltiness, so don’t add salt until you’ve tasted the finished gravy. Freshly cracked black pepper is a must for that sharp, aromatic finish.
Butter (1 tablespoon, optional) — For a restaurant-quality finish, stir in a cold pat of butter at the very end. It adds shine and a velvety mouthfeel. This is called “monter au beurre,” and it’s the chef’s secret.
Equipment Needed
You don’t need fancy equipment for this. Here’s what I actually use.
Whisk — A good, sturdy whisk is non-negotiable. I use a balloon whisk because it gets into the corners of the pan and breaks up clumps better than a spoon. A dull whisk won’t do the job.
Saucepan or Skillet — A 2-quart saucepan is ideal for small batches. For larger quantities, a 12-inch skillet or even the roasting pan itself (if it’s stove-top safe) works. I prefer a heavy-bottomed saucepan because it distributes heat evenly and prevents burning.
Wooden Spoon — For stirring the roux initially. Some people swear by wooden spoons for roux, but I find a whisk is faster for the liquid stage. I keep a wooden spoon handy for deglazing the roasting pan.
Measuring Cups and Spoons — Precision matters here, especially with the flour. Too much flour makes it gummy; too little makes it watery. Use proper measuring cups, not the ones in the handle.
Strainer (Optional) — If you’re paranoid about lumps (or if your roasting pan has tiny burnt bits you can’t remove), keep a fine-mesh strainer handy. I rarely need it, but it’s good peace of mind.
How to Make It: Step-by-Step
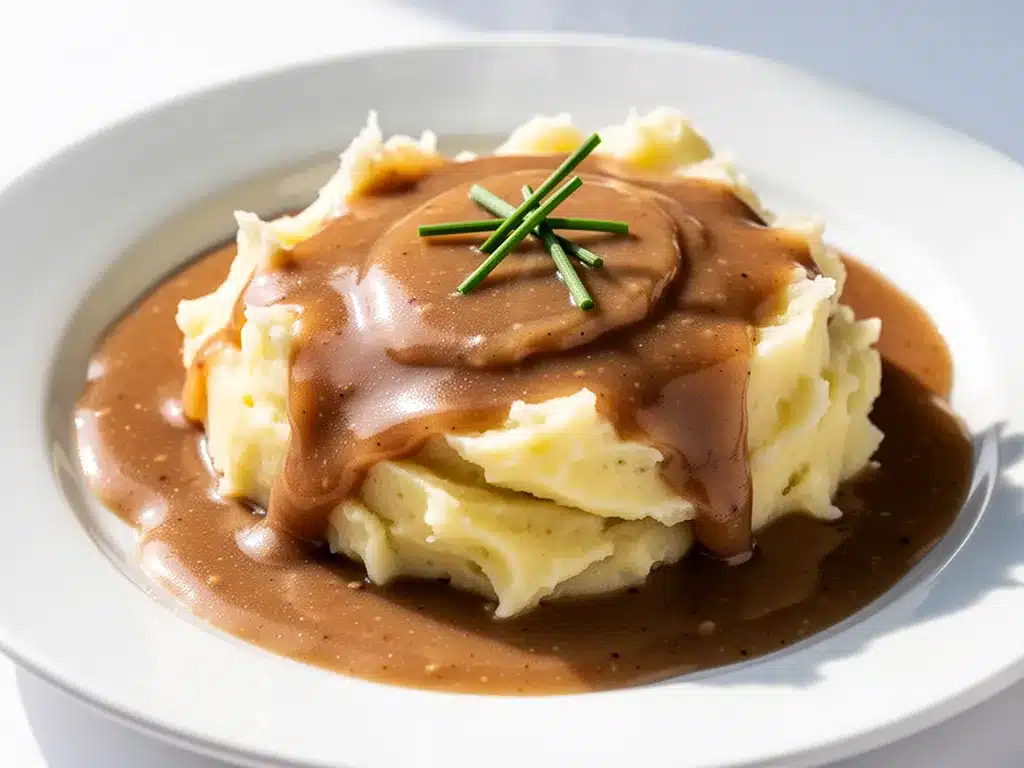
Alright, let’s make this! I’m walking you through exactly how I do it, including the little tricks I’ve picked up. This process takes about 15 minutes, but most of that is just simmering. The active time is less than 10 minutes.
Step 1: Collect the Drippings
If you’re roasting meat, let the meat rest for 15-20 minutes while you handle the gravy. Pour the roasting pan juices into a fat separator or a large measuring cup. Let it sit for a minute so the fat rises to the top. Skim off about 3-4 tablespoons of the fat and leave the flavorful liquid (the broth) in the cup. If there are large burnt bits, don’t worry; we’ll deal with those. If you’re not roasting, melt 3-4 tablespoons of butter in your saucepan over medium heat.
Step 2: Make the Roux
Place your saucepan over medium heat. Add the fat (or butter) to the pan. Once it’s hot and shimmering, but not smoking, sprinkle in the flour. Whisk constantly. You want to cook the flour for about 2-3 minutes. You’ll see it turn from white to a light golden brown. Smell it? It should smell nutty, like toasted bread. Don’t let it burn. If it turns dark brown too fast, take it off the heat for a second. This nutty flavor is the base of your savory taste.
Step 3: Deglaze with Hot Water
Here’s the trick for smoothness. Slowly pour in the ½ cup of hot water while whisking furiously. The mixture will bubble up and look weird, like a thick paste. Keep whisking until it smooths out. This step hydrates the flour and prevents clumps when you add the larger volume of stock.
Step 4: Add the Stock
Gradually pour in the 2 cups of stock, a little at a time, whisking constantly. Don’t dump it all in at once, or you’ll get lumps. Whisk until the stock is fully incorporated before adding more. The gravy will look thin at first. That’s okay. It will thicken as it simmers.
Step 5: Simmer and Thicken
Once all the stock is in, bring the mixture to a gentle simmer. Reduce the heat to medium-low. Let it cook for 5-7 minutes, stirring occasionally. You’ll see it start to bubble gently and thicken. It’s ready when it coats the back of a spoon. If you run your finger across the spoon, the line should stay clean. If it’s too thick, add a splash more stock or water. If it’s too thin, let it simmer longer.
Step 6: Season and Finish
Remove the pan from the heat. Stir in the Worcestershire sauce and Dijon mustard. Taste the gravy. Now is the time to add salt and black pepper. Add salt a pinch at a time. Remember, the stock already has salt, and the drippings might too. Add pepper to taste. For that glossy finish, stir in the cold butter until it melts. This adds richness and shine.
Expert Tips & Tricks
Here’s everything I’ve learned from making this dozens of times. These tips will save you from my mistakes.
Don’t Skip the Roux Cooking Time
Many people rush this step. Raw flour tastes like paste. Cooking it for 2-3 minutes until it’s golden removes that raw flavor and adds a nutty depth. If your roux is pale, your gravy will taste flat.
Whisk, Don’t Stir
Stirring with a spoon leaves pockets of flour that turn into lumps. A whisk aerates the mixture and breaks up clumps instantly. It’s not optional if you want silky gravy.
Control the Heat
Medium heat is the sweet spot. Too high, and the flour burns before the liquid thickens. Too low, and it takes forever. If you see the roux darkening too quickly, take the pan off the burner for 30 seconds.
Use Low-Sodium Stock
This is crucial. If you use regular stock, your gravy might be inedibly salty by the time it’s thickened. Low-sodium gives you control. You can always add salt; you can’t take it out.
Strain if Needed
If you’re making turkey gravy and there are tiny bits of turkey skin or burnt onion in the drippings, strain the gravy through a fine-mesh sieve into a clean pot. It’s not necessary for every batch, but it’s nice for special occasions.
Reheat Gently
Gravy can separate if reheated too quickly. Reheat it over low heat, adding a splash of water or stock if it’s too thick. Never microwave it on high power. Low and slow is the way.
Variations & Substitutions
Once you’ve nailed the basic version, here’s how you can mix it up. I’ve tried all of these.
Vegetarian Gravy
Skip the meat drippings. Use 4 tablespoons of butter or olive oil for the roux. Use vegetable stock instead of chicken or beef. Add a teaspoon of mushroom powder or soy sauce to boost the umami flavor. It tastes just as rich.
Beef Gravy
Use beef stock and save the drippings from a roast beef or pan-seared steak. Add a teaspoon of Worcestershire sauce and a pinch of thyme. This is perfect for pot roast or Salisbury steak.
Chicken Gravy
Use chicken stock and turkey drippings. Add a pinch of sage and thyme. This is the classic Thanksgiving gravy. It’s lighter and more delicate than beef gravy.
Dairy-Free Option
Use olive oil or dairy-free butter for the roux. Ensure your stock is dairy-free (most are, but check labels). The texture might be slightly less creamy, but the flavor is still excellent.
Gluten-Free Gravy
Use a gluten-free flour blend for the roux. Note that some gluten-free flours (like rice flour) can make the gravy slightly thinner. You might need to cook it a minute longer or use a bit more flour. Arrowroot powder is another option, but add it at the end as a slurry.
Spicy Gravy
Add a pinch of cayenne pepper or a dash of hot sauce. It’s surprising how well heat pairs with savory gravy. Great for fried chicken.
Serving & Storage
How to Serve:
I usually serve this straight from the saucepan or pour it into a gravy boat. It’s best served warm, not piping hot, as it thickens as it cools. Pair it with mashed potatoes, roasted vegetables, biscuits, or fried chicken.
Side Dishes:
– Mashed potatoes (obviously)
– Roasted carrots
– Grilled steak
– Biscuits or dinner rolls
– Fried chicken
Storage Instructions:
Store leftover gravy in an airtight container in the refrigerator for up to 4 days. It will thicken significantly in the fridge. To reheat, add a splash of water, stock, or milk and warm it gently over low heat, stirring until smooth.
Freezing:
Yes, this gravy freezes well! Portion it into freezer-safe containers or zip-top bags. It lasts for up to 3 months. Thaw in the fridge overnight and reheat gently. Add a little liquid when reheating, as freezing can separate the emulsion slightly.
Nutrition Information
I’m not a nutritionist, but here’s the breakdown if you’re tracking. Keep in mind that this varies based on the stock and fat used.
Per Serving (based on 8 servings of ½ cup):
– Calories: 65
– Protein: 2g
– Carbs: 5g
– Fat: 4g
– Sodium: 280mg (varies by stock)
What’s Good:
– Low in calories compared to cream-based sauces
– Good source of sodium if you’re on a low-carb diet (electrolytes)
– Can be made lighter by using less fat
What to Know:
– Contains gluten (unless modified)
– Contains dairy (if using butter)
– Sodium content depends heavily on the stock used
My Take:
Look, this is comfort food. It’s not a diet recipe, but it’s not overly heavy either. A little goes a long way. When I’m watching my salt, I use low-sodium stock and skip the extra salt at the end. But usually? I just enjoy it in moderation.
Final Thoughts
So that’s my foolproof homemade gravy recipe! I’ve probably talked your ear off at this point, but when you make a recipe this often, you have a lot to say about it. This gravy has saved weeknight dinners more times than I can count. It’s my answer to “what’s for dinner” when I’m tired, don’t want takeout, and still want something that tastes really good. My kids are happy, my husband’s happy, and I’m happy because I’m not stressed about cooking.
Make it yours! Try different add-ins, swap in your favorite herbs, adjust the salt to your taste. The best recipes are the ones you adapt to your family’s tastes. If you make this, drop a comment and let me know what you think! I love hearing how recipes turn out in your kitchen. And if something doesn’t work, tell me that too—I’m here to help troubleshoot.
Happy cooking! And I hope your kitchen smells half as good as mine does right now.
Frequently Asked Questions
Can I use water instead of stock?
You can, but the flavor will be much blander. Stock adds depth, body, and savory notes that water simply doesn’t have. If you’re out of stock, use water but add extra seasoning like salt, pepper, garlic powder, and herbs. It won’t be as good, but it’ll work in a pinch.
Why did my gravy get lumpy?
Lumps usually happen because the flour wasn’t fully incorporated before the liquid was added, or the heat was too high. To fix it, whisk vigorously. If lumps persist, strain the gravy through a fine-mesh sieve. To prevent it next time, add the liquid gradually and whisk constantly.
Can I make this ahead of time?
Absolutely. In fact, it often tastes better the next day because the flavors have time to meld. Make it, let it cool, store it in the fridge, and reheat it gently when needed. Just remember to add a splash of liquid when reheating, as it thickens in the fridge.
Why is my gravy too thin?
If it’s too thin, let it simmer longer. The starch in the flour needs time to activate and thicken the liquid. If it’s still too thin after 10 minutes of simmering, make a slurry by mixing 1 tablespoon of cornstarch with 1 tablespoon of cold water, then stir it into the gravy. Cook for another 2 minutes until thickened.
Why is my gravy too thick?
Just add more liquid. Stock or water works best. Add it a little at a time, stirring until you reach your desired consistency. Don’t worry about diluting the flavor too much; the salt and seasoning can be adjusted at the end.
Can I use cornstarch instead of flour?
You can, but the method is different. With cornstarch, you don’t make a roux. Instead, mix 2 tablespoons of cornstarch with ¼ cup of cold water or stock to make a slurry. Once your stock is hot and simmering, whisk in the slurry. Cook for 1-2 minutes until thickened. Note that cornstarch gravy is clearer and glossier but doesn’t have the same nutty flavor as a flour roux.
How long does homemade gravy last?
In the fridge, it lasts up to 4 days. In the freezer, it lasts up to 3 months. After that, it’s still safe to eat, but the quality and flavor may degrade.
Pin This Recipe!

Foolproof Homemade Gravy: Best Easy Recipe
- Total Time: 15 minutes
- Yield: 8 servings 1x
Description
A rich, savory, and lump-free homemade gravy made from meat drippings or butter, flour, and stock. This foolproof method ensures a silky texture and deep flavor, perfect for mashed potatoes, turkey, or beef.
Ingredients
- 3–4 tablespoons meat drippings or unsalted butter
- 3–4 tablespoons all-purpose flour
- 2 cups low-sodium chicken or beef stock
- ½ cup hot water
- 1 teaspoon Worcestershire sauce (optional)
- ½ teaspoon Dijon mustard (optional)
- Salt and freshly cracked black pepper to taste
- 1 tablespoon cold butter (optional, for finishing)
Instructions
- Collect drippings from roasted meat or melt butter in a saucepan over medium heat.
- Add flour to the hot fat and whisk constantly for 2-3 minutes until the mixture turns light golden brown and smells nutty.
- Slowly pour in hot water while whisking vigorously to create a smooth paste and prevent clumps.
- Gradually add stock, a little at a time, whisking constantly until fully incorporated.
- Bring to a gentle simmer over medium-low heat and cook for 5-7 minutes, stirring occasionally, until the gravy coats the back of a spoon.
- Remove from heat and stir in Worcestershire sauce and Dijon mustard.
- Season with salt and black pepper to taste.
- For a glossy finish, stir in cold butter until melted.
Notes
Use low-sodium stock to control salt levels. If the gravy is too thick, add more stock or water. If too thin, simmer longer or use a cornstarch slurry. Gravy thickens as it cools and can be thinned when reheating. For vegetarian gravy, use butter or olive oil and vegetable stock.
- Prep Time: 5 minutes
- Cook Time: 10 minutes
- Category: Side Dish
- Cuisine: American
Nutrition
- Serving Size: ½ cup
- Calories: 65
- Sodium: 280
- Fat: 4
- Saturated Fat: 2
- Carbohydrates: 5
- Protein: 2
Keywords: homemade gravy, easy gravy recipe, turkey gravy, beef gravy, mashed potatoes, roux, holiday dinner, comfort food


