It was 6:15 AM on a Tuesday, and I was already losing. My coffee wasn’t even brewed yet, my kids were arguing over who got the blue cup, and I was staring at the empty fridge like it owed me money. We had soccer practice at 7:30, school started in four hours, and the only thing I had to eat was a sad-looking banana and a half-empty jar of peanut butter. I couldn’t serve them that. I absolutely could not. That was the line.
I rummaged through the crisper drawer and found a bag of broccoli florets that were slightly past their prime and a carton of eggs that were definitely past their prime. But here’s the thing about cooking when you’re desperate: it forces creativity. I threw those eggs into a bowl, chopped the broccoli (yes, even the tough stems), grated some cheddar cheese that had been hiding in the back of the fridge, and dumped it all into a muffin tin. I didn’t measure anything. I just hoped.
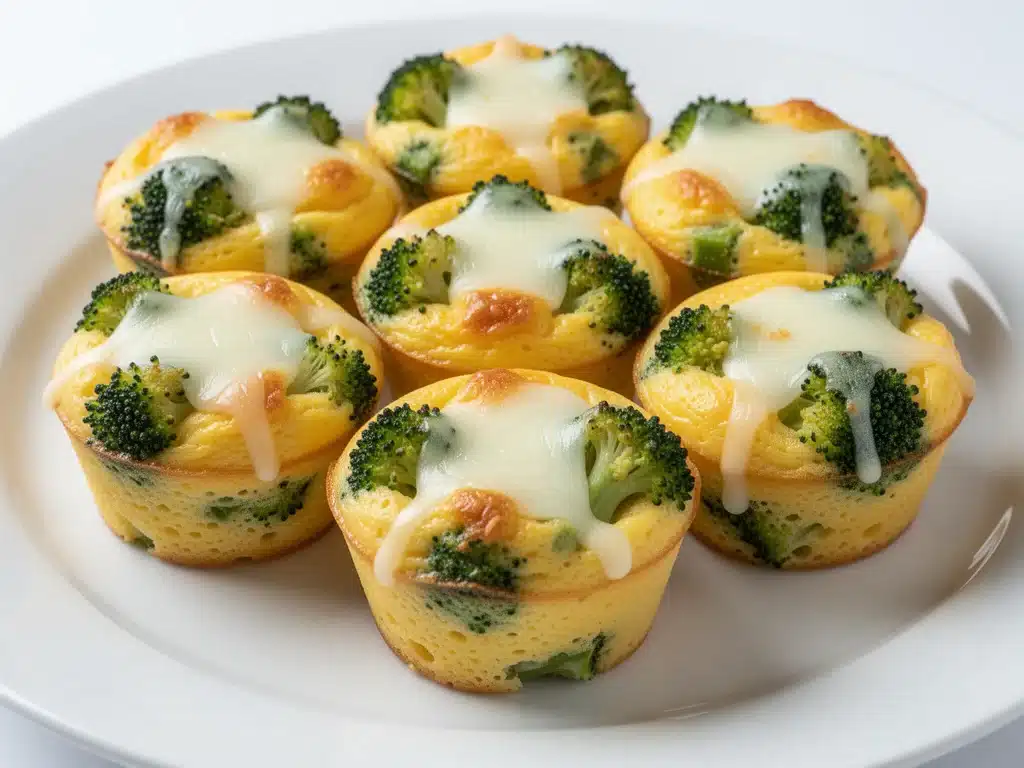
Twenty minutes later, I pulled these Cheesy Broccoli Egg Muffin Cups out of the oven. They were golden, puffy, and smelled like actual breakfast instead of panic. My kids ate them standing up by the counter, still in their pajamas, before we ran out the door. No one complained. No one asked for toast. For the first time in weeks, the morning rush didn’t feel like a battle.
Since that chaotic Tuesday, these muffin cups have become our lifeline. I make them every Sunday now, stacking them in the fridge like little edible bricks of hope. They’re perfect for busy weeknights (if you’re meal-prepping for the week ahead), lazy weekends, or when you just need a protein-packed breakfast that doesn’t require standing over a stove. I’ve tested this recipe at least twenty times, tweaking the broccoli-to-egg ratio and cheese types, and I can confidently say this is the version that works. It’s fluffy, it’s cheesy, and it’s ready in under 20 minutes of active time.
Why You’ll Love This Recipe
Look, I know what you’re thinking. “Egg muffins? Again?” But hear me out. These aren’t the rubbery, dry breakfast sandwiches you get at gas stations. These are tender, savory, and actually delicious. I’ve made these for everything from soccer practice snacks to last-minute lunchbox additions, and they always disappear. Here’s why they’re worth your time:
- Zero Morning Stress — Seriously. If you make a batch on Sunday, your mornings are basically automatic. Grab two muffin cups, maybe a piece of fruit, and go. I’ve done this with kids who usually take 45 minutes to get dressed. It’s magic.
- Hidden Veggies — My kids think these are just “cheesy egg bites.” They don’t even know there’s broccoli in there until I tell them. It’s the perfect way to sneak in nutrients without the usual breakfast battles over vegetables.
- Meal Prep Friendly — These keep for up to 5 days in the fridge and freeze beautifully. I make a double batch every other week. They reheat in the microwave in 30 seconds. Yes, 30 seconds. That’s it.
- Gluten-Free by Default — No flour, no wheat, no gluten. Just eggs, cheese, and veggies. If you’re watching carbs or dealing with sensitivities, this is your best friend.
- Customizable — Hate broccoli? Use spinach. Love bacon? Add crumbled bacon. Want it spicy? Throw in some diced jalapeños. This recipe is a canvas for whatever is in your fridge.
This is my go-to when I need breakfast to just work. No complicated techniques, no weird ingredients, just reliable, delicious food that makes everyone happy. And honestly? It tastes way better than fluffy ricotta lemon pancakes when you’re running late (don’t tell my husband I said that).
Ingredients You’ll Need
Here’s the best part: you probably have most of this already. I’m not asking you to go to three different stores for obscure ingredients. This is pantry-friendly, fridge-cleaning goodness.
The Base
Eggs (10 large) — I use large eggs because they give the best structure. If you’re making a smaller batch, use 6 eggs. Farm-fresh eggs have nicer yolks, but regular ones work fine. Don’t buy organic unless you really want to; the difference in taste for baked eggs is minimal.
Heavy Cream or Milk (¼ cup / 60ml) — I use heavy cream for extra richness, but whole milk works too. If you’re lightening it up, 2% milk is fine. Just don’t use skim—it makes them dry. A splash of cream makes them custardy.
Salt and Black Pepper (1 teaspoon salt, ½ teaspoon pepper) — Season well. Eggs can be bland if you don’t salt them properly. I use kosher salt because it’s easier to control. Sea salt works too.
The Star: Broccoli
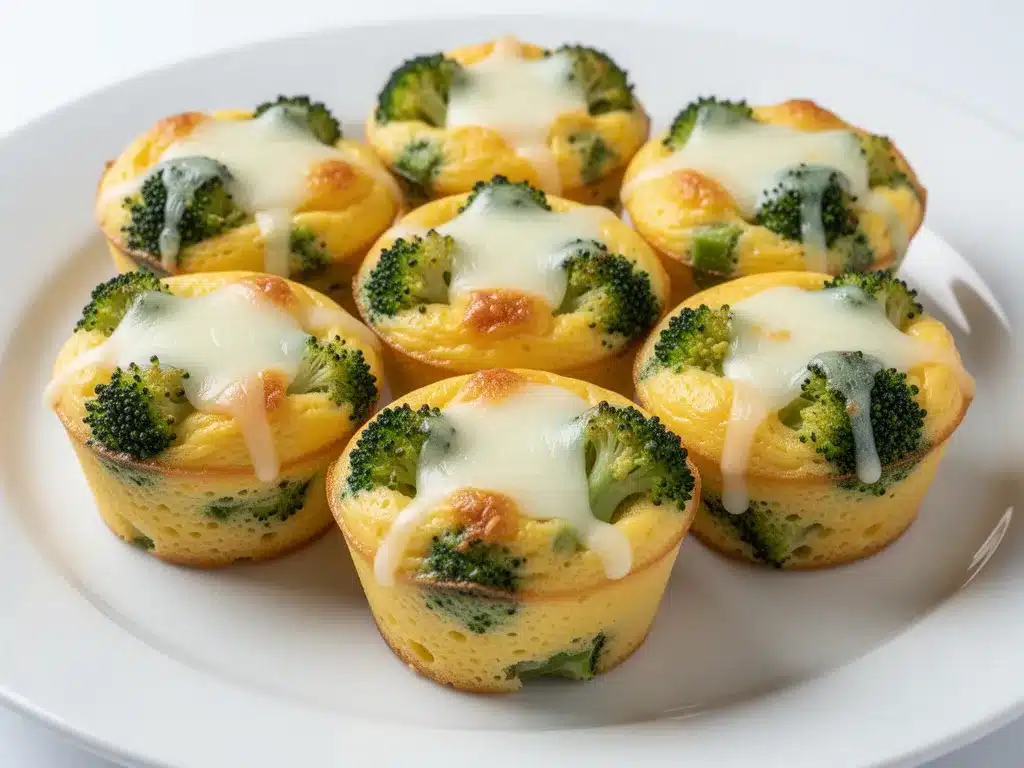
Broccoli Florets (1 cup / 100g, finely chopped) — This is the key. Don’t just throw whole florets in. You need to chop them into tiny, tiny pieces—almost like rice size. I use a food processor for this, but a knife works if you’re patient. If the pieces are too big, the muffin cups won’t cook evenly, and you’ll end up with raw broccoli in the middle. Trust me on this.
Tip — If your broccoli is old and floppy, blanch it first! Boil it for 30 seconds, then plunge it into ice water. This keeps it bright green and tender. I do this if my broccoli isn’t super fresh.
The Cheese & Flavor
Sharp Cheddar Cheese (½ cup / 50g, shredded) — Use block cheese and grate it yourself. Pre-shredded cheese has anti-caking agents that prevent it from melting smoothly. I want gooey, melty cheese, not grainy chunks. Sharp cheddar gives the best flavor, but Monterey Jack or Pepper Jack work too.
Garlic Powder (½ teaspoon) — Fresh garlic can burn in the oven, so I stick with powder. It gives a nice savory background note without risking burnt bits. If you really want fresh garlic, mince it super fine and mix it with the eggs.
Optional Add-ins — Cooked bacon bits, diced ham, spinach, mushrooms, or red pepper flakes. I usually have leftover bacon from dinner, so I toss a handful in. It makes them feel like a treat.
Equipment Needed
You don’t need fancy equipment for this. Here’s what I actually use.
12-Cup Muffin Tin — Standard size. If you want smaller bites, use a mini muffin tin (bakes in 12-15 minutes instead of 18-20). I use a non-stick tin because cleanup is easier, but a metal one works fine if you grease it well.
Whisk — For beating the eggs. A balloon whisk is best for getting air into them, which makes them fluffy.
Food Processor or Knife — To chop the broccoli. A food processor with the pulse button is fastest. I pulse it 5-6 times until it’s finely chopped. If you don’t have one, just chop it super finely with a knife.
Measuring Cups and Spoons — For the cream and cheese. I’m not super precise with the eggs, but I measure the cream and cheese to keep the ratio right.
Silicone Brush or Spray — To grease the muffin cups. I use cooking spray for speed, but brushing with butter tastes richer.
Small Bowl — For mixing the egg mixture. I use a medium bowl so I don’t spill when whisking.
How to Make It: Step-by-Step
Alright, let’s make this! I’m walking you through exactly how I do it, including the little tricks I’ve picked up over dozens of batches.
Step 1: Prep the Oven and Pan (5 minutes)
Preheat your oven to 350°F (175°C). This needs to be hot enough to set the eggs quickly so they stay fluffy, not rubbery. Grease your muffin tin generously. I use cooking spray, making sure to get into every nook. If you’re using silicone cups, you might not need grease, but I’m paranoid about sticking.
Step 2: Chop the Broccoli (5 minutes)
This is the most important step. Wash your broccoli and pat it dry. Remove the tough stems (save them for soup if you want). Chop the florets into the smallest pieces you can manage. I aim for pieces no bigger than a grain of rice. If they’re too big, you’ll have chunks of raw broccoli in your muffin cups. Use a food processor for speed, or take your time with a knife. Uniformity is key.
Step 3: Whisk the Eggs (2 minutes)
Crack 10 eggs into a large bowl. Add the heavy cream, salt, pepper, and garlic powder. Whisk vigorously for about 30 seconds. You want to incorporate as much air as possible. This is what makes them light and fluffy instead of dense and rubbery. Don’t be shy with the whisking.
Step 4: Combine Everything
Add the chopped broccoli and shredded cheese to the egg mixture. Stir gently to combine. If you’re adding other ingredients like bacon or ham, toss those in now. Make sure the broccoli is evenly distributed. I usually do two stirs with a spatula to ensure every muffin cup will have veggies.
Step 5: Fill the Muffin Tin
Divide the mixture evenly among the 12 muffin cups. I usually fill them about ¾ full. This gives them room to rise without overflowing. If you use a small ice cream scoop or a measuring cup, it helps keep them even. I don’t usually measure, but if I’m feeding a crowd, I want them uniform.
Step 6: Bake
Place the tin in the center of the oven. Bake for 18-20 minutes. You’ll know they’re done when the tops are golden brown and the centers are set (not jiggly). If you insert a toothpick and it comes out clean, they’re ready. Don’t overbake them! They continue to cook slightly after you take them out. If you like them a bit runny (like soft-boiled), take them out a minute early, but most people prefer them fully set.
Step 7: Cool and Serve
Let them cool in the pan for 5 minutes. This helps them set completely and makes them easier to remove. After 5 minutes, run a knife around the edges and pop them out. They’re ready to eat warm, or you can let them cool completely for meal prep.
Total Time: About 25 minutes (5 minutes prep, 20 minutes bake)
Expert Tips & Tricks
Here’s everything I’ve learned from making these dozens of times. These tips will save you from my mistakes.
Chop Small — I can’t stress this enough. If your broccoli pieces are big, the muffin cups will fall apart when you eat them. Tiny pieces bind better with the eggs. Think of it like a frittata, but in muffin form.
Don’t Skip the Grease — Eggs love to stick. Even if you have a non-stick pan, grease it. I’ve lost muffin cups to stuck bottoms more times than I care to admit. It’s a sad sight.
Blanch for Bright Green — If you want your muffin cups to look vibrant and green, blanch the broccoli first. Raw broccoli can turn olive green in the oven. Blanching locks in the color and tenderizes it, so it cooks faster.
Cool Completely for Meal Prep — If you’re storing them, let them cool completely before putting them in the fridge. Steam creates condensation, which makes them soggy. I leave them on the counter for 20 minutes, then transfer to an airtight container.
Reheat Gently — When reheating, cover them with a damp paper towel in the microwave. This keeps them moist. If you reheat them uncovered, they dry out fast. 30-45 seconds is usually enough.
Variations & Substitutions
Once you’ve nailed the basic version, here’s how you can mix it up. I’ve tried all of these.
Spinach & Feta — Swap broccoli for fresh spinach (chopped) and feta cheese. Add a pinch of nutmeg. This is my favorite for Easter brunch.
Bacon & Cheddar — Skip the veggies, add ½ cup cooked bacon bits and extra cheddar. These are basically breakfast candy.
Southwestern Style — Add diced jalapeños, corn, black beans, and Pepper Jack cheese. Top with sour cream when serving.
Mushroom & Onion — Sauté diced mushrooms and onions first (to remove moisture), then add to the egg mix. Very savory and earthy.
Vegetarian Protein Boost — Add cooked quinoa or lentils for extra fiber and protein. They hold up well in the muffin cups.
Dairy-Free — Use olive oil instead of cream, and skip the cheese or use a dairy-free alternative. They won’t be as rich, but still tasty.
Serving & Storage
How to Serve: I usually serve these straight out of the oven with a side of fresh fruit. They’re great for breakfast, but I’ve also used them for lunchbox snacks or even appetizers at parties. They’re portable and easy to eat with your hands.
Side Dishes: These pair well with fresh watermelon agua fresca for a light summer breakfast, or a simple green salad if you’re having them for lunch.
Storage Instructions:
- Refrigerator: Store in an airtight container for up to 5 days. They stay moist if sealed well.
- Freezer: These freeze beautifully! Let them cool completely, then freeze in a single layer on a baking sheet. Once frozen, transfer to a freezer bag. They keep for up to 3 months. Thaw in the fridge overnight or reheat from frozen in the microwave.
- Reheating: Microwave for 30-45 seconds. For best texture, cover with a damp paper towel. Oven reheating at 350°F for 5-7 minutes works too if you want them crispy on the outside.
Pro Tip: If you’re meal-prepping, label your container with the date. Eggs don’t last forever, even in the fridge. I usually make a batch every Sunday and eat them throughout the week.
Nutrition Information
I’m not a nutritionist, but here’s the breakdown if you’re tracking. This is per muffin cup (based on 12 servings).
| Nutrient | Amount per Cup |
|---|---|
| Calories | 85 |
| Protein | 7g |
| Carbs | 1g |
| Fat | 6g |
| Saturated Fat | 2g |
| Cholesterol | 115mg |
| Sodium | 140mg |
| Fiber | 0.5g |
What’s Good: High in protein, low in carbs, and packed with vitamins from the broccoli. Great for keeping you full until lunch.
What to Know: Higher in cholesterol due to the eggs, but dietary cholesterol doesn’t affect everyone the same way. If you’re watching sodium, reduce the salt in the recipe.
My Take: This is a healthy, balanced breakfast option. It’s not a diet food, but it’s nutrient-dense and satisfying. I love that I can eat two of these and feel like I’ve had a real meal without the sugar crash from cereal or toast.
Final Thoughts
So that’s my go-to Cheesy Broccoli Egg Muffin Cups! I’ve probably talked your ear off at this point, but when you make a recipe this often, you have a lot to say about it. These muffin cups have saved me more mornings than I can count. They’re my answer to “what’s for breakfast” when I’m tired, don’t want to cook, and still want something nutritious.
Make it yours! Try different veggies, swap the cheese, or add some spice. The best recipes are the ones you adapt to your family’s tastes. If you make these, drop a comment and let me know what you think! I love hearing how recipes turn out in your kitchen. And if something doesn’t work, tell me that too—I’m here to help troubleshoot.
Happy cooking! And I hope your kitchen smells half as good as mine does right now.
Frequently Asked Questions
Can I use frozen broccoli?
Yes, but you need to thaw and squeeze out the water first. Frozen broccoli releases a lot of moisture, which can make the muffin cups soggy. I usually thaw it in the microwave, then wrap it in a paper towel and squeeze hard to remove as much liquid as possible. If you skip this step, your muffin cups might not set properly.
Why did my egg muffins turn out rubbery?
Overbaking is usually the culprit. Eggs continue to cook after you take them out of the oven. If the centers are still slightly jiggly when you remove them, they’re done. Also, make sure you’re whisking the eggs well to incorporate air. Dense, unwhisked eggs turn out rubbery. And don’t skip the cream—it adds moisture and richness.
Can I make these ahead for a party?
Absolutely. I make these for brunch parties all the time. You can bake them up to 2 days ahead and reheat them before serving. They hold up well at room temperature for a few hours, but I usually warm them up in the oven (350°F for 10 minutes) before serving to keep them fresh-tasting.
How do I store leftover egg muffins?
Let them cool completely, then store in an airtight container in the fridge for up to 5 days. For longer storage, freeze them in a single layer, then transfer to a freezer bag. They keep for up to 3 months. Reheat in the microwave for 30-45 seconds.
Can I use other vegetables?
Yes! Bell peppers, onions, mushrooms, spinach, and zucchini all work. Just make sure to chop them finely and remove excess moisture. Zucchini, in particular, needs to be squeezed dry like broccoli. Tomatoes can be tricky because they’re so watery—I usually roast them first or use very small amounts.
Are these gluten-free?
Yes, naturally. There’s no flour or gluten-containing ingredients. They’re perfect for gluten-free diets. Just make sure your cheese and any add-ins (like bacon) are certified gluten-free if you have celiac disease.
Pin This Recipe!


Cheesy Broccoli Egg Muffin Cups: 5-Minute Healthy Breakfast
- Total Time: 25 minutes
- Yield: 12 servings 1x
Description
Fluffy, savory egg muffin cups packed with chopped broccoli and sharp cheddar cheese. These gluten-free, protein-packed breakfast bites are perfect for meal prep and ready in under 25 minutes.
Ingredients
- 10 large eggs
- ¼ cup heavy cream or whole milk
- 1 teaspoon kosher salt
- ½ teaspoon black pepper
- 1 cup broccoli florets, finely chopped
- ½ cup sharp cheddar cheese, shredded
- ½ teaspoon garlic powder
- Cooking spray or butter for greasing
Instructions
- Preheat oven to 350°F (175°C) and generously grease a 12-cup muffin tin.
- Wash and pat dry broccoli florets, removing tough stems. Chop into very small pieces (rice-sized) using a food processor or knife.
- In a large bowl, crack eggs and add heavy cream, salt, pepper, and garlic powder. Whisk vigorously for 30 seconds to incorporate air.
- Add the chopped broccoli and shredded cheese to the egg mixture. Stir gently to combine evenly.
- Divide the mixture evenly among the 12 muffin cups, filling them about ¾ full.
- Bake for 18-20 minutes until tops are golden brown and centers are set (not jiggly).
- Let cool in the pan for 5 minutes before removing with a knife.
- Serve warm or store for later.
Notes
Chop broccoli very finely to ensure even cooking and binding. If broccoli is old, blanch it for 30 seconds then plunge into ice water to keep it bright green. For meal prep, let muffins cool completely before storing to prevent sogginess. Reheat in microwave with a damp paper towel for 30-45 seconds.
- Prep Time: 5 minutes
- Cook Time: 20 minutes
- Category: Breakfast
- Cuisine: American
Nutrition
- Serving Size: 1 muffin cup
- Calories: 85
- Sodium: 140
- Fat: 6
- Saturated Fat: 2
- Carbohydrates: 1
- Fiber: 0.5
- Protein: 7
Keywords: egg muffins, broccoli breakfast, gluten-free breakfast, meal prep, healthy breakfast, cheesy eggs, quick breakfast


