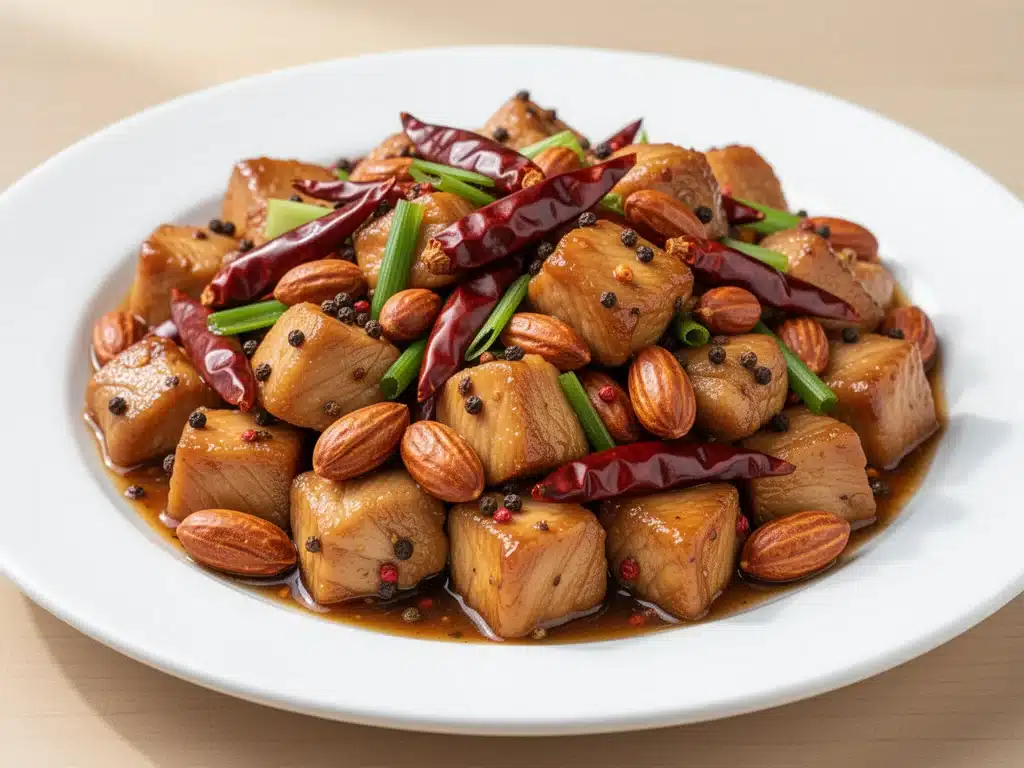
I still remember the first time I tried Kung Pao chicken. I was in my early twenties, sitting in a dimly lit booth at a local Chinese restaurant, and I ordered what I thought was a safe bet. When the dish arrived, it wasn’t just chicken and peanuts. It was this vibrant, glossy explosion of flavors—sweet, savory, tangy, and with a serious kick of heat that made my eyes water in the best possible way. The chicken was tender, the peanuts were crunchy, and the sauce clung to every single bite.
For the next six months, that restaurant became my go-to Friday night treat. I’d order the same dish every time, convinced that recreating it at home was impossible. Who has time for a wok? Who knows how to balance that specific sweet-sour-spicy profile without tasting like a chemistry experiment? I ordered takeout so many times that my credit card company probably flagged me.
Then, last year, I had a revelation. I was scrolling through food videos late at night, frustrated by the idea of spending $25 on a portion of food that would last me two days. I decided to try making it myself. I was skeptical, obviously. But I also remembered that the secret to restaurant-style dishes is rarely complicated techniques—it’s usually just the sauce ratio and high heat.
That first attempt was… let’s call it “edible.” The chicken was a bit dry, and the sauce was too thin. But the flavor? It was there. I tweaked the sauce the next week. I changed the cut of the chicken. I learned how to properly toast the peanuts. And on my fifth or sixth try, I made a batch that actually made my husband stop mid-bite and ask, “Wait, you made this? This tastes better than the place downtown.”
That was the moment I knew I never had to order takeout again. This Restaurant-Style Kung Pao Chicken recipe is now a staple in our house. It’s faster than waiting for a delivery driver, it’s healthier because we control the oil and sugar, and it tastes incredible. I’ve tested this recipe more times than I care to admit, tweaking the cornstarch slurry and the vinegar balance until it was perfect. And I’m sharing it with you because you deserve to eat better than takeout, without the stress.
Why You’ll Love This Homemade Kung Pao Chicken
There are plenty of chicken recipes out there, but this one is special. It’s not just another stir-fry. It’s that specific balance of flavors that makes you crave it weeks later. Here’s why this version has completely changed our weeknight dinners:
- It’s Faster Than Delivery — Seriously. From chopping to plating, this takes about 30 minutes. That’s less time than it takes to wait for a driver to show up at your door. I make this on Tuesdays when I’m tired and don’t want to think about cooking. It just works.
- The Sauce is Perfectly Balanced — Most homemade versions are too sweet or too vinegary. I’ve nailed the ratio of soy sauce, rice vinegar, sugar, and chili oil. It’s that sticky, glossy coating that makes restaurant food so addictive. You’ll notice the difference immediately.
- It’s Customizable Heat — Some people love it fiery; others prefer mild. With this recipe, you control the spice. I use Sichuan peppercorns for that numbing sensation, but you can skip them if you’re sensitive. I usually add extra chili flakes for my husband, who loves the burn.
- It Uses Simple Ingredients — You probably have most of this in your pantry. Soy sauce, vinegar, sugar, garlic, ginger, and peanuts. If you have a chicken breast and a wok (or a big skillet), you’re good to go. It’s pantry-friendly and budget-smart, too.
- Leftovers Taste Even Better — I know, I know, stir-fry is best fresh. But this actually reheats well. I make extra on Sunday and pack it for lunch on Monday. The flavors meld together overnight, and it’s still delicious. Just add a splash of water when reheating to loosen the sauce.
This is my go-to when I need dinner to just work. No complicated techniques, no weird ingredients, just reliable, delicious food that makes everyone happy. It’s the kind of meal that feels like a treat but doesn’t feel like a chore.
Ingredients You’ll Need for Restaurant-Style Kung Pao Chicken
Here’s the best part: you probably have most of these ingredients already. The key to this recipe is the sauce, and the ingredients for that are basic pantry staples. I’m particular about a few things here, and I’ll tell you exactly why they matter.
For the Chicken
Chicken Breast (1.5 pounds / 680g) — I use boneless, skinless chicken breast. It’s lean and absorbs the marinade well. You can use thigh meat if you prefer it juicier, but breast gives that classic restaurant texture. Cut it into 1-inch cubes. Uniform size ensures even cooking.
Light Soy Sauce (1 tablespoon) — For the marinade. It adds saltiness without being too dark. I use Kikkoman or a similar brand. Don’t use table salt; it won’t taste the same.
Shaoxing Wine (1 tablespoon) — This is Chinese cooking wine. It removes the “gamey” smell from the chicken and adds depth. If you can’t find it, dry sherry works as a substitute. I keep a bottle in my cabinet specifically for this.
Cornstarch (1 teaspoon) — This is the secret to velvety chicken. It coats the meat and keeps it tender during the high-heat stir-fry. Don’t skip this step.
Egg White (1 large) — Optional, but it helps the cornstarch adhere and keeps the chicken silky. I usually skip it when I’m in a rush, but I notice the texture is better with it.
For the Sauce
Rice Vinegar (2 tablespoons) — Unseasoned rice vinegar is key. It’s mild and sweet. Do not use distilled white vinegar; it’s too harsh. I use Marukan or a similar brand.
Dark Soy Sauce (1 tablespoon) — This adds color and a slightly molasses-like sweetness. It’s not essential, but it gives that deep brown restaurant look. If you don’t have it, use extra light soy sauce, but the color will be lighter.
Chinkiang Vinegar (1 teaspoon) — Also known as black vinegar. This is the soul of Kung Pao sauce. It’s complex, tangy, and slightly smoky. If you can’t find it, use extra rice vinegar and a dash of balsamic for depth, but Chinkiang is best.
Sugar (1 tablespoon) — Granulated white sugar balances the acidity of the vinegar. I use a heaping tablespoon. Adjust to taste if you prefer less sweet.
Chicken Broth (2 tablespoons) — Adds volume and savory flavor without making it too salty. Low-sodium is best so you can control the salt level.
Cornstarch (1 teaspoon) — Mixed with the broth to create a slurry. This thickens the sauce so it clings to the chicken instead of pooling at the bottom of the bowl.
For the Stir-Fry
Vegetable Oil (3 tablespoons) — For high-heat cooking. Canola or peanut oil works well. Avocado oil is also good. Don’t use olive oil; it smokes too easily.
Dried Red Chilies (10-15 pieces) — This is where the heat comes from. Use Chinese dried red chilies if you can find them. They have a smoky heat. If not, standard red pepper flakes work, but you’ll need more. I start with 10 and add more if I want it spicier.
Sichuan Peppercorns (1 teaspoon) — Optional but recommended. They provide that signature numbing sensation (ma la). Toast them lightly in the pan before adding oil for maximum flavor. If you’re sensitive to them, skip them, but you’ll miss out on the authentic experience.
Ginger (1 tablespoon, minced) — Fresh ginger is non-negotiable. It adds warmth and brightness. Pre-minced ginger from a jar doesn’t have the same punch.
Garlic (4 cloves, minced) — Yes, four cloves. Garlic is a major flavor component here. Don’t skimp. Fresh only.
Green Onions (4 stalks, chopped) — Both the white and green parts. I use the whites for cooking and the greens for garnish. They add a fresh, oniony bite.
Roasted Peanuts (½ cup) — Unsalted, roasted peanuts. I buy them from the bulk bin at the grocery store. They add crunch and richness. You can use cashews if you prefer, but peanuts are traditional.
Sichuan Chili Oil (1 tablespoon) — Optional, but it adds a layer of chili flavor and red color. I use Lao Gan Ma brand. It’s delicious and shelf-stable.
Equipment Needed
You don’t need fancy equipment for this. Here’s what I actually use.
Wok — I have a carbon steel wok. It heats evenly and has that nice curved shape for tossing. If you don’t have one, a large skillet or Dutch oven works fine. Just make sure it’s big enough to hold all the ingredients without crowding.
Sharp Knife — For cutting the chicken into uniform cubes. A dull knife will crush the chicken instead of cutting it cleanly. I use my Japanese chef’s knife.
Cutting Board — Any size works. I use a large plastic board for easy cleanup.
Mixing Bowls — One small bowl for the chicken marinade and one for the sauce. I keep them ready before I start cooking so I’m not scrambling.
Wooden Spoon or Spatula — For stirring. Silicone works too. Don’t use metal on non-stick surfaces.
Measuring Spoons — Pretty standard stuff. Dollar store versions work fine.
How to Make It: Step-by-Step
Alright, let’s make this! I’m walking you through exactly how I do it, including the little tricks I’ve picked up.
Step 1: Marinate the Chicken (10 minutes)
In a medium bowl, combine the cubed chicken, light soy sauce, Shaoxing wine, cornstarch, and egg white (if using). Toss until the chicken is evenly coated. Let it sit for at least 10 minutes. This is crucial. The cornstarch and egg white create a protective layer that keeps the chicken tender. If you’re short on time, 5 minutes works, but 10 is better.
Step 2: Make the Sauce
In a small bowl, whisk together the rice vinegar, dark soy sauce, Chinkiang vinegar, sugar, chicken broth, and cornstarch slurry. Stir until the sugar and cornstarch are fully dissolved. Set aside. The sauce should look slightly thick and glossy. If it’s too thick, add a teaspoon of water.
Step 3: Prep the Aromatics
While the chicken marinates, mince your ginger and garlic. Chop your green onions. Measure out your dried chilies and Sichuan peppercorns. Having everything ready before you start cooking is key for stir-fry. Once you heat the pan, things move fast.
Step 4: Sear the Chicken
Heat a wok or large skillet over high heat. Add 2 tablespoons of vegetable oil. When the oil is shimmering but not smoking, add the chicken in a single layer. Don’t crowd the pan. If you have a small skillet, cook in batches. Sear for 2-3 minutes on each side until golden brown and cooked through. Remove the chicken from the pan and set aside on a plate. Don’t worry if it’s not fully cooked; it will finish later.
Step 5: Bloom the Spices
Reduce the heat to medium. Add the remaining 1 tablespoon of oil. Add the dried red chilies and Sichuan peppercorns. Stir-fry for 30 seconds until fragrant. Be careful not to burn them. If they start to smoke too much, add the ginger and garlic immediately to stop the cooking. The goal is to infuse the oil with their flavors.
Step 6: Stir-Fry the Vegetables
Add the white parts of the green onions to the pan. Stir-fry for 1 minute until softened. Add the chicken back to the pan. Toss everything together for 30 seconds to heat the chicken through.
Step 7: Add the Sauce
Give the sauce mixture a quick stir (the cornstarch settles) and pour it into the pan. Stir constantly. The sauce will thicken rapidly, within 30-60 seconds, coating the chicken in a glossy, sticky glaze. If it’s too thick, add a splash of water. If it’s too thin, let it cook for another minute.
Step 8: Finish and Serve
Remove the pan from heat. Stir in the roasted peanuts and the green onion greens. Toss to combine. Taste and adjust seasoning if needed. Add a splash of Sichuan chili oil if you want extra heat and color. Serve immediately over steamed jasmine rice.
Total Time: About 30 minutes (10 minutes prep, 20 minutes cooking)
Expert Tips & Tricks
Here’s everything I’ve learned from making this dozens of times. These tips will save you from my mistakes.
High Heat is Key — Stir-frying requires high heat. If your pan isn’t hot enough, the chicken will steam instead of sear. Preheat your wok or skillet until it’s almost smoking. This creates that “wok hei” or breath of the wok flavor.
Don’t Crowd the Pan — If you put too much chicken in at once, the temperature drops, and the chicken releases moisture. It steams instead of frying. Cook in batches if necessary. It’s worth the extra time.
Toast Your Peanuts — If you buy raw peanuts, toast them in a dry pan for 5-7 minutes until golden and fragrant. Store-bought roasted peanuts are fine, but toasting them again adds extra crunch.
Use Chinkiang Vinegar — I can’t stress this enough. Regular rice vinegar is too one-dimensional. Chinkiang (black) vinegar adds a complex, smoky tang that defines Kung Pao sauce. It’s worth buying a bottle.
Velveting the Chicken — The cornstarch and egg white marinade is called “velveting.” It’s a Chinese technique that keeps meat tender. Don’t skip it. It makes a huge difference in texture.
Common Mistakes (and how to avoid them):
- Sauce is too watery — You didn’t let it simmer long enough, or you didn’t use enough cornstarch. Let it cook for an extra minute.
- Chicken is dry — You overcooked it. Remove it from the pan when it’s almost done, and add it back at the end just to heat through.
- Too spicy — You used too many chilies. Start with 5-7 and add more to taste. Remember, you can always add heat, but you can’t take it away.
Variations & Substitutions
Once you’ve nailed the basic version, here’s how you can mix it up. I’ve tried all of these.
Shrimp Kung Pao — Replace chicken with peeled and deveined shrimp. Cook them for 2 minutes on each side. They cook faster, so add them at the end.
Vegetarian Version — Use tofu instead of chicken. Press the tofu first, cut into cubes, and pan-fry until crispy. Add extra vegetables like bell peppers, broccoli, and carrots.
Cashew Kung Pao — Swap peanuts for cashews. It’s slightly sweeter and richer. My kids prefer this version.
Mild Version — Skip the Sichuan peppercorns and reduce the dried chilies to 3-4. Add a little extra sugar to balance the vinegar.
Gluten-Free — Use tamari instead of soy sauce, and ensure your chili oil is gluten-free. Everything else is naturally gluten-free.
Dairy-Free — This recipe is naturally dairy-free. Just check your chili oil for any dairy additives.
Serving & Storage
How to Serve: I usually serve this straight from the skillet. It looks rustic and stays warm. Pair it with steamed jasmine rice. The rice soaks up the sauce beautifully. I also like to serve it with a simple cucumber salad or steamed bok choy to balance the richness.
Storage: Store leftovers in an airtight container in the fridge for up to 3 days. The sauce will thicken in the fridge—totally normal.
Reheating: Best method: Add to a skillet with a splash of water or broth over medium heat. Stir until heated through and creamy again. Microwave method: Heat in 30-second intervals, stirring between. Add a splash of water if it’s too thick. Never works: Trying to reheat it dry. It will get sticky and rubbery.
Freezing: I don’t recommend freezing this. The texture of the chicken and peanuts changes. Make it fresh or store in the fridge.
Nutrition Information
I’m not a nutritionist, but here’s the breakdown if you’re tracking. This is per serving (based on 4 servings).
- Calories: 380
- Protein: 28g
- Carbs: 22g
- Fiber: 2g
- Sugar: 8g
- Fat: 18g
- Sodium: 650mg
What’s good: High protein, moderate carbs. What to know: Higher in sodium due to soy sauce. Use low-sodium soy sauce to reduce. It’s a balanced meal when served with rice.
Final Thoughts
So that’s my Restaurant-Style Kung Pao Chicken! I’ve probably talked your ear off at this point, but when you make a recipe this often, you have a lot to say about it. This has saved weeknight dinners more times than I can count. It’s my answer to “what’s for dinner” when I’m tired, don’t want takeout, and still want something that tastes really good. My kids are happy, my husband’s happy, and I’m happy because I’m not stressed about cooking.
Make it yours! Try different add-ins, swap in your favorite vegetables, adjust the garlic (though more is always better in my opinion). The best recipes are the ones you adapt to your family’s tastes. If you make this, drop a comment and let me know what you think! I love hearing how recipes turn out in your kitchen. And if something doesn’t work, tell me that too—I’m here to help troubleshoot. Happy cooking! And I hope your kitchen smells half as good as mine does right now.
Frequently Asked Questions
Can I use chicken thighs instead of breast?
Absolutely! Chicken thighs are juicier and more flavorful. Just cut them into 1-inch cubes and marinate them the same way. They take slightly longer to cook, so keep an eye on them. I prefer thighs for the texture, but breast is leaner.
What if I don’t have Chinkiang vinegar?
You can substitute with rice vinegar, but add a teaspoon of balsamic vinegar for color and depth. It won’t be exactly the same, but it will work. Chinkiang is ideal, but rice vinegar + balsamic is a good backup.
Why did my sauce get too thick?
You probably used too much cornstarch, or you let it cook too long. The sauce thickens quickly. If it’s too thick, add a splash of water or broth and stir. If it’s too thin, let it cook for another minute.
Can I make this ahead of time?
Yes, but I recommend making the sauce and marinating the chicken ahead. Cook it fresh when you’re ready to eat. Stir-fry is best made fresh. The chicken can get rubbery if reheated.
Is Kung Pao chicken spicy?
It can be! The heat comes from the dried red chilies and Sichuan peppercorns. You control the amount. Start with 5-7 chilies and add more to taste. If you’re sensitive to spice, skip the peppercorns and use fewer chilies.
Can I freeze leftovers?
I don’t recommend it. The peanuts lose their crunch, and the sauce can separate. It’s best eaten fresh or stored in the fridge for up to 3 days.
Pin This Recipe!
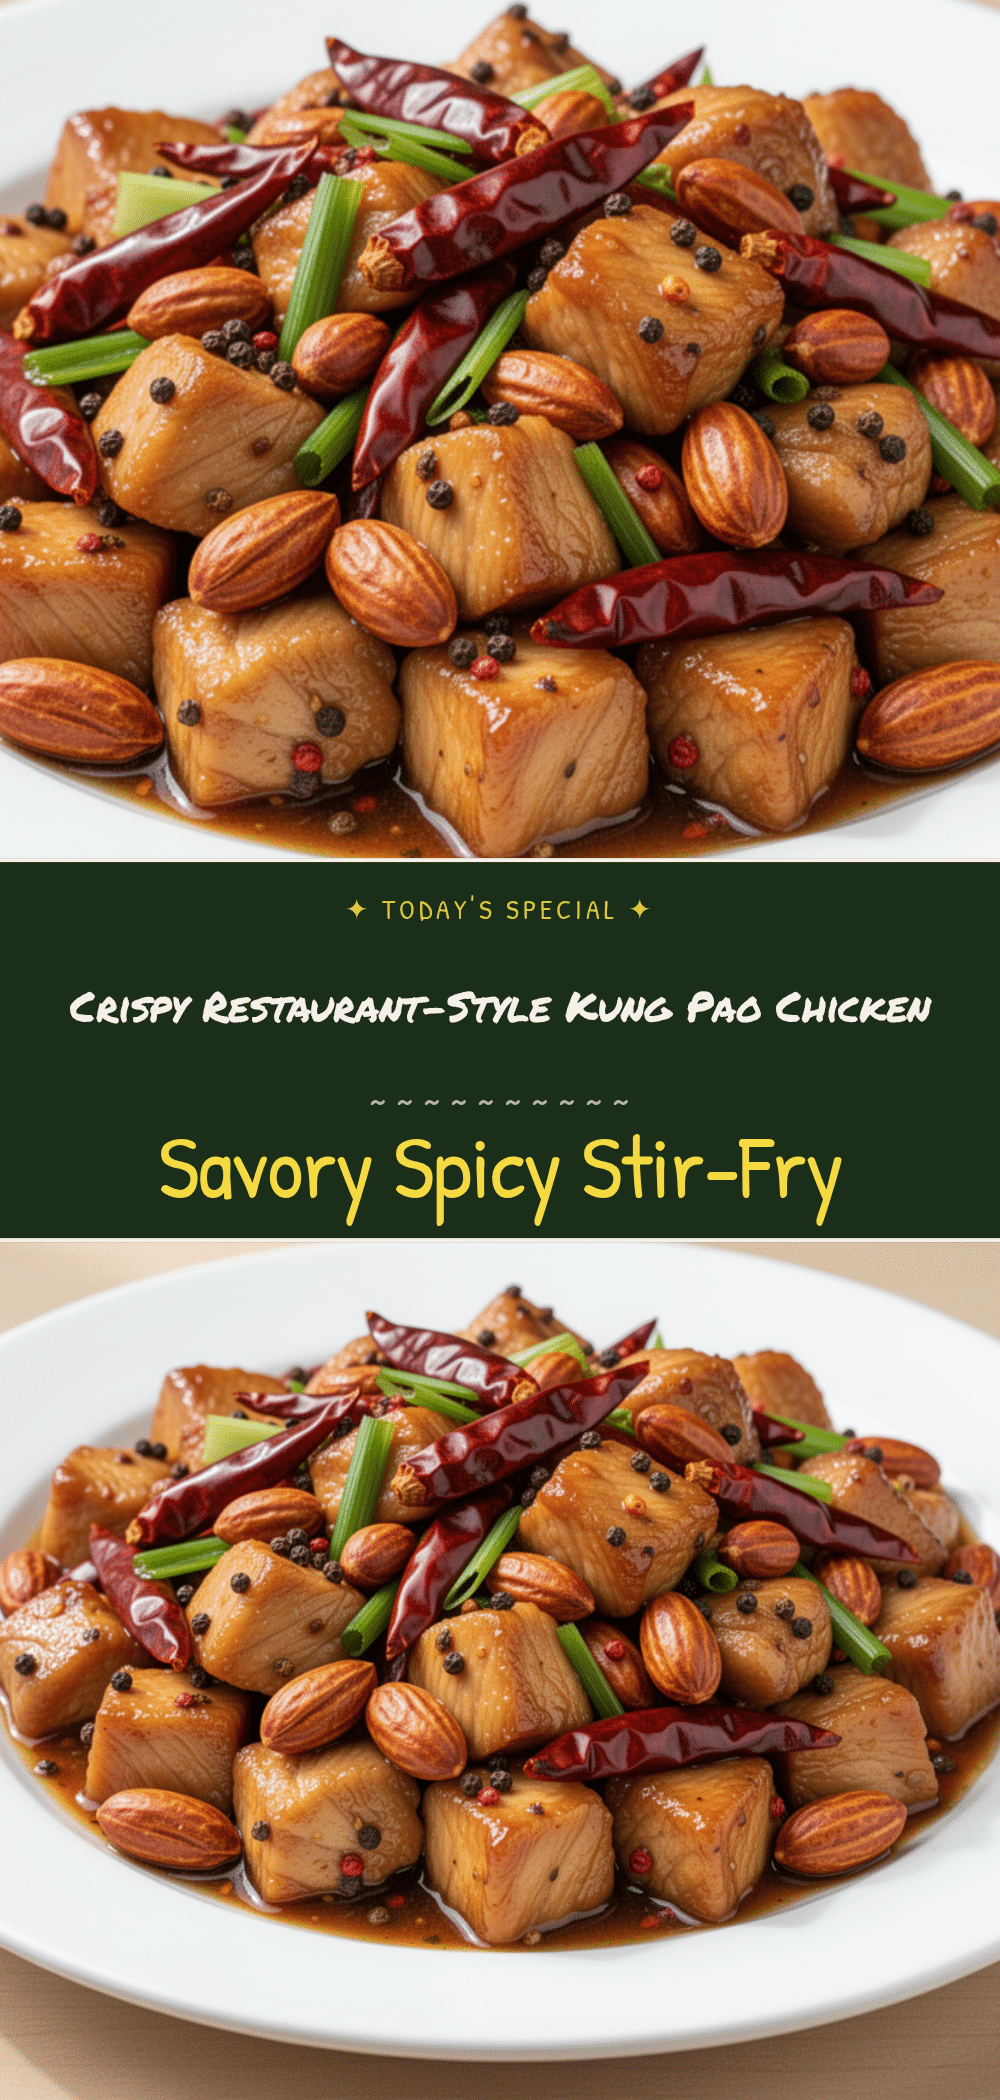
Restaurant-Style Kung Pao Chicken: Easy Homemade Recipe
- Total Time: 30 minutes
- Yield: 4 servings 1x
Description
A homemade version of classic Kung Pao Chicken that balances sweet, savory, tangy, and spicy flavors. This recipe uses velveting techniques for tender chicken and a perfectly balanced sauce, ready in about 30 minutes.
Ingredients
- 1.5 pounds boneless, skinless chicken breast, cut into 1-inch cubes
- 1 tablespoon light soy sauce
- 1 tablespoon Shaoxing wine (or dry sherry)
- 1 teaspoon cornstarch (for marinade)
- 1 large egg white (optional)
- 2 tablespoons rice vinegar (unseasoned)
- 1 tablespoon dark soy sauce
- 1 teaspoon Chinkiang vinegar (black vinegar)
- 1 tablespoon granulated white sugar
- 2 tablespoons chicken broth (low-sodium)
- 1 teaspoon cornstarch (for sauce slurry)
- 3 tablespoons vegetable oil (divided)
- 10–15 dried red chilies
- 1 teaspoon Sichuan peppercorns
- 1 tablespoon fresh ginger, minced
- 4 cloves garlic, minced
- 4 stalks green onions, chopped (whites and greens separated)
- ½ cup roasted unsalted peanuts
- 1 tablespoon Sichuan chili oil (optional)
Instructions
- In a medium bowl, combine chicken cubes, light soy sauce, Shaoxing wine, 1 teaspoon cornstarch, and egg white. Toss to coat and let marinate for at least 10 minutes.
- In a small bowl, whisk together rice vinegar, dark soy sauce, Chinkiang vinegar, sugar, chicken broth, and 1 teaspoon cornstarch until dissolved. Set aside.
- Mince ginger and garlic, chop green onions, and measure out dried chilies and Sichuan peppercorns.
- Heat a wok or large skillet over high heat. Add 2 tablespoons vegetable oil. When shimmering, add chicken in a single layer (cook in batches if necessary). Sear for 2-3 minutes per side until golden brown. Remove chicken and set aside.
- Reduce heat to medium. Add remaining 1 tablespoon oil. Add dried red chilies and Sichuan peppercorns. Stir-fry for 30 seconds until fragrant. Add ginger and garlic immediately if they start to smoke.
- Add the white parts of the green onions to the pan. Stir-fry for 1 minute until softened. Add the cooked chicken back to the pan and toss for 30 seconds.
- Stir the sauce mixture and pour it into the pan. Stir constantly for 30-60 seconds until the sauce thickens and coats the chicken. Add a splash of water if too thick.
- Remove from heat. Stir in roasted peanuts and green onion greens. Taste and adjust seasoning. Serve immediately over steamed jasmine rice.
Notes
High heat is essential for stir-frying to achieve ‘wok hei’. Do not crowd the pan to ensure the chicken sears rather than steams. Chinkiang vinegar provides the authentic tangy flavor; if unavailable, substitute with rice vinegar and a dash of balsamic. The sauce thickens quickly, so watch it closely. Leftovers can be stored in the fridge for up to 3 days; reheat with a splash of water or broth to restore consistency.
- Prep Time: 10 minutes
- Cook Time: 20 minutes
- Category: Main Course
- Cuisine: Chinese
Nutrition
- Serving Size: 1 serving (approx. 1
- Calories: 380
- Sugar: 8
- Sodium: 650
- Fat: 18
- Saturated Fat: 3
- Carbohydrates: 22
- Fiber: 2
- Protein: 28
Keywords: Kung Pao Chicken, Chinese Stir Fry, Homemade Takeout, Spicy Chicken, Velveting Chicken, Wok Cooking, Weeknight Dinner


