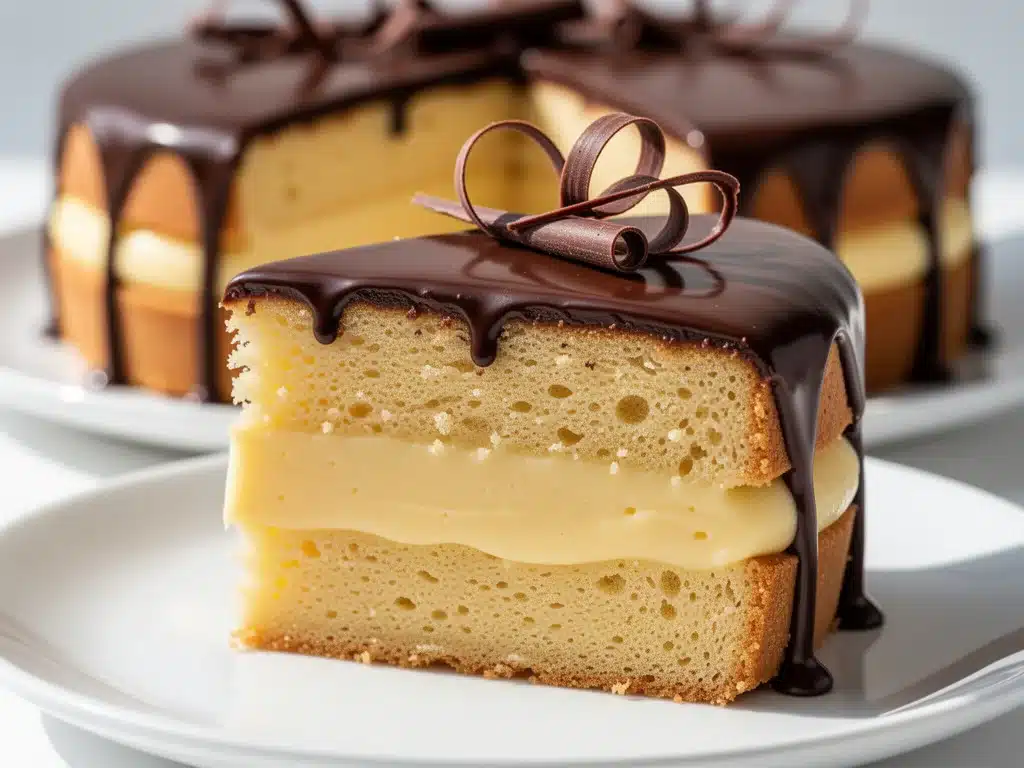
I have to be honest with you. I didn’t set out to make the best Boston cream pie in the world. I was actually trying to save a disaster.
Last year, for my daughter’s graduation party, I decided to tackle a two-layer cake with a custard filling and chocolate glaze. I had watched three YouTube tutorials, bought fancy piping bags, and felt pretty confident. Then, about twenty minutes before guests were supposed to arrive, I realized I’d forgotten one tiny detail: I hadn’t let the cake layers cool completely before filling them. The warm sponge collapsed into the custard like a wet sponge. It looked like a sad, soggy mess.
I stared at it. I stared at the clock. I stared at the chocolate ganache I had just finished making. And then I did what any stressed-out mom would do: I grabbed a serrated knife, sliced the collapsed cake horizontally to make four thin layers, slathered them with the custard, poured the ganache over the top, and prayed.
When my daughter cut into it, she took one bite and said, “This is better than the bakery version.”
Turns out, slicing the cake into thinner layers with more custard in between created a texture that was somehow more tender and more flavorful than the traditional thick layers. I’ve tested the “accident” method against the traditional method about fifteen times since then. And you know what? The traditional method with properly cooled layers is actually superior for structure, but the secret to a truly unforgettable Classic Homemade Boston Cream Pie isn’t the shape. It’s the custard.
Most people think Boston cream pie is just a sponge cake with chocolate on top. But the magic is in that vanilla pastry cream. It’s rich, silky, and completely different from whipped cream or buttercream. Making it from scratch feels intimidating, but I promise you, once you master this technique, you’ll never buy a pre-made filling again. It’s the kind of dessert that makes people stop mid-bite and look at you with pure admiration. It’s impressive, it’s nostalgic, and it’s surprisingly approachable if you know the tricks.
This recipe has become my go-to for special occasions—birthdays, anniversaries, or just because you want to feel fancy on a Tuesday. It’s a showstopper that tastes like it came from a high-end French patisserie, but it’s made in my kitchen with ingredients I can find at any local grocery store.
Why You’ll Love This Recipe
There are a dozen reasons I keep coming back to this cake, but let’s be real: it’s about that moment when you slice into it and everything holds together perfectly. Here’s why this version wins every time.
The Custard Is Actually Creamy — I’ve tried recipes that use cornstarch alone, and they can get gummy. This recipe uses a blend of cornstarch and egg yolks for the perfect balance: rich enough to coat the back of a spoon, but light enough that it doesn’t feel heavy in your stomach. It’s silky smooth, not grainy.
It’s Better Than Store-Bought — You know those frozen cakes from the grocery store? They’re fine in a pinch, but they taste like artificial vanilla and dry sponge. This homemade version smells like real vanilla beans and butter. The difference is night and day. Once you taste the fresh custard, you’ll never go back.
It Looks Impressive But Isn’t Rocket Science — I know, I know. “Pastry cream” sounds scary. But it’s basically just cooking milk, sugar, eggs, and cornstarch. You whisk, you wait, you chill. The hardest part is patience. The cake layers are simple yellow cake, and the glaze is just chocolate and cream. You can absolutely do this.
It Feeds a Crowd — This makes two 8-inch layers. That’s enough for 12-16 generous slices. Perfect for a dinner party or a family gathering. Plus, it travels well if you have to bring it to someone’s house (just keep it chilled).
Make-Ahead Friendly — This is my favorite part. You can make the custard two days ahead. You can bake the cake a day ahead. You can even assemble it the night before. The flavors meld together overnight, making the cake even moister and the custard even more flavorful. It’s the ultimate stress-free dessert for a busy host.
So basically, this is the dessert that says, “I care about you enough to spend a few hours in the kitchen,” without actually requiring you to be a professional baker. It’s reliable, delicious, and always gets a second slice.
Ingredients You’ll Need
Before we get to the mixing bowls, let’s talk about what goes in. I’m particular about a few of these because they make a huge difference in the final texture and flavor. Don’t skip the details!
For the Vanilla Pastry Cream
Whole milk (2 cups / 480ml) — Use full-fat milk. Skim milk won’t give you that rich, creamy texture. I buy the gallon jugs because I use it for everything.
Vanilla bean (1 pod, scraped) — Or 2 teaspoons of high-quality vanilla extract. If you can find a vanilla bean, scrape the seeds into the milk. Those little black specks look gorgeous in the cream and add a deeper flavor. If you use extract, stir it in at the end, off the heat, so the alcohol evaporates.
Granulated sugar (½ cup / 100g) — Just standard white sugar. It sweetens the cream without making it cloying.
Egg yolks (4 large / about 70g) — We’re using just the yolks for richness and color. Save the whites for an omelet or meringue! I always keep a few extra yolks in the fridge for baking emergencies.
Cornstarch (3 tablespoons / 24g) — This is the thickener. It’s what turns liquid milk into thick, spreadable cream. Make sure it’s fresh; old cornstarch loses its thickening power.
Unsalted butter (2 tablespoons / 30g) — Added at the very end, off the heat. This gives the custard a glossy shine and a silky mouthfeel. It’s the secret weapon.
Salt (¼ teaspoon) — Just a pinch. It balances the sweetness and makes the vanilla flavor pop.
For the Yellow Cake Layers
All-purpose flour (2 cups / 250g) — Spoon it into the cup and level it off. Don’t scoop directly from the bag, or you’ll pack in too much flour and get a dry cake.
Baking powder (2 teaspoons) — Check the date on your can. Old baking powder means flat cakes. I replace mine every six months.
Salt (½ teaspoon) — For flavor balance.
Unsalted butter (½ cup / 115g, softened) — Room temperature butter creams better with sugar, creating air pockets that make the cake light. If it’s too cold, your cake will be dense.
Granulated sugar (1 cup / 200g) — Standard white sugar.
Eggs (2 large, room temperature) — Again, room temp is key. Cold eggs can cause the batter to curdle when mixed with butter.
Whole milk (½ cup / 120ml, room temp) — Adds moisture and tenderness.
Vanilla extract (1 teaspoon) — For that classic vanilla cake flavor.
For the Chocolate Ganache Glaze
Semi-sweet chocolate chips (1 cup / 170g) — I use Ghirardelli or Hershey’s. Avoid “baking bars” that are chopped up, as they can have inconsistent melt rates. Chips are reliable.
Heavy cream (½ cup / 120ml) — Full-fat only. Half-and-half won’t be rich enough to create a smooth glaze.
Butter (1 teaspoon) — Optional, but adds a nice sheen to the glaze.
Pinch of salt — Enhances the chocolate flavor.
Equipment Needed
You don’t need a fancy kitchen to make this. Here’s what I actually use and why.
Medium saucepan — For heating the milk. I use a 3-quart saucepan with a heavy bottom so the milk doesn’t scorch on the bottom. Stainless steel is great for this.
Whisk — A good quality balloon whisk is essential. You need to whisk vigorously to incorporate air and prevent lumps in the custard. A spoon just won’t do the job.
Heatproof spatula — For stirring the custard as it thickens. Silicone is best because it won’t scratch your pan.
Two 8-inch round cake pans — Grease and flour them, or line the bottoms with parchment paper. I always use parchment for the bottom; it guarantees the cake doesn’t stick. I love the Wilton pans—they’re durable and bake evenly.
Mixer — A hand mixer or stand mixer works. I use a hand mixer because it’s easier to clean, but a stand mixer is great if you’re making other things too.
Piping bag (optional) — For spreading the custard evenly. If you don’t have one, a ziplock bag with the corner cut off works perfectly.
Cooling rack — Essential for cooling the cake layers. Never put a hot cake on a plate; it’ll steam and get soggy.
Small saucepan — For heating the cream for the ganache.
How to Make It: Step-by-Step
Alright, let’s make this! I’m walking you through exactly how I do it, including the little tricks I’ve picked up over the years. This might seem like a lot of steps, but it’s mostly waiting time. You’re not doing much active work.
Step 1: Make the Pastry Cream (30 minutes + chilling time)
Start with the custard because it needs time to chill. In your medium saucepan, combine the milk and vanilla bean (or extract). Heat over medium heat until it just starts to simmer—small bubbles around the edges. Don’t let it boil over. If using a vanilla bean, add the scraped seeds and the pod. Remove from heat and let the vanilla infuse for 10 minutes. This step is crucial for flavor. If you skip it, your cream will taste flat.
While the milk heats, whisk the egg yolks, sugar, and salt in a medium bowl until pale and thick, about 2 minutes. Whisk in the cornstarch until completely smooth. No lumps allowed!
Slowly pour about half of the hot milk into the egg mixture while whisking constantly. This is called “tempering,” and it prevents the eggs from scrambling. Once mixed, pour the egg mixture back into the saucepan with the rest of the milk.
Return to medium heat and whisk constantly. This is the part where you can’t walk away. The mixture will start to thicken after about 2-3 minutes. Keep whisking until it comes to a gentle boil and thickens to a pudding-like consistency. It should coat the back of a spoon heavily.
Remove from heat. Discard the vanilla pod if you used one. Stir in the butter until melted and smooth. Transfer the cream to a clean bowl. Press plastic wrap directly onto the surface of the cream (this prevents a skin from forming). Chill in the refrigerator for at least 2 hours, or until completely cold. I usually make it the night before.
Step 2: Bake the Cake Layers (20 minutes prep + 25 minutes bake)
Preheat your oven to 350°F (175°C). Grease two 8-inch round cake pans and line the bottoms with parchment paper. Dust with flour, tapping out the excess.
In a medium bowl, whisk together the flour, baking powder, and salt. Set aside.
In a large bowl, beat the softened butter and sugar together on medium-high speed until light and fluffy, about 3-4 minutes. This incorporates air, which makes the cake tender. Scrape down the sides of the bowl.
Add the eggs one at a time, beating well after each addition. Mix in the vanilla extract.
Reduce mixer speed to low. Add the dry ingredients in three parts, alternating with the milk in two parts, beginning and ending with the dry ingredients. Mix just until combined. Do not overmix! Overmixing develops gluten and makes the cake tough. The batter should be smooth and pourable.
Divide the batter evenly between the two pans. Bake for 22-25 minutes, or until a toothpick inserted into the center comes out clean. The cakes should spring back when lightly touched.
Let the cakes cool in the pans for 10 minutes, then turn them out onto a wire rack to cool completely. This is non-negotiable. If you try to fill a warm cake, the custard will melt and slide out. Let them cool for at least 1 hour, preferably 2.
Step 3: Assemble the Boston Cream Pie (15 minutes)
Once the cakes are completely cool, it’s time to assemble. Take one cake layer and place it on your serving plate. If the top is domed, slice it off horizontally with a serrated knife to create a flat surface. I always do this—it makes stacking easier and looks more professional.
Spread the chilled pastry cream evenly over the first cake layer. Use a spatula to create a nice, smooth layer. Don’t be shy with the cream; that’s the star of the show.
Place the second cake layer on top, pressing down gently to secure it. The dome should be facing up. If you sliced the dome off the first layer, you might have a flat top now. If not, you can trim the second layer too, or just embrace the dome.
Step 4: Make and Apply the Ganache (10 minutes)
While the cake is assembling, make the glaze. In a small saucepan, heat the heavy cream over medium heat until it just begins to simmer. Remove from heat.
Pour the hot cream over the chocolate chips in a heatproof bowl. Let it sit for 5 minutes without touching it. This allows the chocolate to melt gently. Then, whisk slowly from the center outwards until smooth and glossy. Stir in the butter and salt.
Pour the warm ganache over the top of the cake, starting from the center and letting it flow down the sides. Use an offset spatula to guide the glaze over the edges. You want a nice, even coat. Don’t worry if it’s not perfect; the rustic look is part of the charm.
Let the glaze set for at least 30 minutes before slicing. This allows it to firm up so you get clean cuts.
Expert Tips & Tricks
Here’s everything I’ve learned from making this dozens of times. These tips will save you from my mistakes.
Temper Your Eggs
I cannot stress this enough. If you pour hot milk directly into eggs, you’ll get egg drop soup. Always add a little hot milk to the eggs first, whisking constantly, before adding the mixture back to the pot. It’s a small step that prevents disaster.
Plastic Wrap on the Surface
When chilling the custard, press plastic wrap directly onto the cream. If you leave it exposed, a skin will form on top. You can whisk it out later, but it’s easier to prevent it. I use a technique where I fold a piece of parchment paper to fit the bowl, then plastic wrap on top. Double protection.
Cool Completely
I know it’s tempting to fill the cake while it’s still warm, but resist! Warm cake + cold custard = sliding disaster. The cake needs to be room temperature. I usually bake the cake in the morning and assemble it in the evening.
Don’t Overmix the Batter
Once you add the flour, mix only until you don’t see streaks of white flour. Overmixing makes the cake dense and chewy instead of light and fluffy. It’s a delicate balance.
Warm the Knife for Clean Slices
When you’re ready to serve, dip your knife in hot water and dry it before each cut. This gives you smooth, clean slices without squishing the layers. It’s a little trick from professional bakers that makes a huge difference in presentation.
Save the Leftover Crumbs
If you trim the domes off the cake, don’t throw them away! Crumble them up and sprinkle them on top of the ganache for extra texture and decoration. It looks fancy and reduces waste.
Variations & Substitutions
Once you’ve nailed the basic version, here’s how you can mix it up. I’ve tried all of these.
Coffee Boston Cream Pie
Add 1 tablespoon of instant espresso powder to the milk when heating it. The coffee flavor complements the chocolate and vanilla beautifully. It’s like a mocha cake. My husband loves this version.
Lemon Pastry Cream
Swap the vanilla for the zest of two lemons and 2 tablespoons of lemon juice in the custard. It’s brighter and tangier. Great for spring or summer parties.
Chocolate Cake Layers
Replace ¼ cup of flour with ¼ cup of unsweetened cocoa powder in the cake recipe. It makes a chocolate vanilla cake, which is even more decadent. Just make sure the cocoa is unsweetened.
Gluten-Free Option
Use a 1-to-1 gluten-free flour blend for the cake layers. The custard and ganache are naturally gluten-free. I’ve used King Arthur Measure for Measure and it works great. The texture might be slightly denser, but it’s still delicious.
Dairy-Free Version
Use coconut milk in the custard and coconut cream for the ganache. Substitute the butter with coconut oil. It’s richer and heavier, but it works. My lactose-intolerant friend enjoys this version.
Mini Cakes
Divide the batter into six 4-inch round pans or muffin tins. Bake for 15-18 minutes. Make individual custard portions and top with a dollop of ganache. Perfect for party favors.
Serving & Storage
How to Serve
I usually serve this straight from the fridge, but let it sit at room temperature for 15 minutes before slicing. Cold custard is thick and rich, but it’s more enjoyable when it’s slightly softened. Pair it with a cup of hot coffee or tea to cut through the sweetness. I also like to serve it with fresh berries on the side—a few raspberries or strawberries add a nice tart contrast.
Storage Instructions
Refrigerator: Store the cake in an airtight container or cover it loosely with plastic wrap. It will keep for up to 4 days in the fridge. The custard needs to be refrigerated, so don’t leave it out at room temperature for more than 2 hours.
Freezing: You can freeze the unfilled cake layers for up to 2 months. Wrap them tightly in plastic wrap and then in foil. Thaw overnight in the fridge before assembling. The custard and ganache do not freeze well; the texture will change and become grainy. It’s best to make them fresh.
Reheating: Do not reheat this cake. The custard will separate and the chocolate will melt. Serve it cold or at room temperature.
Nutrition Information
I’m not a nutritionist, but here’s the breakdown if you’re tracking. This is a rich dessert, so portion control is key!
Per Serving (based on 12 slices):
- Calories: 380
- Protein: 5g
- Carbs: 42g
- Fiber: 1g
- Sugar: 28g
- Fat: 20g
- Saturated Fat: 12g
- Cholesterol: 95mg
- Sodium: 180mg
What’s Good: It provides some protein from the eggs and milk. The chocolate has some antioxidants.
What to Know: It’s high in sugar and saturated fat due to the cream, butter, and chocolate. It’s definitely a treat, not a daily snack. But hey, life’s short, right?
Final Thoughts
So that’s my take on the classic Boston cream pie! It’s a labor of love, but it’s worth every minute. There’s something special about making a dessert from scratch that feeds people you care about. It’s not just about the taste; it’s about the effort, the care, and the joy of sharing something you made with your own hands.
This cake has been a staple in my family for years. It’s the dessert I make when I want to say “I love you” without saying it. It’s the reason my daughter still talks about her graduation party. And now, it’s your turn to make it. Don’t be afraid of the custard. Don’t be afraid of the ganache. Just take it one step at a time.
If you make this, I’d love to hear how it turns out! Drop a comment below with your thoughts. Did you add espresso? Did you use fresh vanilla beans? I love hearing your variations. And if you need more inspiration for your next gathering, check out my labor day frozen lemonade icebox pie for a no-bake option, or my fluffy ricotta lemon pancakes for a sweet breakfast treat.
Happy baking! And I hope your kitchen smells as amazing as mine did when I pulled this out of the oven.
Frequently Asked Questions
Can I make the custard ahead of time?
Yes! In fact, I recommend it. The custard can be made up to 2 days in advance. Store it in an airtight container in the fridge. Make sure to press plastic wrap directly onto the surface to prevent a skin. Let it come to room temperature for 15 minutes before using it to fill the cake.
Why did my custard get lumpy?
This usually happens if the heat was too high or if you didn’t whisk constantly. If you see lumps, strain the custard through a fine-mesh sieve before chilling. It will save the texture. Also, make sure your cornstarch is fully dissolved in the egg mixture before adding the hot milk.
Can I use a different type of chocolate for the glaze?
You can! Semi-sweet is standard, but you can use dark chocolate (70% cocoa) for a less sweet, more intense flavor. Or use milk chocolate for a sweeter, creamier glaze. Just make sure the chocolate is high quality. Cheap chocolate chips with lots of additives can result in a grainy glaze.
How do I prevent the cake layers from sinking?
Don’t open the oven door while the cake is baking! The sudden drop in temperature can cause them to collapse. Also, make sure your baking powder is fresh. And don’t overmix the batter, as too much air can cause the structure to fail.
Can I freeze the assembled cake?
I don’t recommend it. The custard will separate and become watery when thawed. The ganache might also lose its shine. It’s best to freeze the unfilled cake layers and assemble the cake fresh.
What if I don’t have an 8-inch pan?
You can use a 9-inch pan, but the layers will be thinner. Adjust the baking time accordingly—they’ll bake faster, so check them at 18 minutes. Or, you can make a single-layer cake and enjoy the extra custard!
Is there a way to make the cake less sweet?
You can reduce the sugar in the cake batter by ¼ cup without affecting the texture too much. For the custard, reducing sugar might affect the thickening process, so it’s better to leave that as is. You can also use a less sweet chocolate for the glaze, like dark chocolate.
Pin This Recipe!
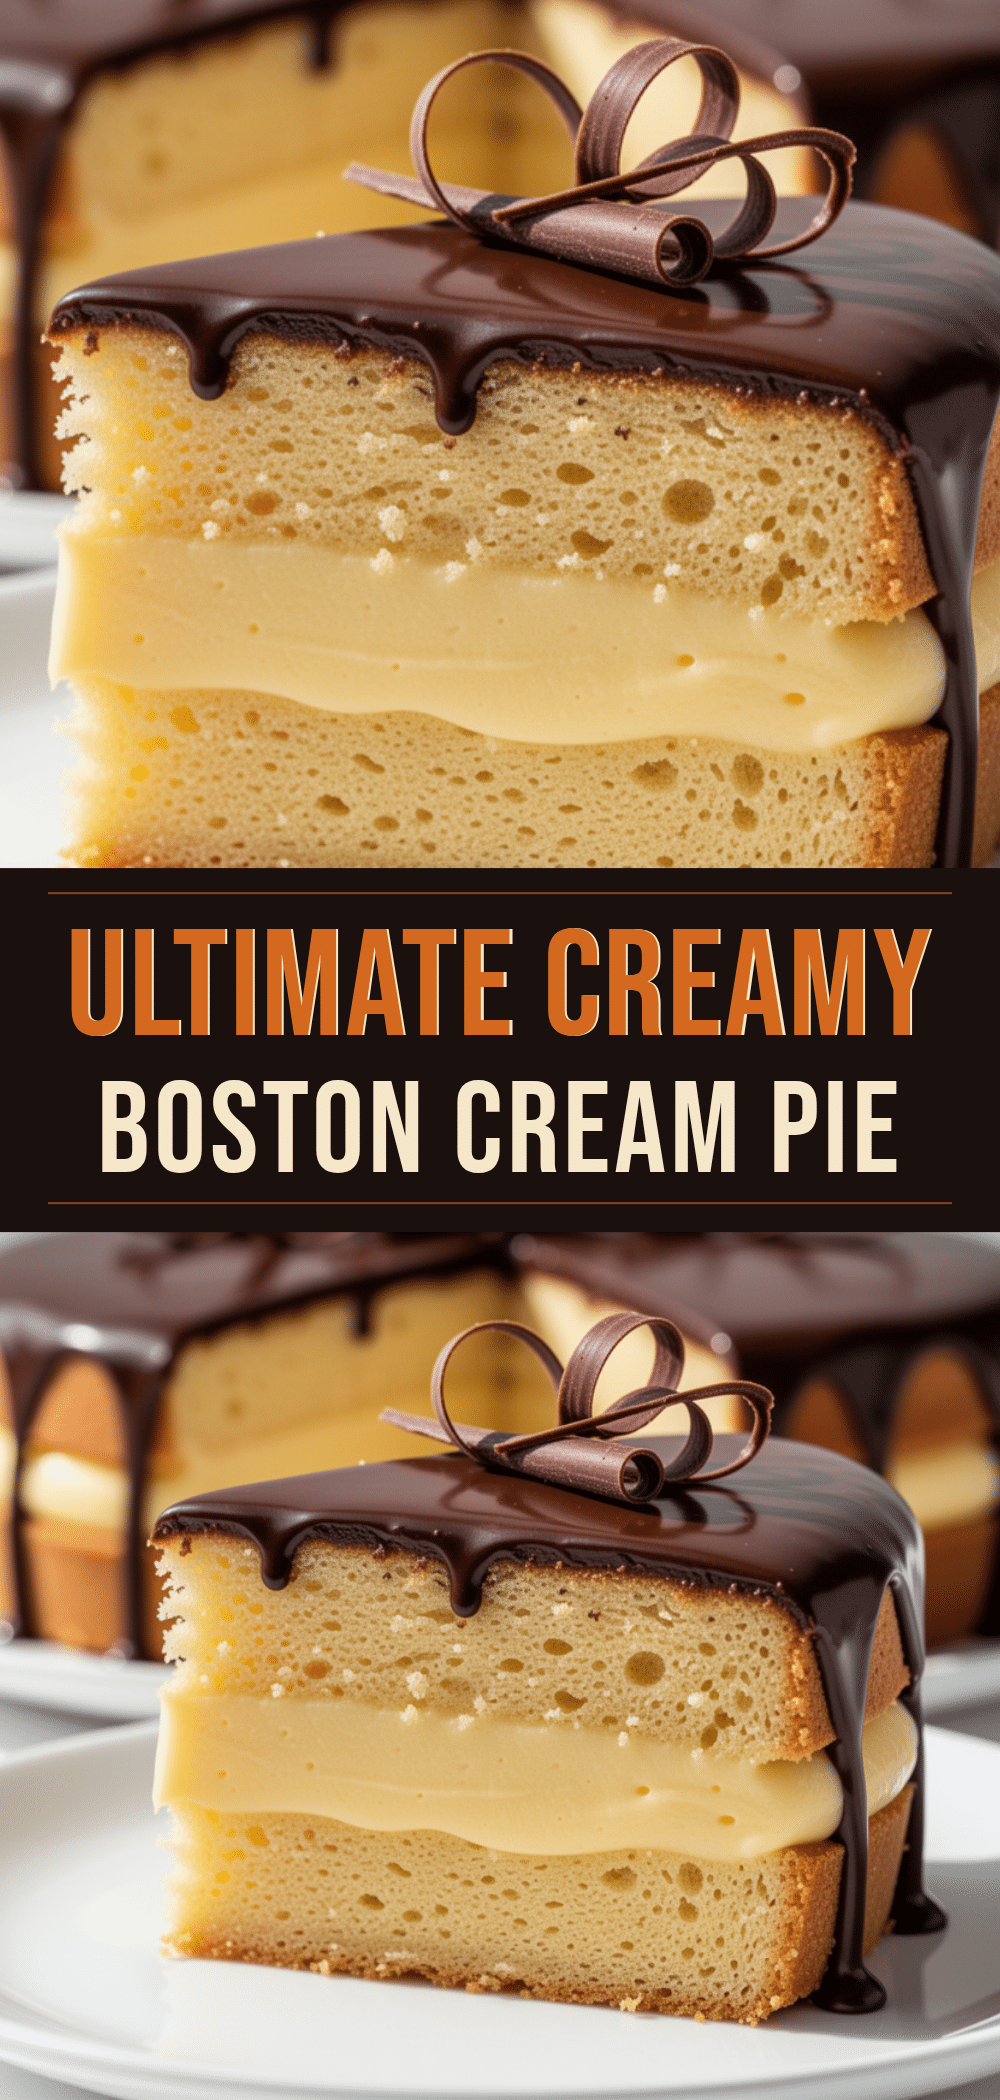
Classic Boston Cream Pie: Easy Homemade Dessert
- Total Time: 1 hour 10 minutes (plus chilling time)
- Yield: 12 servings 1x
Description
A rich, homemade Boston cream pie featuring tender yellow cake layers, silky vanilla pastry cream, and a smooth chocolate ganache glaze. This recipe offers a superior texture and flavor compared to store-bought versions.
Ingredients
- For the Vanilla Pastry Cream:
- 2 cups whole milk
- 1 vanilla bean, scraped (or 2 tsp vanilla extract)
- 1/2 cup granulated sugar
- 4 large egg yolks
- 3 tablespoons cornstarch
- 2 tablespoons unsalted butter
- 1/4 teaspoon salt
- For the Yellow Cake Layers:
- 2 cups all-purpose flour
- 2 teaspoons baking powder
- 1/2 teaspoon salt
- 1/2 cup unsalted butter, softened
- 1 cup granulated sugar
- 2 large eggs, room temperature
- 1/2 cup whole milk, room temperature
- 1 teaspoon vanilla extract
- For the Chocolate Ganache Glaze:
- 1 cup semi-sweet chocolate chips
- 1/2 cup heavy cream
- 1 teaspoon butter (optional)
- Pinch of salt
Instructions
- Make the Pastry Cream: Heat milk and vanilla bean in a saucepan until simmering. Remove from heat and let infuse for 10 minutes.
- Whisk egg yolks, sugar, and salt in a bowl until pale. Whisk in cornstarch until smooth.
- Temper the eggs by slowly whisking in half of the hot milk. Pour the mixture back into the saucepan.
- Cook over medium heat, whisking constantly, until the mixture thickens and comes to a gentle boil. Remove from heat and stir in butter.
- Press plastic wrap directly onto the surface of the cream and chill for at least 2 hours.
- Bake the Cake Layers: Preheat oven to 350°F (175°C). Grease and line two 8-inch round cake pans.
- Whisk flour, baking powder, and salt in a medium bowl.
- Beat butter and sugar until light and fluffy. Add eggs one at a time, then vanilla.
- Mix in dry ingredients and milk alternately until just combined. Divide batter between pans.
- Bake for 22-25 minutes until a toothpick comes out clean. Cool in pans for 10 minutes, then turn out onto a rack to cool completely.
- Assemble: Place one cake layer on a plate. Spread chilled pastry cream evenly over the top. Place second layer on top.
- Make Ganache: Heat heavy cream until simmering. Pour over chocolate chips and let sit for 5 minutes. Whisk until smooth, then stir in butter and salt.
- Pour ganache over the cake, letting it flow down the sides. Let set for at least 30 minutes before slicing.
Notes
Ensure cake layers are completely cool before filling to prevent the custard from melting. Press plastic wrap directly onto the custard surface to prevent a skin from forming. For clean slices, dip a knife in hot water and dry it before cutting.
- Prep Time: 45 minutes
- Cook Time: 25 minutes
- Category: Dessert
- Cuisine: American
Nutrition
- Serving Size: 1 slice
- Calories: 380
- Sugar: 28
- Sodium: 180
- Fat: 20
- Saturated Fat: 12
- Carbohydrates: 42
- Fiber: 1
- Protein: 5
Keywords: Boston cream pie, homemade dessert, vanilla pastry cream, chocolate ganache, yellow cake, baking from scratch


