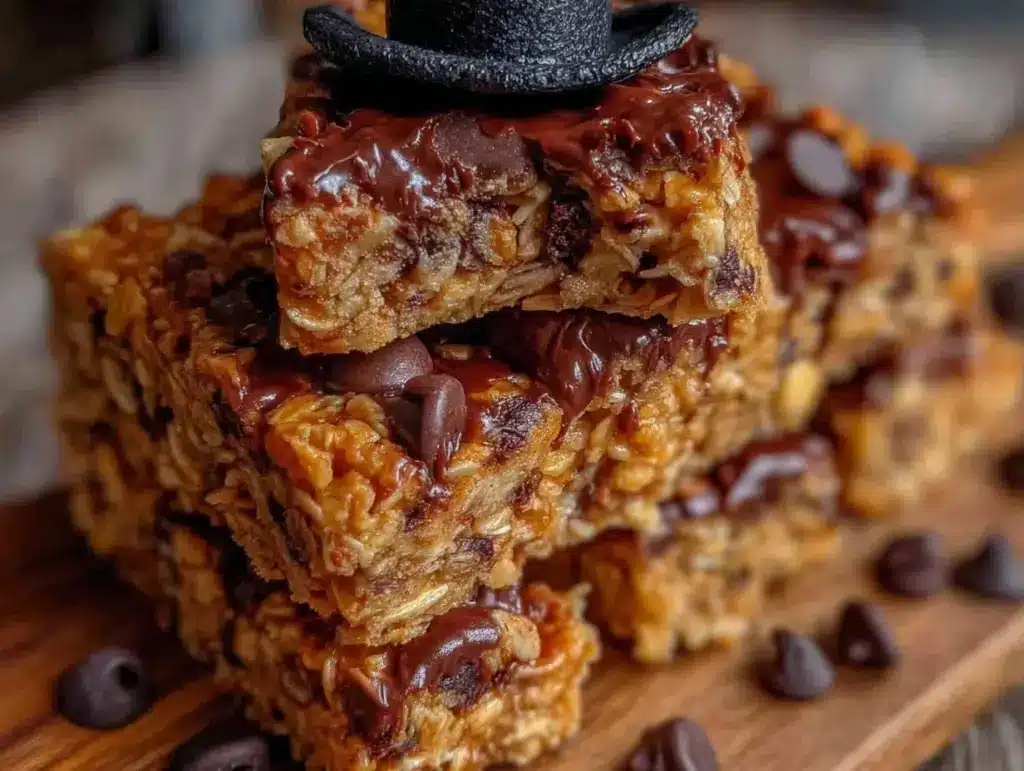
Last Sunday, I was staring at a stack of empty Tupperware containers and a half-eaten bag of stale pretzels. My husband had asked for something “healthy” for his afternoon snack at work, and my brain immediately screamed no. We both knew that “healthy” usually meant dry carrot sticks or some sad rice cake that tasted like cardboard. I needed something that felt like a treat but actually fueled him through his 3 PM slump. I needed something I could make in bulk, portion out, and forget about until Thursday.
That’s when I decided to stop buying those overly sweet, wax-coated granola bars from the gas station and finally tackle my own batch. I’ve made these no-bake chocolate chip granola bars four separate times in the last month alone. Four times. That is how obsessed I am with the efficiency and taste ratio. They are the ultimate “make it once, eat it four times this week” solution. Unlike my small batch buffalo chicken dip which is great for immediate gratification, these bars are built for the long haul. They don’t require an oven, they don’t require precise temperature checks, and they don’t require me to stand over a boiling pot stirring constantly.
I remember my first attempt. I rushed it. I didn’t let the mixture cool enough before pressing it into the pan, and the bars fell apart like sandcastles in a tide. I was frustrated. But I learned quickly that patience is the secret ingredient here. Now, I have a system. I make them on Sunday afternoon while listening to a podcast. By Monday morning, I have four perfectly portioned bars sitting in my fridge, ready to go. They travel well in lunchboxes, they don’t melt in the car glove box (mostly), and they taste like a cookie but act like fuel. If you are trying to get ahead of your week, this is the recipe you need to know.
Why You’ll Love This Meal Prep Staple
Let’s be real. Meal prep isn’t always glamorous. Sometimes it’s just about survival. But these no-bake chocolate chip granola bars for meal prep are the exception. They aren’t just convenient; they are genuinely delicious. Here is why they have earned a permanent spot in my weekly rotation:
- Zero Oven Required — I hate heating up my kitchen in the summer. This recipe uses a stovetop for the binding agent, but no baking time. It’s faster than boiling water for pasta and leaves my kitchen smelling like a bakery without the heat.
- Perfect Portion Control — I cut these into four distinct squares. Each one is a substantial snack, roughly 250 calories, with a good balance of carbs and fat. No more guessing if you ate one bar or three.
- Grab-and-Go Convenience — I wrap each bar in wax paper or parchment. They stack neatly in my container. I can throw one in my bag five minutes before leaving the house. No crumpling, no mess.
- Stays Fresh for Days — Unlike my labor day blueberry peach crisp bars which are best eaten fresh, these bars actually improve after a day in the fridge. The oats soften slightly, and the chocolate chips firm up, giving you that perfect chewy-crisp texture.
- Customizable Sweetness — You control the sugar. I use a little less honey than some recipes call for, and you barely notice. It’s sweet enough to satisfy a craving but not so sweet that you crash an hour later.
This is my go-to when I need a reliable, non-perishable (for about a week) snack that doesn’t require reheating. It’s the backbone of my Wednesday and Thursday afternoons when my willpower is low.
Key Ingredients for the Perfect Bar
You don’t need fancy, hard-to-find ingredients for this. In fact, the beauty of this no-bake chocolate chip granola bars for meal prep is that it uses pantry staples. Here is exactly what you need, with exact measurements so you don’t have to guess.
Old-Fashioned Rolled Oats
(4 cups / 320g) — This is your base. Do not use quick oats or steel-cut oats. Quick oats turn to mush because they have no structure. Steel-cut oats are too hard and won’t bind properly. You need the flat, hearty flakes of old-fashioned oats. They provide that chewy texture that makes these bars satisfying. I buy the store brand; it’s the same quality as the name brands.
Chunky Peanut Butter
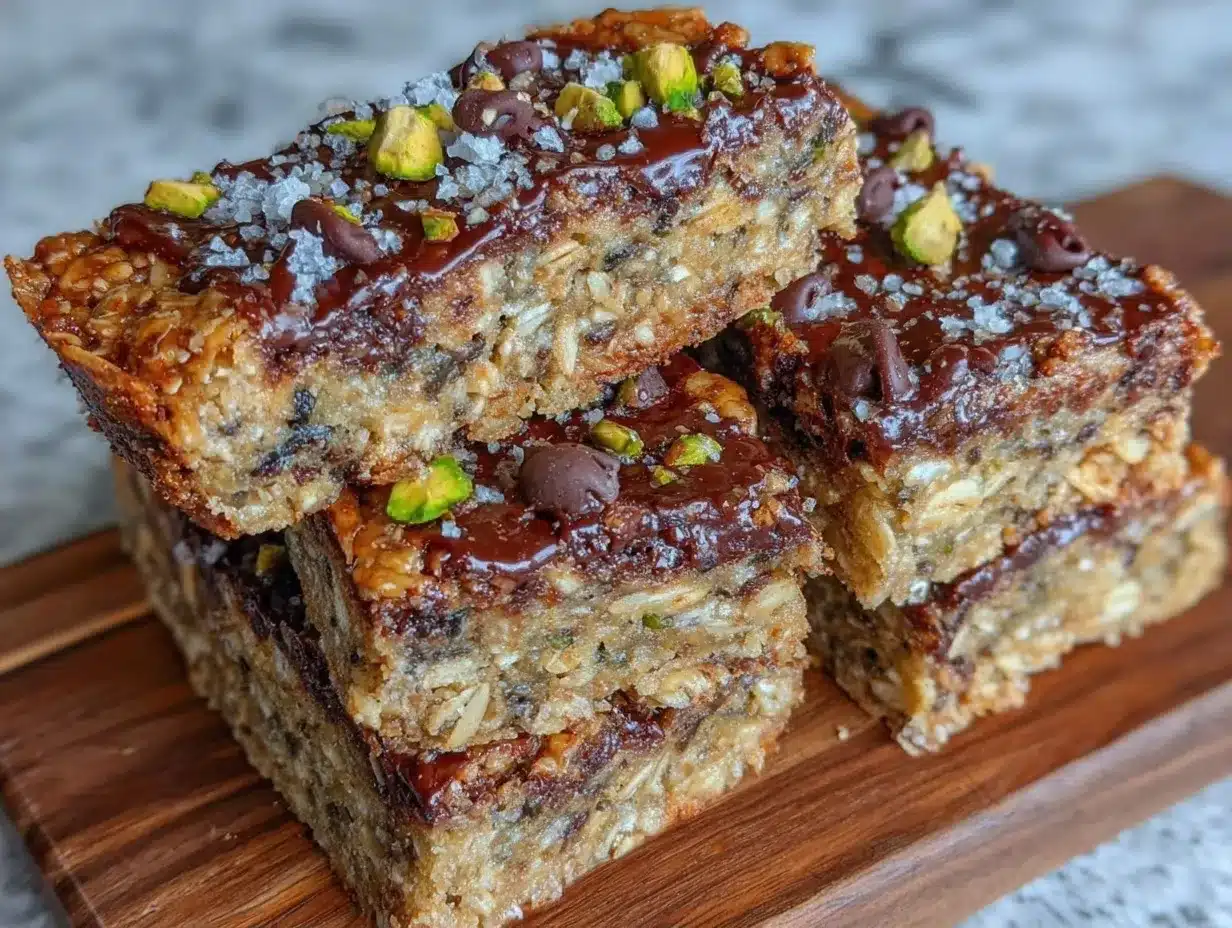
(1 cup / 250g) — Peanut butter is the glue. It holds everything together. I prefer chunky because it adds texture, but smooth works if you prefer a uniform bite. Crucial tip: Use natural peanut butter or regular peanut butter, but not the “no-stir” kind with excessive hydrogenated oils. Those don’t melt smoothly and can leave you with grainy bars. If your natural peanut butter is separated, stir it well before measuring.
Honey
(1/2 cup / 170g) — Honey provides the sticky sweetness and helps the bars set. Maple syrup is a good substitution if you want to keep it vegan, but honey gives a richer flavor that pairs better with chocolate. Be careful not to boil the honey; you just need to warm it until it’s pourable.
Dark Chocolate Chips
(1 cup / 170g) — I use semi-sweet dark chocolate chips. They aren’t too sweet, which balances the oats and peanut butter. Milk chocolate chips work, but they make the bars very sweet. If you want to add more crunch, you can chop up a chocolate bar instead of using chips, but chips distribute more evenly.
Mini Chocolate Chips
(1/2 cup / 85g) — I mix in mini chips because they melt into the background, giving you chocolate in every bite rather than just big chunks. It feels like you’re getting more chocolate without adding too many calories.
Vanilla Extract
(1 tsp / 5ml) — Just a teaspoon. It adds depth. Don’t skip it. It makes the peanut butter taste less like raw nuts and more like a dessert.
Salt
(1/2 tsp / 3g) — A pinch of salt is non-negotiable. It cuts the sweetness and enhances the peanut flavor. If you forget this, the bars will taste flat.
Tools You Actually Need
You don’t need fancy equipment. I keep this simple so you can make it on a busy Sunday.
Large Heavy-Bottomed Pot — I use a 3-quart saucepan. You need something with a thick bottom so the honey and peanut butter don’t scorch. If you use a thin pot, you’ll get hot spots and burnt bits. My old enamel pot works perfectly for this.
9×9 Inch Baking Pan — Standard size. Line it with parchment paper. I leave an overhang on the sides like handles. This is the #1 trick for removing the bars later. Without the overhang, you’re digging them out with a spatula and risking a mess.
Large Mixing Bowl — A bowl big enough to hold 4 cups of oats plus the wet ingredients. I use a 6-quart bowl. If it’s too small, you’ll spill the oats.
Silicone Spatula — For scraping the pot and folding the oats. A rubber spatula works too, but silicone handles heat better.
How to Make No-Bake Chocolate Chip Granola Bars
Here is the step-by-step. Pay attention to the timing on the stove. That’s where most people go wrong.
Step 1: Prep Your Pan (2 minutes)
Line your 9×9 inch baking pan with parchment paper. Leave a 2-inch overhang on two opposite sides. This creates “handles” so you can lift the entire block of bars out later. Lightly spray the parchment with cooking spray. This prevents the sticky peanut butter mixture from sticking to the paper.
Step 2: Combine Dry Ingredients (3 minutes)
In your large mixing bowl, add the 4 cups of old-fashioned oats, 1 cup of chunky peanut butter (if it’s solid, break it up), 1 cup of dark chocolate chips, 1/2 cup of mini chocolate chips, and 1/2 teaspoon of salt. Mix them together with your spatula until the oats are lightly coated in peanut butter. This helps distribute the flavor. Set this bowl aside.
Step 3: Warm the Wet Ingredients (3-4 minutes)
In your saucepan over medium-low heat, combine the 1/2 cup of honey and 1 teaspoon of vanilla extract. Heat this gently, stirring constantly. You want the honey to become fluid and warm, not boiling. This takes about 3-4 minutes. If you boil it, the honey can crystallize or burn. Watch for small bubbles around the edges. Once it’s smooth and pourable, remove it from the heat immediately.
Step 4: Combine Wet and Dry (2 minutes)
Pour the warm honey-vanilla mixture over the oat and peanut butter mixture. Stir vigorously. The heat from the honey will soften the peanut butter. Keep stirring until everything is evenly coated and no dry oats remain. It should look like a sticky, chocolate-speckled mass. This usually takes about 2 minutes of energetic mixing.
Step 5: Press and Chill (30 minutes)
Pour the mixture into your prepared pan. Use your spatula or the back of a greased measuring cup to press it down firmly. This is critical. If you don’t press it down, the bars will crumble. Press until the surface is flat and compact. Place the pan in the refrigerator for at least 30 minutes. Do not skip this step. If you try to cut them warm, they will be a mess.
Step 6: Cut and Store
Once the bars are firm, lift them out of the pan using the parchment handles. Place them on a cutting board. Use a sharp knife to cut into four large squares. For smaller snacks, you can cut them into eight rectangles. Wrap each bar individually in wax paper or plastic wrap. Store in an airtight container in the fridge for up to one week, or freeze for up to three months.
Total Time: 40 minutes active/chill time. Yields: 4 large bars or 8 small bars.
Expert Tips from My Meal Prep Trials
I’ve made this recipe enough times to know where the pitfalls are. Here is how to avoid them.
The Pressing Matters
The biggest mistake I see is loose bars. When you press the mixture into the pan, use the bottom of a glass or a flat measuring cup. Apply serious pressure. You want the density of a brick, not a cloud. If it’s too loose, the chocolate chips will fall out when you bite into them.
Temperature Control
When warming the honey, keep the heat low. Honey burns easily. If it smells like burnt sugar, start over. Burnt honey ruins the entire batch. It’s better to take 5 extra minutes on low heat than to waste ingredients.
Chocolate Chip Choice
Use high-quality chocolate chips. Cheap chips often contain wax that doesn’t melt properly, leaving you with hard, waxy chunks. I like Ghirardelli or Nestle Toll House. The quality of the chocolate shines through because there are few other ingredients.
Storage Reality Check
These bars do not freeze well if you leave them unwrapped. They will absorb freezer odors and the chocolate will bloom (turn white). Always wrap individually before freezing. Thaw them in the fridge overnight before eating. Eating a frozen granola bar is like eating a rock.
Recipe Variations
Once you’ve nailed the basic version, here is how to mix it up for different weeks.
Almond Butter Swap
Replace the peanut butter with almond butter. It’s slightly drier, so you might need an extra tablespoon of honey. It tastes more sophisticated and less like a Reese’s Cup.
Seed-Loaded
Add 1/4 cup of chia seeds or flax seeds to the dry mix. This boosts the fiber and omega-3s. Great if you’re looking for extra health benefits without changing the taste much.
Coconut Lime
Add 1/2 cup of shredded coconut and swap the vanilla for 1/2 teaspoon of lime zest. It’s a tropical twist that feels lighter. I pair this with my outdoor watermelon feta skewers for a summer picnic vibe.
Vegan Option
Use maple syrup instead of honey and ensure your chocolate chips are dairy-free. The texture is nearly identical. The maple flavor is stronger, so it pairs well with the peanut butter.
Protein Boost
Stir in 1 scoop of vanilla protein powder into the dry mix. Note: This will absorb moisture, so you may need to add an extra tablespoon of honey or peanut butter to get the right consistency.
Serving & Storage
Serving: These are best eaten straight from the fridge. The cold chocolate chips snap nicely. I serve them with a glass of cold milk or a black coffee. They pair well with my fluffy ricotta lemon pancakes if you’re making a big weekend breakfast, though they are too dense for a light morning meal.
Storage: In the fridge, they last 7 days in an airtight container. In the freezer, they last 3 months. I recommend freezing in batches of four. When you’re ready to eat, move four bars to the fridge the night before.
Meal Prep Tip: Label your container with the date. These look identical, so you don’t want to guess which batch is which. I write “Batch 1: Oct 12” on a piece of tape.
Nutrition Information
I’m not a nutritionist, but here’s the breakdown per large bar (1/4 of the recipe).
| Nutrient | Amount |
|---|---|
| Calories | ~380 |
| Protein | 12g |
| Carbs | 45g |
| Fiber | 5g |
| Fat | 18g |
| Sugar | 22g |
My Take: These are calorie-dense. They are not a “light” snack. But they are nutrient-dense too. The oats provide sustained energy, the peanut butter has healthy fats and protein, and the chocolate gives you a mood boost. It’s a balanced snack if you watch the portion size. One bar is plenty.
Final Thoughts
These no-bake chocolate chip granola bars for meal prep have saved my sanity. They are simple, reliable, and delicious. I love that I can make them on Sunday and not think about snacks until Thursday. They are perfect for busy weeknights, school lunches, or office desks. Give them a try. If you make them, drop a comment! I love hearing how they turn out in your kitchen. Happy cooking!
FAQs
Can I substitute honey with agave nectar?
Yes, but agave is thinner than honey. You might need to chill the bars for an extra 15 minutes to ensure they set firmly. The flavor will be milder, so add an extra teaspoon of vanilla to compensate.
Why did my bars fall apart?
This usually happens for two reasons: you didn’t press them down firmly enough, or you didn’t let them chill long enough. The peanut butter needs to solidify to act as the glue. If you cut them warm, they will crumble. Give them a full 30 minutes in the fridge.
Can I make these gluten-free?
Yes, as long as you use certified gluten-free oats. Regular oats are often cross-contaminated with wheat. Most other ingredients like honey and chocolate chips are naturally gluten-free, but always check the labels.
How do I prevent the chocolate chips from sinking?
In baked bars, chips sink. In no-bake bars, they usually stay put because the mixture isn’t liquid. However, if your peanut butter is very runny, the chips might settle. To prevent this, ensure your peanut butter is at room temperature but not melted, and press the bars down quickly after mixing.
Can I double this recipe?
Yes, but you’ll need a larger pot and a 9×13 inch pan. The cooking time for the honey will be similar, but the chilling time might need to be extended by 10 minutes if the pan is thicker. I don’t recommend tripling it in one go; it gets too messy to mix evenly.
Pin This Recipe!
No-Bake Chocolate Chip Granola Bars: 4-Portion Meal Prep
- Total Time: 40 minutes
- Yield: 4 servings 1x
Description
These no-bake chocolate chip granola bars are the ultimate meal prep solution for busy weeks. Made with pantry staples like oats, peanut butter, and honey, they require no oven and provide a delicious, fueling snack that stays fresh for days.
Ingredients
- 4 cups old-fashioned rolled oats
- 1 cup chunky peanut butter
- 1/2 cup honey
- 1 cup semi-sweet dark chocolate chips
- 1/2 cup mini chocolate chips
- 1 tsp vanilla extract
- 1/2 tsp salt
Instructions
- Line a 9×9 inch baking pan with parchment paper, leaving a 2-inch overhang on two opposite sides to use as handles. Lightly spray with cooking spray.
- In a large mixing bowl, combine the oats, peanut butter, dark chocolate chips, mini chocolate chips, and salt. Mix until oats are lightly coated.
- In a large heavy-bottomed saucepan over medium-low heat, combine honey and vanilla extract. Warm gently, stirring constantly, until fluid and pourable (about 3-4 minutes). Do not boil.
- Remove honey mixture from heat and pour over the dry ingredients. Stir vigorously until everything is evenly coated and no dry oats remain.
- Pour mixture into the prepared pan. Press down firmly and evenly using a spatula or greased measuring cup to ensure density.
- Refrigerate for at least 30 minutes until firm.
- Lift bars out of the pan using parchment handles. Cut into 4 large squares or 8 smaller rectangles.
- Wrap individually in wax paper or plastic wrap and store in an airtight container in the fridge for up to one week, or freeze for up to three months.
Notes
Do not use quick oats or steel-cut oats as they will affect the texture. Ensure peanut butter is natural or regular, not ‘no-stir’ varieties with hydrogenated oils. Press the mixture firmly into the pan to prevent crumbling. If using natural peanut butter, stir well before measuring. For vegan option, substitute honey with maple syrup and use dairy-free chocolate chips.
- Prep Time: 10 minutes
- Cook Time: 5 minutes
- Category: Snack
- Cuisine: American
Nutrition
- Serving Size: 1 large bar (1/4 of
- Calories: 380
- Sugar: 22
- Sodium: 150
- Fat: 18
- Saturated Fat: 5
- Carbohydrates: 45
- Fiber: 5
- Protein: 12
Keywords: no-bake granola bars, meal prep snacks, healthy afternoon snack, peanut butter bars, chocolate chip granola, easy meal prep, gluten-free option


