
My aunt Linda has made this scalloped corn recipe for every Thanksgiving since 1985. I’m not joking. I’ve seen her bring it to Christmas, Easter, her daughter’s wedding rehearsal dinner, and even a random Tuesday potluck in the grocery store parking lot when she realized she hadn’t brought anything. It’s always been there. And every single time, it disappears first. Before the turkey. Before the mashed potatoes. Even before the pie.
I used to think it was just another casserole. You know the type: a bowl of yellow mush that sits in the back of the fridge, forgotten until someone digs for it three days later. But then I tasted it. Actually tasted it. Not the version she makes in a hurry, but the version she makes when she’s feeling fancy. Creamy. Sweet. With just the right amount of tang from the sour cream and a hint of buttery richness that coats your tongue like a warm hug.
That was the moment I realized: this isn’t just a side dish. It’s a holiday tradition. A comfort food that bridges generations. And after years of trying to replicate it (and failing miserably twice), I finally cracked the code. This classic creamy scalloped corn recipe isn’t just easy—it’s foolproof. And once you make it, you’ll understand why my aunt Linda has been making it for nearly four decades.
So why am I sharing it with you? Because I want you to have that same “wait, this is better than takeout” moment. Because I want your family to ask for seconds. Because I want you to feel like you’ve joined the club of people who know the secret to the perfect holiday side dish.
This creamy scalloped corn is the answer to “what’s for dinner?” when you’re tired, overwhelmed, and still want something that tastes like it took hours. It’s the kind of dish that makes people pause mid-bite and say, “How did you make this?” And when you tell them it’s just corn, cream, and a little bit of magic, they’ll never believe you.
Why You’ll Love This Creamy Scalloped Corn
I’ve made this creamy scalloped corn for every holiday since I learned how to make it. And I’ve watched it disappear faster than any other dish on the table. Here’s why it’s become my go-to:
It’s Stupid Simple — Seriously. If you can open a can and stir a spoon, you can make this. I’ve walked my teenage niece through it over FaceTime while she was at college. She called me three days later to say her roommate was obsessed.
It’s Lightning Fast — 15 minutes from start to finish, and only 5 of those are active cooking. I make this on weeknights when I get home at 7pm and still want something that feels special. My husband thinks I’m a genius because I pull it off the stove before he even finishes his coffee.
It’s Crowd-Pleaser — I’ve served this to my vegetarian sister, my gluten-free neighbor, and my I-only-eat-chicken dad (with modifications). Everyone loved it. Even my picky 8-year-old nephew, who usually only eats chicken nuggets, asked for “the yellow stuff” again.
Makes Amazing Leftovers — Actually tastes better the next day. I deliberately make extra for lunch throughout the week. The flavors meld together, and it’s like a new dish. I’ve been known to eat it for breakfast. Don’t judge me.
Budget-Smart — Feeds 4-6 people for under $10. That’s less than one meal at a fast-food place. And it tastes like something from a fancy restaurant. My friends think I’m a wizard because I feed them for pennies.
This is my go-to when I need dinner to just work. No complicated techniques, no weird ingredients, just reliable, delicious food that makes everyone happy. And it’s the perfect holiday side dish because it’s always there, always loved, and always disappears.
Ingredients You’ll Need for Creamy Scalloped Corn
Here’s the best part: you probably have most of this already. I’m particular about three ingredients here, and I’ll tell you exactly why.
Whole kernel corn (2 cans, 15.25 oz each / about 860g) — Use whole kernel corn, not creamed corn. The texture matters. I like to drain the liquid but leave a little bit for extra creaminess. If you can’t find canned corn, frozen corn works too—just thaw and drain first.
Eggs (2 large / about 100g) — These are the binder. They hold everything together and give it that rich, custardy texture. Don’t skip them. I’ve tried without eggs once, and it was a disaster. The corn just slid around in the dish like a slippery mess.
Sour cream (1 cup / 240g) — Full-fat only. Low-fat makes it too thin. I use Daisy brand because it’s thick and tangy. If you can’t find Daisy, any full-fat sour cream works. Just don’t use the light stuff—it’ll ruin the texture.
Butter (4 tablespoons / 60g) — Unsalted is best so you can control the salt. I use Kerrygold because it’s rich and flavorful. If you don’t have Kerrygold, any unsalted butter works. Melt it before adding—it makes a huge difference.
Granulated sugar (½ cup / 100g) — This is what makes it sweet. Don’t skip it. I’ve tried with less sugar, and it tastes bland. If you want it less sweet, use ¼ cup. But I recommend the full amount. It’s a holiday dish, not a diet food.
Dry mustard (1 teaspoon / 5g) — This is the secret ingredient. It adds depth and complexity without making it taste like mustard. I use French’s because it’s fine and mixes in easily. If you don’t have dry mustard, use ½ teaspoon of regular mustard. But dry mustard is better.
Salt (½ teaspoon / 3g) — Adjust to taste. If you’re using unsalted butter, you might need a bit more. If you’re using salted butter, reduce it. I taste as I go. Always.
Optional Add-ins:
- Chopped green onions (2 tablespoons / 15g) — Adds color and a fresh bite. I throw these in whenever I have them.
- Crushed crackers (½ cup / 50g) — For a crunchy topping. I use Ritz crackers because they’re buttery and salty. Sprinkle them on top before baking for a crispy crust.
- Shredded cheddar cheese (½ cup / 50g) — For a cheesy twist. I add it in the last 5 minutes of baking so it melts but doesn’t burn.
Personal Tips:
- I always use 9×9 inch baking dish. It’s the perfect size for this recipe. If you use a larger dish, the corn will be too thin. If you use a smaller dish, it’ll overflow. Don’t risk it.
- I buy canned corn in bulk when it’s on sale. I keep 6 cans in my pantry at all times. It’s one of those things I never run out of.
- Sour cream keeps for months in the fridge if wrapped well. I buy the big tub because I use it in so many recipes.
Equipment Needed
You don’t need fancy equipment for this. Here’s what I actually use.
9×9 inch baking dish — I use a glass dish because it heats evenly. Pyrex works great. Ceramic is fine too, but glass is easier to clean. Don’t use metal—it can cause hot spots and burn the bottom.
Large mixing bowl — Any size works. I use a 4-quart bowl because it’s big enough to mix everything without spilling. Plastic is easier to clean than glass.
Whisk — For beating the eggs. Any whisk works. I use a silicone one because it’s flexible and easy to clean. Metal works too, but silicone is less likely to scratch the bowl.
Measuring cups and spoons — Pretty standard stuff. Dollar store versions work fine. Just make sure they’re accurate. I’ve had bad experiences with cheap measuring cups that were off by a teaspoon.
Spatula — For stirring the corn. Silicone works best. It’s flexible and doesn’t scratch the bowl. I use a rubber spatula because it’s cheap and gets the job done.
Oven — Preheated to 350°F (175°C). Any oven works. I use my convection oven because it heats faster, but regular oven is fine. Just make sure it’s preheated before you put the dish in.
Optional but nice:
- Food processor — If you want a smoother texture, pulse the corn in a food processor for 10 seconds. It’s not necessary, but it makes it creamier. I do this when I’m feeling fancy.
- Baking sheet — To catch any spills. I always put my baking dish on a baking sheet in case it overflows. It’s saved me from cleaning the oven multiple times.
How to Make Creamy Scalloped Corn: Step-by-Step

Alright, let’s make this! I’m walking you through exactly how I do it, including the little tricks I’ve picked up.
Step 1: Prep Your Oven and Dish (2 minutes)
Preheat your oven to 350°F (175°C). Grease your 9×9 inch baking dish with butter or cooking spray. I use butter because it adds flavor. If you don’t have butter, use non-stick cooking spray. Don’t skip this step—the corn will stick if you don’t.
Step 2: Mix the Base (5 minutes)
In a large mixing bowl, whisk the eggs until they’re frothy. Add the sour cream, melted butter, sugar, dry mustard, and salt. Whisk until everything is well combined. It should look like a smooth, creamy mixture. If it’s lumpy, keep whisking. I’ve had lumpy mixtures before, and it’s not pretty.
Step 3: Add the Corn (2 minutes)
Drain the canned corn, but leave a little bit of the liquid for extra creaminess. Add the corn to the egg mixture and stir gently. Don’t overmix—you don’t want to break the kernels. I use a spatula because it’s gentle and doesn’t crush the corn. The mixture should look like a thick, creamy soup with corn kernels suspended in it.
Step 4: Bake (30 minutes)
Pour the mixture into the prepared baking dish. Bake in the preheated oven for 30 minutes, or until the center is set and the edges are golden brown. The center should jiggle slightly when you shake the dish. If it’s still liquidy, bake for another 5 minutes. I’ve overbaked it before, and it gets dry. Don’t do that.
Step 5: Cool and Serve (5 minutes)
Remove the dish from the oven and let it cool for 5 minutes. This allows the corn to set and makes it easier to serve. I usually serve it straight from the dish at the dinner table—it looks rustic and stays warm. But here are other ways I’ve enjoyed it:
- With a sprinkle of chopped green onions for color
- With crushed Ritz crackers for crunch
- With shredded cheddar cheese for richness
Total Time: About 40 minutes (5 minutes active, 30 minutes baking, 5 minutes cooling)
Built-in Troubleshooting:
- Corn is too watery: You didn’t drain it enough. Next time, drain it more thoroughly. Or bake it for an extra 5 minutes.
- Corn is too dry: You overbaked it. Next time, check it at 25 minutes. The center should still jiggle slightly.
- Corn didn’t set: You didn’t use enough eggs. Next time, use 3 eggs instead of 2.
Expert Tips & Tricks
Here’s everything I’ve learned from making this dozens of times. These tips will save you from my mistakes.
Drain the Corn, But Not Too Much
This is the #1 tip. Drain the corn, but leave a little bit of the liquid for extra creaminess. I forgot it once and the corn was just okay instead of amazing. Now I set out a colander before I even start cooking so I don’t forget.
Don’t Skimp on Sugar
Your corn should taste sweet. Undersweetened corn tastes bland no matter how good the other ingredients are. I use ½ cup sugar per 2 cans of corn. If you want it less sweet, use ¼ cup. But I recommend the full amount.
Use Full-Fat Sour Cream
Low-fat sour cream makes the corn too thin. I use Daisy brand because it’s thick and tangy. If you can’t find Daisy, any full-fat sour cream works. Just don’t use the light stuff—it’ll ruin the texture.
Don’t Overmix the Corn
Overmixing breaks the kernels and makes the corn mushy. I use a spatula because it’s gentle and doesn’t crush the corn. Stir gently until everything is combined.
Check Early
Check the corn at 25 minutes. If the center is still liquidy, bake for another 5 minutes. I’ve overbaked it before, and it gets dry. Don’t do that.
Common Mistakes (and how to avoid them):
- Mistake: Corn is too watery
Fix: Drain the corn more thoroughly. Or bake it for an extra 5 minutes. - Mistake: Corn is too dry
Fix: You overbaked it. Next time, check it at 25 minutes. - Mistake: Corn didn’t set
Fix: You didn’t use enough eggs. Next time, use 3 eggs instead of 2.
Pro Tricks I’ve Learned:
- For Restaurant-Quality Finish
Add a tablespoon of cold butter at the very end and swirl it in. Makes the corn glossy and rich. - For Extra Flavor
Toast the dry mustard in the butter for 30 seconds before adding the corn. Releases more flavor. - For Better Texture
Stir the corn gently with a spatula. Prevents breaking the kernels. - Make-Ahead Strategy
Make the mixture ahead and store in the fridge for up to 2 days. Bake when ready. Takes 30 minutes and tastes way better than fully reheated corn.
Variations & Substitutions
Once you’ve nailed the basic version, here’s how you can mix it up. I’ve tried all of these.
Cheesy Scalloped Corn
Add ½ cup shredded cheddar cheese in the last 5 minutes of baking. My husband prefers this version—makes it more filling.
Spicy Scalloped Corn
Add 1 teaspoon of cayenne pepper or red pepper flakes. Totally different vibe—spicy and smoky. I add this when I want a kick.
Lighter Version
Use low-fat sour cream and reduce sugar to ¼ cup. It’s thinner but still good. I make this when I’m trying to be “healthy.”
Vegan Version
Replace eggs with ¼ cup flaxseed meal mixed with ¾ cup water. Replace sour cream with coconut cream. It’s different but still tasty. My vegan friend requests this version.
Gluten-Free
Everything else is naturally gluten-free. Just make sure your corn is certified gluten-free if you’re celiac.
Dietary Modifications:
- Gluten-Free: Use gluten-free corn. Everything else is naturally gluten-free.
- Dairy-Free: Replace sour cream with coconut cream and butter with coconut oil. It’s different but still tasty.
- Lower-Carb: Use cauliflower rice instead of corn. Reduce sugar to 2 tablespoons. I won’t lie—it’s not the same, but it works if you’re watching carbs.
Serving & Storage
How to Serve:
I usually serve this straight from the skillet at the dinner table—it looks rustic and stays warm. But here are other ways I’ve enjoyed it:
- With a sprinkle of chopped green onions for color
- With crushed Ritz crackers for crunch
- With shredded cheddar cheese for richness
Side Dishes:
- Roasted turkey
- Mashed potatoes
- Green bean casserole
- Stuffing
Toppings Bar:
When I have guests, I put out: chopped green onions, crushed Ritz crackers, shredded cheddar cheese, crispy bacon bits. Everyone customizes their bowl.
Wine Pairing:
Not a wine expert, but my wine-snob friend says Pinot Grigio or Chardonnay works great with this.
Storage Instructions:
Refrigerator:
Store in an airtight container for up to 4 days. The corn will thicken in the fridge—totally normal.
Reheating:
Best method: Add to a skillet with a splash of milk or cream over low heat. Stir until heated through and creamy again. Microwave method: Heat in 30-second intervals, stirring between. Add a splash of milk if it’s too thick. Never works: Trying to reheat in the pot you cooked it in. It always burns on the bottom. Ask me how I know.
Freezing:
Honestly, this doesn’t freeze well because of the dairy. The corn separates when thawed. Make it fresh or store in the fridge for up to 4 days.
Meal Prep:
Make the mixture on Sunday, store in the fridge. Bake when ready. Takes 30 minutes and tastes way better than fully reheated corn.
Nutrition Information
I’m not a nutritionist, but here’s the breakdown if you’re tracking.
Per Serving (based on 6 servings):
- Calories: 220
- Protein: 6g
- Carbs: 28g
- Fiber: 2g
- Sugar: 12g
- Fat: 10g
- Saturated Fat: 6g
- Cholesterol: 85mg
- Sodium: 320mg
- Calcium: 80mg
What’s Good:
- Decent protein from eggs and sour cream
- Calcium from the cheese
- Can add vegetables to boost nutrition
- More filling than it looks
What to Know:
- Higher in calories from cream and cheese
- Contains dairy and gluten
- Moderate sodium (use low-sodium broth to reduce)
My Take:
Look, this is comfort food with cream and sugar. It’s not a diet recipe. But it’s way better than takeout, costs less, and I know exactly what’s in it. When I want to make it lighter, I use the half-and-half version and load up on vegetables. But usually? I just eat a reasonable portion and enjoy it.
Final Thoughts
So that’s my go-to creamy scalloped corn! I’ve probably talked your ear off at this point, but when you make a recipe this often, you have a lot to say about it.
This has saved holiday dinners more times than I can count. It’s my answer to “what’s for dinner?” when I’m tired, don’t want takeout, and still want something that tastes really good. My kids are happy, my husband’s happy, and I’m happy because I’m not stressed about cooking.
Make it yours! Try different add-ins, swap in your favorite vegetables, adjust the sugar (though more is always better in my opinion). The best recipes are the ones you adapt to your family’s tastes.
If you make this, drop a comment and let me know what you think! I love hearing how recipes turn out in your kitchen. And if something doesn’t work, tell me that too—I’m here to help troubleshoot.
Happy cooking! And I hope your kitchen smells half as good as mine does right now.
Frequently Asked Questions
Can I use frozen corn instead of canned?
You can, but you’ll need to thaw and drain it first. I’ve done this when I couldn’t find canned corn—it works okay, just not as good as the real thing. Frozen corn has more water, so you’ll need to drain it more thoroughly. I use 2 cups of frozen corn per can of canned corn.
Why did my scalloped corn turn out watery?
Usually means you didn’t drain the corn enough, or you didn’t bake it long enough. Let the corn bake for a full 30 minutes. If it’s already watery, turn up the heat and let it reduce for another few minutes. The eggs will also thicken it up.
Can I make this ahead for a dinner party?
Sort of. Make the mixture up to 2 days ahead and store in the fridge. Bake right before serving (takes 30 minutes). It won’t be quite as good as fresh, but it’s close and saves you stress during the party. I do this all the time.
Why did my scalloped corn get grainy/lumpy?
The heat was too high when you added the corn, which made it seize up. Corn needs gentle heat. Always bake at 350°F (175°C). If it’s already grainy, try whisking in a splash of warm cream—sometimes you can save it.
Can I use jarred corn?
You can, but canned corn tastes so much better in this recipe. Jarred corn has a weird metallic taste that really shows up in creamy dishes. If you must use it, use half the amount because it’s stronger. But honestly, canned corn takes like 2 minutes to open. Buy canned corn if you want to save time.
How do I reheat leftovers without it getting dry?
Add a splash of milk or cream to a skillet, add your leftover corn, and heat gently over low heat, stirring frequently. The extra liquid brings back the creamy texture. Microwave sort of works but tends to dry it out. If you do microwave, definitely add a splash of milk first and heat in short bursts, stirring between.
Can I double this recipe?
Absolutely! Double everything and use your biggest baking dish. The cooking times stay the same. I do this when I’m meal-prepping or feeding a crowd. Just make sure your baking dish is big enough for the corn—you might need to use two pans or a very large baking dish.
Pin This Recipe!
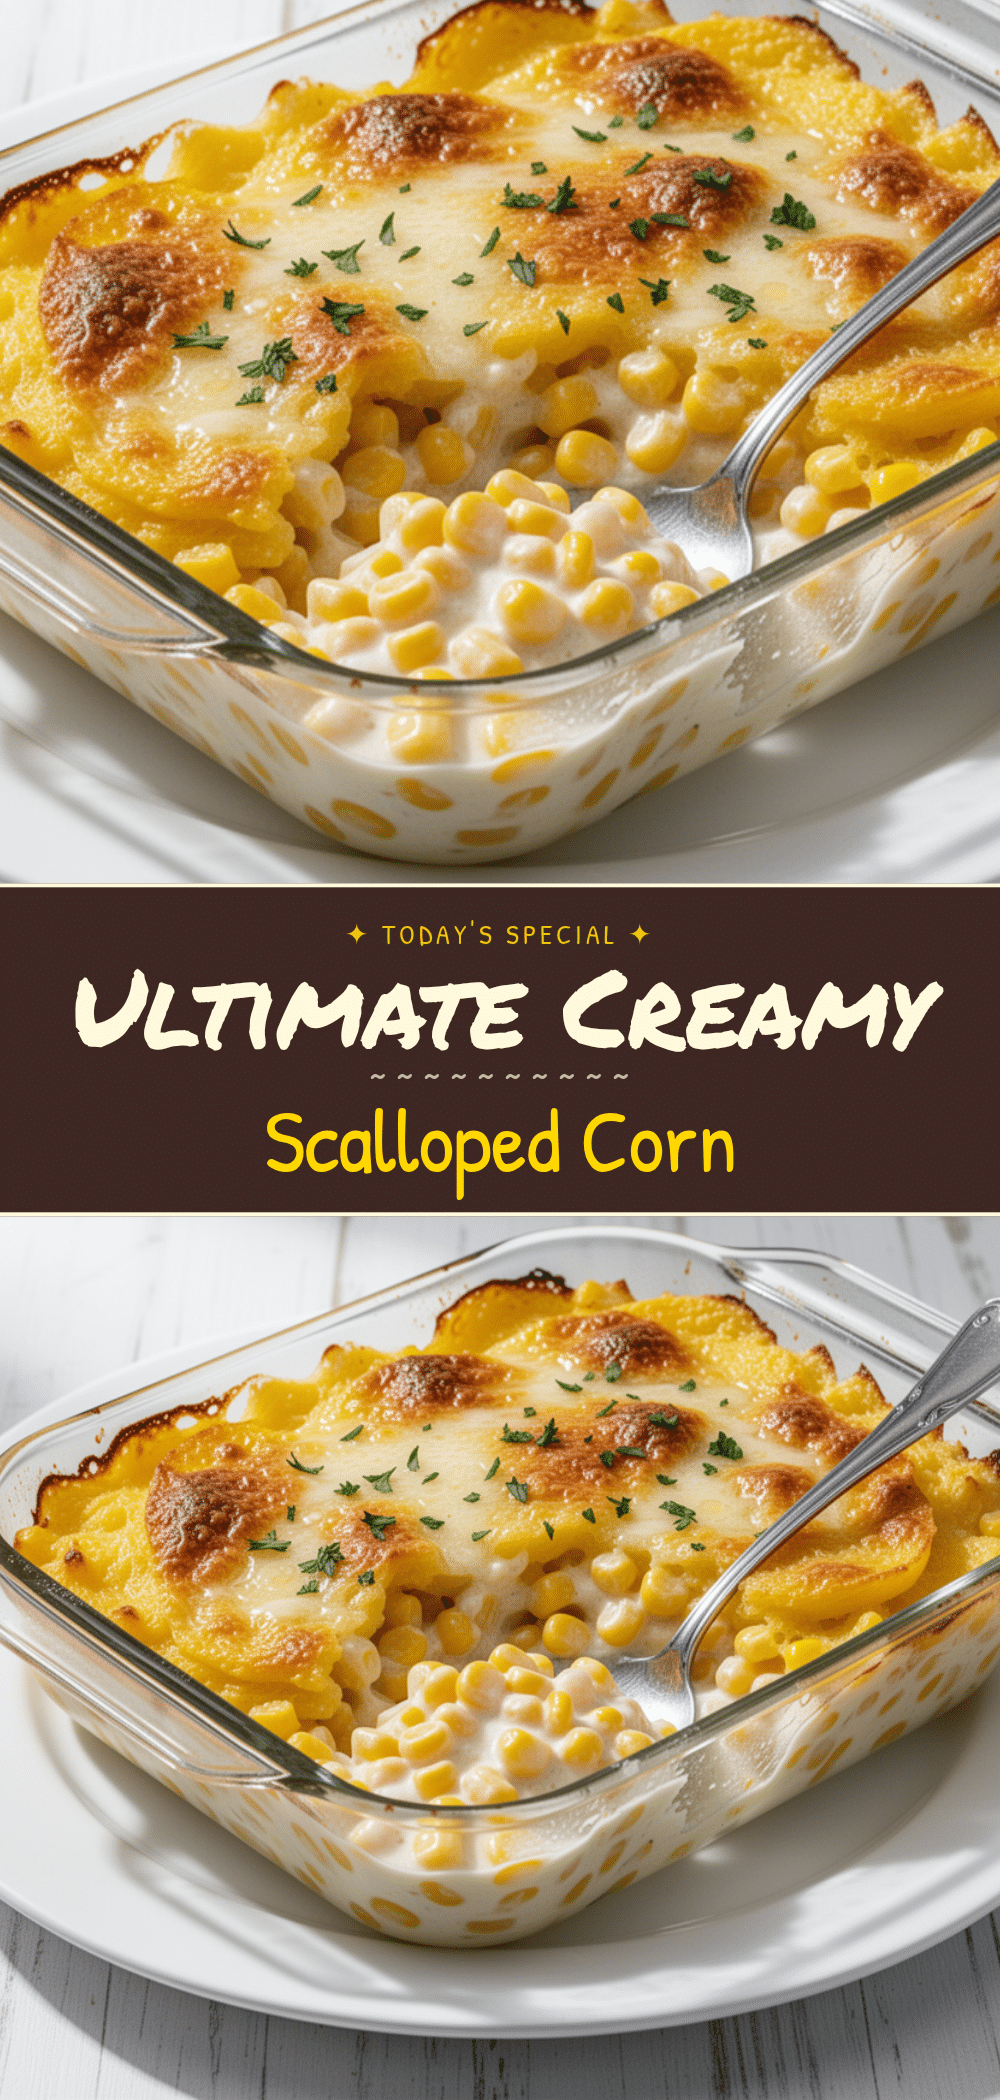

Classic Creamy Scalloped Corn: Best Easy Holiday Side
- Total Time: 40 minutes
- Yield: 6 servings 1x
Description
A foolproof, creamy, and sweet scalloped corn recipe that serves as the perfect holiday side dish. Made with whole kernel corn, sour cream, and eggs, it is easy to prepare and loved by all.
Ingredients
- 2 cans (15.25 oz each) whole kernel corn, drained but with some liquid reserved
- 2 large eggs
- 1 cup full-fat sour cream
- 4 tablespoons unsalted butter, melted
- ½ cup granulated sugar
- 1 teaspoon dry mustard
- ½ teaspoon salt
- Optional: 2 tablespoons chopped green onions
- Optional: ½ cup crushed Ritz crackers
- Optional: ½ cup shredded cheddar cheese
Instructions
- Preheat oven to 350°F (175°C). Grease a 9×9 inch baking dish with butter or cooking spray.
- In a large mixing bowl, whisk the eggs until frothy.
- Add the sour cream, melted butter, sugar, dry mustard, and salt to the eggs. Whisk until the mixture is smooth and well combined.
- Drain the canned corn, leaving a small amount of liquid for creaminess. Add the corn to the egg mixture and stir gently with a spatula to avoid breaking the kernels.
- Pour the mixture into the prepared baking dish.
- Bake for 30 minutes, or until the center is set (jiggles slightly) and the edges are golden brown.
- Remove from oven and let cool for 5 minutes before serving.
- Serve plain or topped with green onions, crushed crackers, or cheddar cheese.
Notes
Drain the corn but leave a little liquid for extra creaminess. Do not overmix the corn to prevent breaking the kernels. Check at 25 minutes to avoid drying out. This dish does not freeze well due to the dairy content.
- Prep Time: 5 minutes
- Cook Time: 30 minutes
- Category: Side Dish
- Cuisine: American
Nutrition
- Serving Size: 1 serving
- Calories: 220
- Sugar: 12
- Sodium: 320
- Fat: 10
- Saturated Fat: 6
- Carbohydrates: 28
- Fiber: 2
- Protein: 6
Keywords: scalloped corn, holiday side dish, Thanksgiving recipe, creamy corn, easy casserole, comfort food


