It was 11:30 PM on a Tuesday. The house was finally quiet, the kids were asleep, and I was standing in my kitchen in my pajamas, staring into the fridge like it held the secrets to the universe. I was craving something salty, something chewy, something that felt like a warm hug from the inside out. I grabbed the frozen bag of pretzel bites from the back shelf—the ones with the bright blue packaging—and dumped a handful into the air fryer. Five minutes later, I was biting into a sad, rubbery disc that tasted like cardboard and regret.
I threw the rest of the bag in the trash. I couldn’t do it. I needed real pretzels. Not the sad, frozen versions that lose their soul in the freezer aisle, but actual Bavarian pretzel bites. Soft, golden, salty, and chewy in the best way possible. So, I did what I always do when I’m craving something specific: I started experimenting. And honestly? It didn’t take long to realize that making homemade soft Bavarian pretzel bites with simple ingredients is easier than I ever imagined. It’s not about fancy baking techniques or expensive equipment. It’s about knowing a few tricks that transform basic pantry staples into something that tastes like it came from a Munich bakery.
These bites have taken over our house. They’re our go-to for movie nights, late-night snacks, and even breakfast (yes, really, with peanut butter and jelly). They’re soft enough to pull apart with your fingers, salty enough to make you reach for another one immediately, and they freeze beautifully for those nights when you’re too tired to bake but too hungry to order takeout. I’ve tested this recipe probably thirty times, tweaking the baking soda bath, the yeast proofing, and the butter brushing until it was perfect. And now, I’m sharing it with you.
There’s something deeply satisfying about pulling a batch of these out of the oven. The smell alone will make your neighbors wonder what you’re cooking. Plus, they’re incredibly versatile. You can dip them in beer cheese, mustard, or just eat them plain while watching Netflix. If you’ve been looking for a way to upgrade your snack game without spending hours in the kitchen, this is it. These homemade soft Bavarian pretzel bites are the answer to your salty, chewy cravings.
Why You’ll Love This Recipe
I know what you’re thinking. “Bread? At 11 PM? Do I have time for that?” Yes, you do. And here’s why these pretzel bites have completely replaced my need for chips and crackers:
Stupid Simple Ingredients — Seriously, you probably have everything you need in your kitchen right now. Flour, yeast, sugar, salt, butter, and baking soda. That’s it. No fancy flours, no obscure spices. If you can boil water and mix flour, you can make these. I’ve made these while holding a toddler on my hip, so if I can do it, anyone can.
Lightning Fast (Once You Know the Routine) — The first time you make these, it’ll take about an hour from start to finish. But once you get the hang of it? You’re looking at 45 minutes. And most of that time is just waiting for the dough to rise. You’re not actively cooking the whole time. I often let the dough rise while I’m doing other chores, so the actual work is minimal.
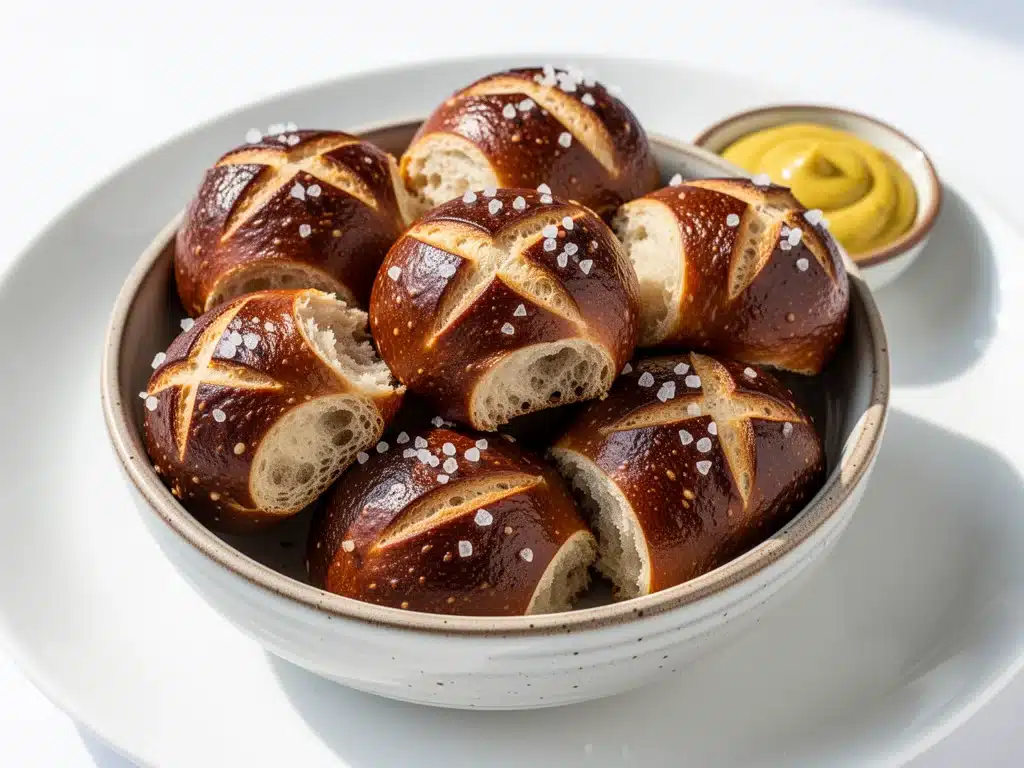
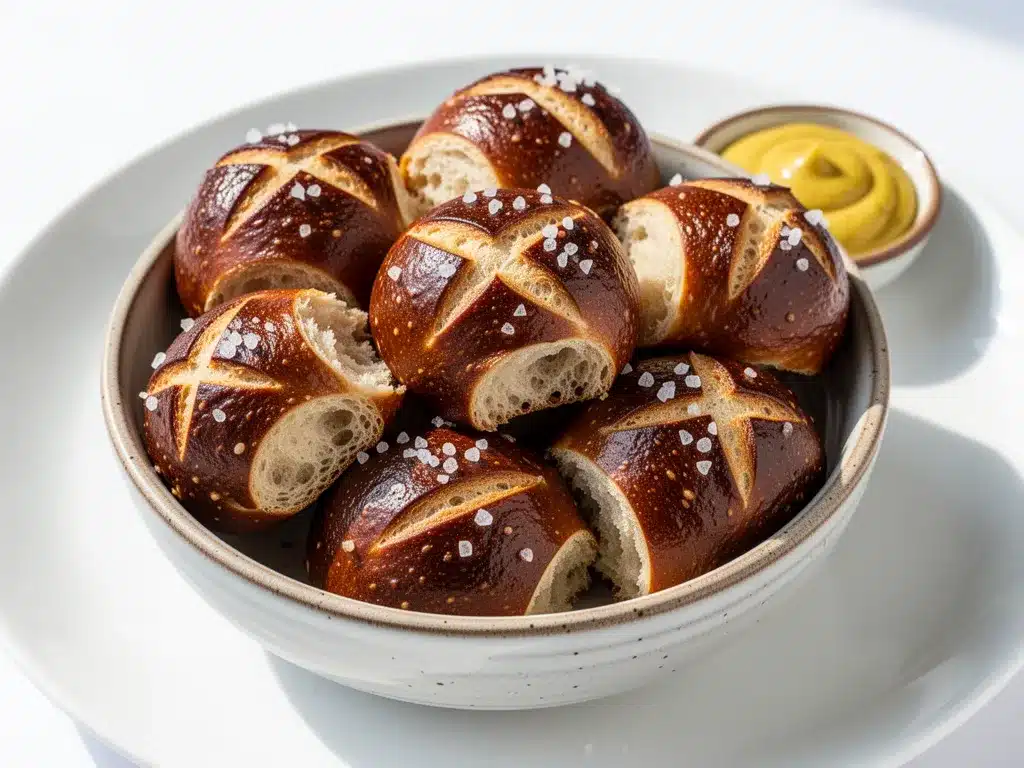
Soft, Chewy, and Perfectly Salty — Store-bought pretzels are hard. These are soft. Like, cloud-like soft on the inside with a slight crisp on the outside. The baking soda bath gives them that authentic pretzel flavor and golden color, and the coarse salt on top is just perfect. It’s the kind of texture that makes you close your eyes when you take a bite.
Freezes Like a Dream — This is the game-changer. I bake a double batch, freeze half of them, and then I have fresh-tasting pretzel bites for weeks. You can freeze them baked or unbaked. I usually freeze them unbaked on a tray, then transfer to a bag. When I want some, I let them thaw and rise, then bake. They taste fresh every single time.
Kid-Approved — My kids, who usually turn their noses up at “new” foods, fight over these. They love dipping them in ketchup, mustard, or even just butter. It’s a great way to get them involved in cooking, too. They love rolling the dough into ropes and sprinkling the salt.
This recipe has saved my sanity on busy weeknights. It’s my answer to “what’s for a snack?” when the pantry is bare but I want something warm and comforting. No complicated techniques, no weird ingredients, just reliable, delicious food that makes everyone happy.
Ingredients You’ll Need
Here’s the best part: you probably have most of this already. I’m not asking you to go to three different stores for obscure ingredients. This is truly simple ingredients, real food, no nonsense.
For the Dough:
Warm Water (1 cup / 240ml) — This is crucial. It needs to be warm, not hot. Think bathwater temperature. If it’s too hot, it’ll kill the yeast. If it’s too cold, the yeast won’t activate. I test it with my finger—it should feel warm but not burn. I use filtered water if I can, but tap water works fine.
Active Dry Yeast (2 packets / 1 packet 1/4 oz or 7g) — I use Fleischmann’s or Red Star. They’re reliable. If you’re using instant yeast, you can skip the proofing step and mix it directly with the flour, but active dry gives me that extra assurance it’s working. Don’t buy old yeast! If it’s been in your pantry for more than six months, buy fresh. It makes a huge difference.
Sugar (1 tablespoon) — This feeds the yeast and helps with browning. I use white granulated sugar. You can use honey or maple syrup for a slightly different flavor, but white sugar is traditional and reliable.
All-Purpose Flour (3 to 3.5 cups / 375-435g) — This is the base. I use King Arthur All-Purpose Flour because it has a good protein content that gives the pretzels their chew. Bread flour is even chewier, but all-purpose works perfectly if that’s what you have. Don’t use self-rising flour—it has baking powder in it and will mess up the texture.
Salt (1 teaspoon) — For flavor. I use kosher salt for mixing into the dough. It dissolves better than table salt.
Unsalted Butter (3 tablespoons / 42g, melted) — This adds richness and softness to the dough. I melt it in the microwave for 30 seconds. Make sure it’s not hot, or it’ll kill the yeast.
For the Topping and Bath:
Baking Soda (2/3 cup / 150g) — This is the secret weapon. The baking soda bath is what gives pretzels their distinctive flavor and dark golden color. It’s not optional. I know it seems like a lot, but you need enough to create a strong alkaline bath. I use Arm & Hammer baking soda. It’s the standard.
Water (4 cups / 960ml for the bath) — Just plain water for the baking soda bath.
Coarse Sea Salt or Pretzel Salt (for sprinkling) — This is non-negotiable. You need big flakes of salt. I buy pretzel salt specifically because it’s chunky and doesn’t dissolve immediately. Kosher salt works too, but pretzel salt looks more authentic. Maldon sea salt is great if you can find it.
Optional Toppings:
Garlic Powder — Mix with the salt for garlic pretzel bites. My husband’s favorite.
Cinnamon Sugar — Toss baked pretzels in melted butter and cinnamon sugar for a sweet version. Great for dessert.
Cheese Powder — Sprinkle with cheddar cheese powder after baking for a snack-attack vibe.
Personal Tips:
– Yeast Check: Before you start, mix the yeast with the warm water and sugar. Let it sit for 5-10 minutes. If it’s foamy and bubbly, it’s alive and ready. If it’s flat, throw it out and get new yeast. Don’t waste your time.
– Flour Measurement: Don’t scoop the flour directly from the bag with the measuring cup—it packs it down and you’ll end up with too much flour. Spoon the flour into the cup and level it off with a knife. This ensures your dough isn’t too dry.
– Baking Soda Safety: The baking soda bath is alkaline and can irritate your skin if you have sensitive hands. I wear gloves when handling the bath, or just wash your hands thoroughly afterward.
Equipment Needed
You don’t need fancy equipment for this. Here’s what I actually use:
Large Bowl — For mixing the dough. I use a 4-quart mixing bowl. Any large bowl works as long as it’s big enough for the dough to double in size.
Stand Mixer or Hand Mixer — Optional but helpful. I have a KitchenAid and I use the dough hook. It saves me arm pain. If you don’t have one, you can mix by hand, but it takes a few minutes of elbow grease.
Large Pot — For the baking soda bath. I use a 6-quart pot. It needs to be big enough to hold 4 cups of water and the baking soda, and big enough to fit a few pretzel bites at a time.
Baking Sheets — Two large sheet pans. I line them with parchment paper or silicone baking mats. Parchment paper is easier for cleanup, but silicone mats are reusable and work great.
Paring Knife or Pizza Cutter — For cutting the ropes into bites. A pizza cutter is faster and cleaner, but a sharp paring knife works fine.
Slotted Spoon or Spider Strainer — For lifting the pretzels out of the baking soda bath. A slotted spoon works, but a spider strainer is better because it drains faster.
Brush — For brushing the melted butter on top. A silicone brush is easy to clean.
Timer — Because I’m forgetful, and the dough doesn’t wait for me. My phone timer is my best friend.
Tool Tips:
– No Stand Mixer? No problem. Mix the dough with a wooden spoon until it comes together, then knead by hand on a floured surface for 5-7 minutes. It’s a workout, but it works.
– Parchment Paper: I always use parchment paper. It prevents sticking and makes cleanup a breeze. If you don’t have it, grease the pans well with butter or oil, but parchment is worth the extra few cents.
How to Make It: Step-by-Step
Alright, let’s make this! I’m walking you through exactly how I do it, including the little tricks I’ve picked up over the years.
Step 1: Proof the Yeast (5-10 minutes)
In a small bowl, combine the warm water, sugar, and yeast. Stir gently to combine. Let it sit for 5-10 minutes until it’s foamy and bubbly on top. This tells you the yeast is alive and active. If it’s not foamy, start over with new yeast. Don’t skip this step—it’s your safety net.
Step 2: Make the Dough (5-8 minutes)
In a large bowl, combine the flour and salt. Add the melted butter and the proofed yeast mixture. Stir with a wooden spoon or use a stand mixer with the dough hook on low speed. Mix until the dough comes together into a shaggy ball. If it’s too sticky, add flour 1 tablespoon at a time. If it’s too dry, add water 1 tablespoon at a time. The dough should be soft and slightly tacky, not sticky.
Step 3: Knead the Dough (7-10 minutes)
Turn the dough out onto a lightly floured surface. Knead it for 7-10 minutes until it’s smooth and elastic. I do this by hand, pushing the dough away with the heel of my hand, folding it over, and turning it. It’s therapeutic, honestly. If you’re using a stand mixer, knead on medium-low for 5-7 minutes. The dough should pass the “windowpane test”—stretch a small piece thin enough to see light through it without tearing.
Step 4: First Rise (1 hour)
Place the dough in a lightly oiled bowl, turning it once to coat. Cover with plastic wrap or a damp kitchen towel. Let it rise in a warm, draft-free spot for 1 hour, or until doubled in size. I often let it rise in the turned-off oven with the light on—the residual heat creates the perfect environment. Don’t rush this step. The dough needs time to develop flavor and texture.
Step 5: Shape the Pretzel Bites (10-15 minutes)
Once the dough has doubled, punch it down gently to release air. Turn it out onto a floured surface. Divide the dough into 4 equal pieces. Roll each piece into a long rope, about 18 inches long. Cut each rope into 6-8 equal pieces (about 2 inches each). You’ll have about 24-32 pretzel bites. Roll each piece into a ball, then roll it into a short rope, about 6 inches long. You can shape them into traditional pretzel knots if you want, but for bites, simple ropes or balls work best. Place them on parchment-lined baking sheets, leaving space between them.
Step 6: Second Rise (15-20 minutes)
Cover the shaped pretzels loosely with plastic wrap or a towel. Let them rise again for 15-20 minutes. They should look puffy and airy. This step is crucial for soft pretzels. Don’t skip it!
Step 7: The Baking Soda Bath (5 minutes)
While the pretzels are rising, preheat your oven to 425°F (220°C). In a large pot, bring 4 cups of water to a boil. Remove from heat and carefully stir in the baking soda. It will foam up—be careful not to spill. Let it settle for a minute. Working in batches, gently lower 3-4 pretzel bites into the bath. Cook for 30 seconds on each side. Use a slotted spoon to remove them and place them back on the baking sheets. This step gives them their signature color and flavor.
Step 8: Bake (10-12 minutes)
Brush the tops of the pretzels with melted butter. Sprinkle generously with coarse sea salt. Bake for 10-12 minutes until they’re deep golden brown. I rotate the pans halfway through for even baking. The pretzels should sound hollow when tapped on the bottom.
Step 9: Cool and Serve
Let the pretzels cool on the pan for 5 minutes before eating. They’re extremely hot inside! Serve warm with your favorite dipping sauce.
Expert Tips & Tricks
Here’s everything I’ve learned from making this dozens of times. These tips will save you from my mistakes.
The Baking Soda Bath is Key
I know it sounds weird, but this is what makes pretzels taste like pretzels. The alkaline bath creates the Maillard reaction that gives them their dark color and distinct flavor. Don’t skip it, and don’t use baking powder instead. Baking soda is the only thing that works for this.
Don’t Overbake
Pretzel bites are small, so they bake quickly. If you leave them in too long, they’ll be hard and crunchy instead of soft and chewy. I pull them out when they’re a deep golden brown, not dark brown. They’ll continue to cook slightly on the pan.
Use Coarse Salt
Table salt will dissolve instantly and you won’t get that satisfying crunch. Pretzel salt or kosher salt stays on top and provides the perfect salty contrast to the soft dough. I sprinkle it while the pretzels are still hot from the oven so it sticks.
Brush with Butter
Brushing the tops with melted butter before baking gives them a beautiful shine and adds richness. It also helps the salt stick. Don’t skip this step—it makes a difference in texture and flavor.
Freezing Unbaked Dough
If you want to prep ahead, you can freeze the shaped, risen pretzels on the baking sheet until solid, then transfer to a bag. When you’re ready to bake, let them thaw for 30 minutes, then do the baking soda bath and bake as normal. They’ll rise again slightly during thawing.
Common Mistakes (and how to avoid them):
Mistake: Dough is too sticky
Fix: Add flour 1 tablespoon at a time. Don’t add too much at once, or the dough will be dry. It should be soft and slightly tacky, not sticky like glue.
Mistake: Pretzels are hard
Fix: You overbaked them or didn’t let them rise enough. Next time, check them at 8 minutes and reduce bake time. Also, ensure your second rise is complete before baking.
Mistake: Baking soda bath didn’t work
Fix: Make sure the water is boiling before you add the baking soda, and let it settle before adding pretzels. Also, ensure you’re cooking them for the full 30 seconds per side.
Variations & Substitutions
Once you’ve nailed the basic version, here’s how you can mix it up. I’ve tried all of these.
Garlic Pretzel Bites
Mix 1 teaspoon garlic powder with the coarse salt before sprinkling. Add 1 teaspoon dried parsley for color. My husband’s favorite. The garlic flavor is subtle but amazing.
Cinnamon Sugar Pretzel Bites
Instead of salt, toss the baked pretzels in melted butter, then mix 1/4 cup sugar with 1 teaspoon cinnamon. Roll them in the mixture while warm. Great for dessert or a sweet snack.
Cheese Pretzel Bites
Sprinkle with grated Parmesan or cheddar cheese after the baking soda bath, before baking. Or sprinkle cheese powder after baking. Adds a savory kick.
Everything Bagel Pretzel Bites
Sprinkle with everything bagel seasoning instead of salt. It’s a fun twist that adds sesame seeds, poppy seeds, garlic, and onion.
Gluten-Free Option
Use a 1:1 gluten-free flour blend that includes xanthan gum. The dough will be stickier, so you may need less flour. The texture won’t be quite as chewy, but it’s still delicious. I’ve used King Arthur Gluten-Free Measure for Measure Flour and it works well.
Yeast-Free Option
Not really possible for traditional pretzels, as yeast is what gives them their rise and chew. If you’re avoiding yeast, try these soft pretzel muffins instead, which use baking powder.
Serving & Storage
How to Serve:
I usually serve these warm, straight from the oven. They’re best fresh, but they’re still good the next day if stored properly. Here are some dipping sauces that pair perfectly:
- Beer Cheese Dip — Classic pairing. Creamy, tangy, and perfect for pretzels.
- Dijon Mustard — Sharp and tangy, cuts through the richness.
- Sweet Chili Sauce — For a sweet and spicy kick.
- Marinara Sauce — Surprisingly good! Like pretzel pizza bites.
- Peanut Butter and Jelly — For my kids, this is a favorite combo. Sweet, salty, and satisfying.
Storage Instructions:
Room Temperature:
Store in an airtight container for up to 2 days. They’ll soften over time, which is fine for pretzel bites. If they get stale, refresh them in the oven at 350°F for 5 minutes.
Refrigerator:
I don’t recommend refrigerating them. It dries them out faster than room temperature. If you must, store in an airtight container for up to 3 days.
Freezing:
Freeze baked pretzels in a freezer-safe bag for up to 3 months. To reheat, thaw at room temperature and warm in the oven at 350°F for 5-10 minutes. Or freeze unbaked, as mentioned above.
Reheating:
Never microwave pretzels. They’ll get tough and chewy in the worst way. Always reheat in the oven or air fryer to restore the soft interior and slight crisp exterior.
Nutrition Information
I’m not a nutritionist, but here’s the breakdown if you’re tracking. These are estimates per bite (based on 24 bites).
- Calories: 110
- Protein: 3g
- Carbs: 20g
- Fiber: 1g
- Sugar: 1g
- Fat: 2g
- Sodium: 250mg (varies with salt amount)
What’s Good: They’re relatively low in calories per bite, and they provide some protein from the flour. What to Know: They’re primarily carbs, so keep portions in mind if you’re watching your carb intake. But honestly? These are a treat, so enjoy them without guilt.
Final Thoughts
So that’s my go-to homemade soft Bavarian pretzel bites! I’ve probably talked your ear off at this point, but when you make a recipe this often, you have a lot to say about it. These bites have saved my sanity, my taste buds, and my wallet. They’re better than store-bought, cheaper than restaurant pretzels, and so much more satisfying.
Make it yours! Try different toppings, experiment with dipping sauces, or make them for a party. The best recipes are the ones you adapt to your family’s tastes. If you make this, drop a comment and let me know what you think! I love hearing how recipes turn out in your kitchen. And if something doesn’t work, tell me that too—I’m here to help troubleshoot.
Happy baking! And I hope your kitchen smells half as good as mine does right now.
Frequently Asked Questions
Can I use instant yeast instead of active dry yeast?
Yes, you can. Instant yeast doesn’t need to be proofed first. You can mix it directly with the flour. Just reduce the liquid slightly if needed, as instant yeast absorbs moisture differently. I usually use the same amount, but if the dough seems dry, add a tablespoon of water.
Why did my pretzels turn out hard?
This usually happens if you overbake them or if the dough didn’t rise enough. Make sure you’re baking for only 10-12 minutes, and ensure the second rise is complete before baking. Also, don’t use too much flour when kneading—it can dry out the dough.
Can I make these ahead of time?
Yes! You can shape the pretzels, let them rise, then freeze them unbaked on a tray. Once frozen, transfer to a bag. When you’re ready to bake, let them thaw for 30 minutes, then do the baking soda bath and bake as normal. They’ll rise again during thawing.
What’s the best dipping sauce for pretzel bites?
It depends on your taste! Beer cheese is classic, Dijon mustard is tangy, and sweet chili sauce is fun. For kids, peanut butter and jelly or ketchup are winners. I also love a simple garlic butter dip.
Can I use bread flour instead of all-purpose flour?
Yes, bread flour will make the pretzels chewier, which is traditional for pretzels. All-purpose flour makes them softer. Both work well. I usually use all-purpose because it’s what I have, but if you want that authentic chew, go with bread flour.
How do I store leftovers?
Store in an airtight container at room temperature for up to 2 days. Reheat in the oven at 350°F for 5 minutes to refresh. Don’t refrigerate, as it dries them out.
Is the baking soda bath safe?
Yes, it’s safe. Baking soda is a common food ingredient. The bath is alkaline, so it can irritate sensitive skin, which is why I wear gloves or wash my hands afterward. Just be careful not to splash it on your eyes.
Pin This Recipe!

Homemade Soft Bavarian Pretzel Bites: 5-Ingredient Recipe
- Total Time: 45 minutes
- Yield: 24 servings 1x
Description
Soft, chewy, and salty homemade Bavarian pretzel bites made with simple pantry staples. These bites feature a traditional baking soda bath for authentic flavor and color, making them perfect for snacking, movie nights, or dipping.
Ingredients
- 1 cup warm water (for yeast)
- 2 packets active dry yeast (or 1 packet 1/4 oz / 7g)
- 1 tablespoon sugar
- 3 to 3.5 cups all-purpose flour
- 1 teaspoon salt (kosher)
- 3 tablespoons unsalted butter (melted)
- 2/3 cup baking soda (for bath)
- 4 cups water (for bath)
- Coarse sea salt or pretzel salt (for sprinkling)
Instructions
- Proof the yeast: In a small bowl, combine warm water, sugar, and yeast. Let sit for 5-10 minutes until foamy.
- Make the dough: In a large bowl, combine flour and salt. Add melted butter and proofed yeast mixture. Mix until a shaggy ball forms.
- Knead the dough: Turn dough onto a floured surface and knead for 7-10 minutes until smooth and elastic (or use a stand mixer with dough hook for 5-7 minutes).
- First rise: Place dough in an oiled bowl, cover, and let rise in a warm spot for 1 hour until doubled in size.
- Shape the bites: Punch down dough and divide into 4 pieces. Roll each into an 18-inch rope and cut into 6-8 pieces. Roll each piece into a short rope or ball. Place on parchment-lined baking sheets.
- Second rise: Cover shaped pretzels and let rise for 15-20 minutes until puffy.
- Prepare baking soda bath: Preheat oven to 425°F (220°C). Bring 4 cups of water to a boil in a large pot, remove from heat, and stir in baking soda.
- Boil pretzels: Working in batches, lower 3-4 pretzels into the bath for 30 seconds per side. Remove with a slotted spoon and return to baking sheets.
- Bake: Brush tops with melted butter and sprinkle with coarse sea salt. Bake for 10-12 minutes until deep golden brown.
- Cool and serve: Let cool for 5 minutes before eating. Serve warm with dipping sauces.
Notes
Ensure water for yeast is warm but not hot to avoid killing the yeast. Use coarse salt for the best texture. The baking soda bath is essential for authentic pretzel flavor and color; handle with care as it can irritate sensitive skin. Do not refrigerate leftovers as it dries them out; store at room temperature or freeze.
- Prep Time: 30 minutes
- Cook Time: 15 minutes
- Category: Snack
- Cuisine: German
Nutrition
- Serving Size: 1 pretzel bite
- Calories: 110
- Sugar: 1
- Sodium: 250
- Fat: 2
- Saturated Fat: 1
- Carbohydrates: 20
- Fiber: 1
- Protein: 3
Keywords: pretzel bites, homemade pretzels, soft pretzels, baking soda bath, snack recipe, easy bread recipe, Bavarian pretzels


