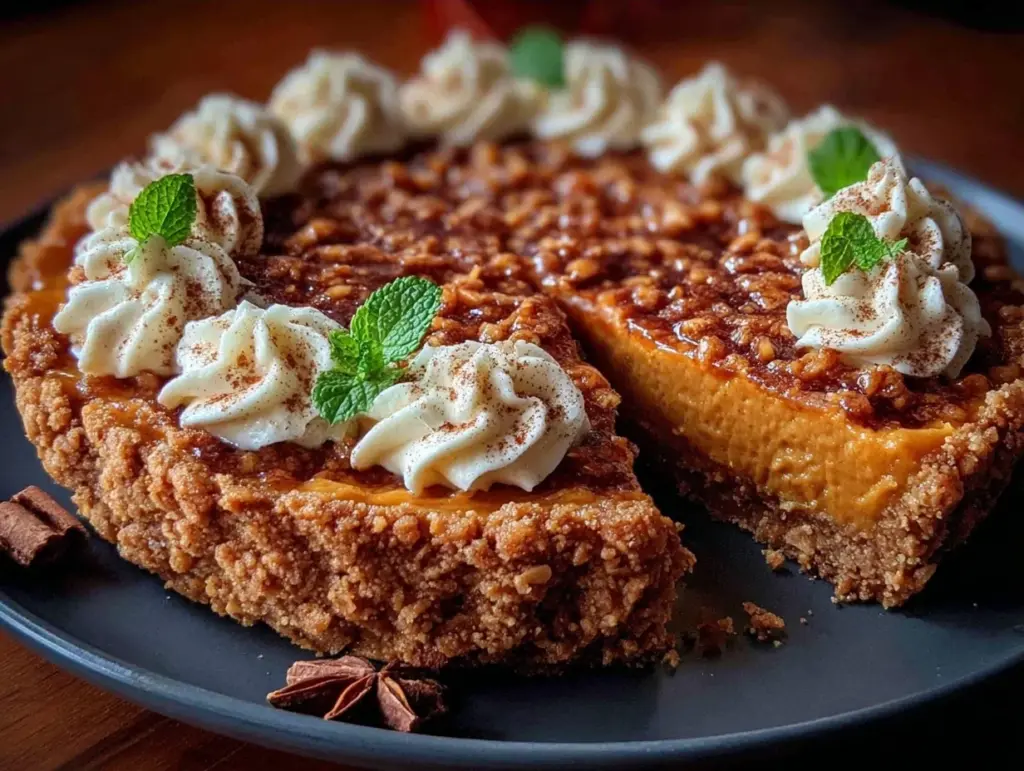
Last November, I was three hours away from having twenty people over for dinner, and I realized I had absolutely no dessert. None. I had tried to bake a classic pumpkin pie earlier that morning, but the crust shattered into a million pieces when I tried to slice it. It was a disaster. I stared at the broken crust and the leftover pumpkin filling, feeling that familiar panic of wanting to be a good hostess while simultaneously wanting to order pizza.
Then I remembered a trick my sister swore by: no-bake pie. Specifically, a no-bake fall pumpkin pie with gingersnap crust. I grabbed a bag of gingersnaps, some cream cheese, whipped topping, and canned pumpkin. I crushed the cookies, pressed them into a pan, mixed the filling in about five minutes, and popped it in the fridge. By the time my guests arrived, the pie was set, firm, and absolutely delicious.
My husband took one bite and said, “This tastes like it came from a fancy bakery, not a Tupperware container.” And honestly? He wasn’t wrong. The gingersnap crust added this incredible spicy crunch that cut through the creamy, spiced pumpkin filling perfectly. It became the star of the evening. Since then, I’ve made this no-bake fall pumpkin pie with gingersnap crust for every holiday, potluck, and random Tuesday night craving. It’s reliable, it’s forgiving, and it tastes like autumn in every bite.
I love this recipe because it takes the stress out of baking. You don’t need to watch the oven, you don’t need to worry about a soggy bottom, and you definitely don’t need to be a pastry chef. It’s the kind of dessert that feels indulgent but actually packs some fiber thanks to the whole-grain cookies and pumpkin. It’s comfort food that fuels your day without feeling like diet food, but still tastes like a treat. If you’ve ever been scared off by baking, this is your gateway pie.
Why You’ll Love This No-Bake Pie
There are a million reasons to make this, but let’s be real: most of them come down to how easy and delicious it is. Here’s what makes this no-bake fall pumpkin pie with gingersnap crust a permanent fixture in my kitchen:
- Zero Oven Heat — I make this in July if I’m in the mood. It requires no baking time, just mixing and chilling. This is perfect for hot days when you don’t want to heat up your kitchen. It’s much easier than dealing with a hot oven, especially if you’re already cooking a big meal.
- 5 Grams of Fiber Per Slice — This isn’t just empty sugar. The canned pumpkin is loaded with fiber, and the gingersnap cookies add more. It’s a dessert that actually has some nutritional merit, making it feel lighter than a traditional cheesecake or heavy cream pie. It’s fuel that keeps you going, not a diet compromise.
- Make-Ahead Magic — You can make this two days in advance. In fact, I recommend it. The flavors meld together overnight, and the texture firms up perfectly. I love that I can prep it while cleaning up from dinner, so the dessert is ready when everyone sits down.
- Gluten-Free Option Available — If you’re hosting friends with celiac disease or gluten sensitivity, you can easily swap the gingersnaps for a gluten-free variety. The texture holds up just as well. I’ve made this for gluten-free guests, and they never know the difference.
- Minimal Cleanup — One bowl for the crust, one bowl for the filling, and the pie plate. That’s it. No dirty mixing bowls from creaming butter, no cookie sheets, no pie dishes to scrub after baking. It’s the easiest cleanup I’ve ever had for a dessert this good.
- Restaurant-Quality Taste — The combination of tangy cream cheese, sweet pumpkin, and spicy ginger is sophisticated. It tastes like something you’d pay $8 for at a coffee shop, but it costs a fraction of that to make at home.
This is my go-to when dinner needs to just work, but I still want to impress. It’s reliable, it’s tasty, and it’s incredibly forgiving.
Key Ingredients for the Best Crust and Filling
Let’s talk about what goes into this no-bake fall pumpkin pie with gingersnap crust. You don’t need fancy ingredients, but quality matters. Here’s what I use and why.
For the Gingersnap Crust
Gingersnap Cookies (300g / about 2.5 cups crushed) — This is the star of the show. I use standard store-bought gingersnaps, but if you can find high-quality ones with real ginger and molasses, that’s even better. Avoid the super thin, crispy ginger snaps; you want the thicker, chewier kind. They crush easier and provide a better texture. If you can’t find gingersnaps, speculoos cookies are a great substitute, though they are sweeter.
Unsalted Butter (115g / 1/2 cup) — You need enough butter to bind the crumbs, but not so much that the crust is greasy. Melted butter works best here. I always use unsalted so I can control the salt level, especially since the cookies already have some.
Granulated Sugar (2 tbsp) — The cookies are already sweet, but a little extra sugar helps them bind together better and balances the spice. You can skip this if you’re watching sugar intake, but I don’t recommend it.
Pinch of Salt — Just a tiny pinch to enhance the ginger flavor. Don’t skip this; it makes the spices pop.
For the Pumpkin Filling
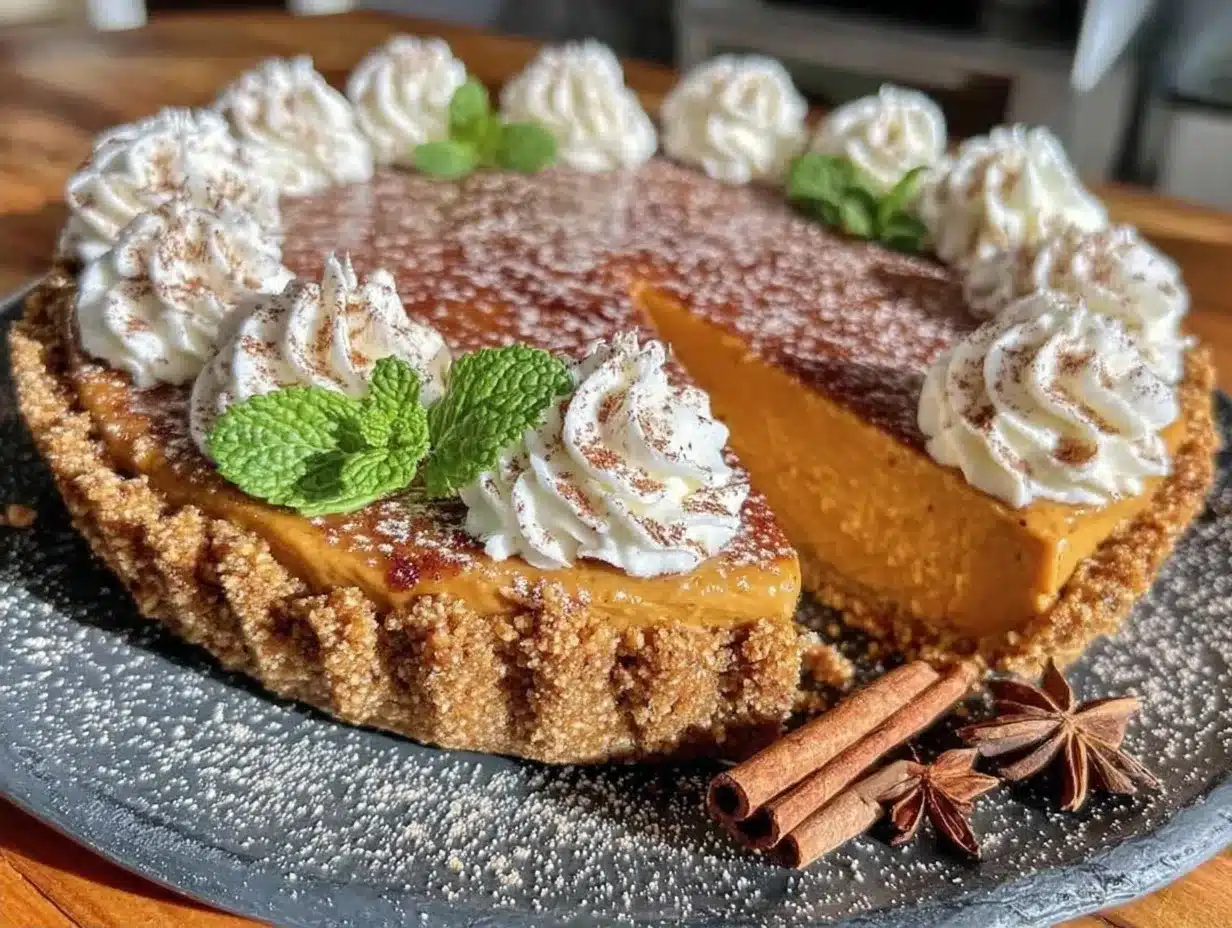
Cream Cheese (565g / 2 blocks, softened) — This is the base. Use full-fat, brick-style cream cheese, not the spread in a tub. The tub version has too much air and moisture, which will make your filling runny. Soften it at room temperature for at least 30 minutes. If it’s cold, you’ll get lumps.
Canned Pumpkin Puree (425g / 1 can) — Make sure it’s 100% pure pumpkin, not pumpkin pie filling. Pie filling already has sugar and spices added, which will throw off the balance. Pure pumpkin gives you control over the sweetness and spice. Look for a brand with a thick consistency; some brands are watery, so if yours is, drain it in a cheesecloth for 10 minutes.
Heavy Whipping Cream (240ml / 1 cup) — For that light, airy texture. You’ll whip this to soft peaks. Don’t use milk or half-and-half; you need the fat content to hold the structure. If you want a lighter option, you can use Cool Whip, but the texture won’t be as rich.
Pumpkin Pie Spice (2 tsp) — This is the magic dust. Cinnamon, nutmeg, ginger, cloves, allspice. If you don’t have a pre-mixed blend, you can make your own, but buying a jar is easier. Use fresh spice if possible; old spices taste dusty and flat.
Vanilla Extract (1 tsp) — Real vanilla, not imitation. It adds depth and rounds out the spices.
Maple Syrup (3 tbsp) — I use pure maple syrup instead of all sugar. It adds a subtle earthy sweetness that pairs beautifully with pumpkin and gingersnaps. It also boosts the fiber content slightly.
Tools You’ll Need
You don’t need fancy equipment. Here’s what I use to make this no-bake fall pumpkin pie with gingersnap crust smoothly.
Food Processor or Ziplock Bag — I use a food processor to crush the gingersnaps. It takes 30 seconds and gives you uniform crumbs. If you don’t have one, put the cookies in a heavy-duty ziplock bag and crush them with a rolling pin. It takes a few minutes of arm work, but it works fine.
9-Inch Pie Dish — A standard glass or ceramic pie dish works best. Glass lets you see the bottom crust to ensure it’s set. Avoid metal if you can, as it can conduct heat differently, though it’s not critical for a no-bake pie.
Stand Mixer or Hand Mixer — Mixing the cream cheese and pumpkin by hand is possible but tiring. A mixer ensures everything is smooth and lump-free. If you mix by hand, you’ll need a strong wrist and a lot of patience.
Whisk or Spatula — For folding in the whipped cream. You want to keep the air in the mixture, so gentle folding is key.
How to Make No-Bake Fall Pumpkin Pie with Gingersnap Crust
Ready to make this? It’s straightforward, but there are a few tricks to get the texture right. Here’s exactly how I do it.
Step 1: Prepare the Crust (10 minutes)
Preheat your oven to 350°F (175°C). Yes, you’re baking just the crust, not the whole pie. This step is crucial for flavor and texture. Pour your crushed gingersnap crumbs into a medium bowl. Add the melted butter, sugar, and salt. Stir until it looks like wet sand. If you squeeze a handful, it should hold together without falling apart.
Press the mixture firmly into the bottom and up the sides of your 9-inch pie dish. Use the bottom of a measuring cup to pack it down tight. Gaps in the crust lead to crumbling later. Bake for 8-10 minutes. You’ll smell the ginger and butter aroma. Let it cool completely on a wire rack. This step prevents the crust from getting soggy when you add the filling.
Step 2: Whip the Cream (5 minutes)
In a large bowl, pour the cold heavy whipping cream. Using your mixer on medium-high speed, whip until you form soft peaks. This means when you lift the beater, the cream forms a peak that droops slightly. Don’t over-whip it into stiff peaks, or it might become grainy when folded. Set this aside. You’ll fold this in later to keep the filling light and airy.
Step 3: Mix the Pumpkin Filling (10 minutes)
In a separate large bowl, beat the softened cream cheese on medium speed until smooth and creamy. This takes about 2 minutes. Scrape down the sides of the bowl. Add the pure pumpkin puree, maple syrup, pumpkin pie spice, vanilla extract, and a pinch of salt. Beat on low until just combined. Do not overmix once the pumpkin is in, or you’ll incorporate too much air, which can cause cracking or separation later.
Check the consistency. It should be thick and smooth. If it looks too thin, add a tablespoon more cream cheese. If it’s too thick, add a splash of milk. Taste it. Does it need more spice? Add a little more pumpkin pie spice. Does it need more sweetness? Add a teaspoon of maple syrup. Adjust to your liking.
Step 4: Fold and Chill (30 seconds + 4 hours)
Gently fold the whipped cream into the pumpkin mixture in three additions. Use a spatula and fold from the bottom up, rotating the bowl. You want to keep as much air in the mixture as possible. This is what gives the pie its fluffy texture. Don’t stir vigorously; you’ll deflate the cream.
Pour the filling into the cooled gingersnap crust. Smooth the top with a spatula. Cover loosely with plastic wrap and refrigerate for at least 4 hours, preferably overnight. The pie needs time to set. If you cut into it too soon, it will be mushy. Patience is key here.
Total time: 10 minutes prep, 8 minutes bake, 4+ hours chill. It’s mostly waiting, which is the easiest part of cooking.
Expert Tips from a Pumpkin Pie Veteran
I’ve made this no-bake fall pumpkin pie with gingersnap crust dozens of times. Here’s everything I learned from those attempts.
Don’t Skip the Crust Bake
I used to skip baking the crust to save time. Big mistake. The raw butter and flour taste doughy, and the crust stays soft. Baking it for 8 minutes sets the structure and toasts the ginger flavor. It’s worth the extra 8 minutes.
Room Temperature Cream Cheese is Non-Negotiable
If your cream cheese is cold, you will get lumps. And you cannot fix lumps in a no-bake pie without blending it, which adds too much air. Soften it for 30 minutes on the counter. If you forget, cut it into small cubes and microwave in 5-second bursts. It’s better than risking a lumpy pie.
Drain Watery Pumpkin
Some brands of canned pumpkin are very watery. If your puree looks thin, drain it in a fine-mesh sieve or cheesecloth for 10 minutes. Excess water makes the filling runny and prevents it from setting properly. I learned this the hard way when my first pie wobbled like jelly.
Fold, Don’t Stir
When combining the whipped cream and pumpkin mixture, use a gentle folding motion. Stirring vigorously deflates the cream, resulting in a dense, heavy pie. You want light and airy. Take your time with this step.
Slice with a Hot Knife
For clean slices, dip your knife in hot water and wipe it dry between each cut. The warm knife cuts through the cold cream cheese filling smoothly. Cold knives tend to drag and tear the crust.
Recipe Variations
Once you’ve nailed the basic version, here’s how to mix it up.
Chocolate Chip Pumpkin Pie
Fold 1/2 cup of mini chocolate chips into the pumpkin filling before folding in the whipped cream. The chocolate and pumpkin are a classic combination. It’s like a pumpkin cookie in pie form.
White Chocolate Gingersnap Crust
Melt 1/2 cup of white chocolate chips and mix them into the crust crumbs before pressing. It adds a sweet, creamy contrast to the spicy ginger. It’s rich, but it’s delicious.
Dairy-Free Option
Use vegan cream cheese and coconut cream (chilled overnight, scoop the solid part) instead of heavy cream. Use vegan gingersnaps. The texture will be slightly denser, but the flavor is still great. It’s a solid option for dairy-free guests.
Maple Pecan Twist
Add 1/2 cup of chopped pecans to the crust mixture. Toast them lightly before adding for extra crunch. The nuttiness pairs beautifully with the maple syrup in the filling.
Spiced Apple Variation
Swap the pumpkin puree for mashed cooked apples. Use apple pie spice instead of pumpkin spice. It’s a great alternative for those who don’t like pumpkin but still want a fall pie. The texture is similar, but the flavor is more tart.
Serving & Storage
Serving:
I serve this pie plain, but it’s great with a dollop of whipped cream or a sprinkle of toasted pecans. It pairs well with coffee or tea. If you’re serving it at a party, cut it into small squares rather than large wedges. It’s rich, and people prefer smaller bites.
Storage:
Keep this pie covered in the refrigerator for up to 5 days. It actually tastes better on day 2 and 3 as the flavors meld. Do not leave it at room temperature for more than 2 hours. The cream cheese and whipped cream need to stay cold for food safety.
Freezing:
This pie freezes well, but the texture of the whipped cream may change slightly upon thawing. It might become a bit watery. If you must freeze it, wrap the whole pie tightly in plastic wrap and foil. Freeze for up to 1 month. Thaw in the refrigerator overnight. I usually make one for immediate eating and one to freeze.
Nutrition Information
I’m not a nutritionist, but here’s the breakdown per slice (1/8 of the pie).
| Nutrient | Amount |
|---|---|
| Calories | 320 |
| Protein | 4g |
| Carbs | 35g |
| Fiber | 5g |
| Fat | 18g |
| Sodium | 280mg |
My Take: This is comfort food with cream and cheese. Not diet food. But it’s better than takeout and I know what’s in it. The 5g of fiber is a nice bonus, and the pumpkin adds vitamins A and C. It’s a balanced indulgence.
Final Thoughts
This no-bake fall pumpkin pie with gingersnap crust has saved me more times than I can count. It’s the perfect balance of easy and impressive. I love that it’s made with whole-food ingredients like pumpkin and spices, giving it a hearty feel. It’s a dessert that fuels your day without feeling like diet food, but still satisfies that sweet tooth.
If you make this, drop a comment! I love hearing how it turns out in your kitchen. Do you like it with whipped cream or plain? Let me know. And if you’re looking for other easy desserts, check out my Labor Day Frozen Lemonade Icebox Pie for a refreshing summer alternative. Happy cooking!
FAQs
Can I make this pie ahead of time?
Yes! This pie is actually better made a day in advance. The crust sets firmly, and the flavors deepen. You can make it 2-3 days before serving. Just keep it covered in the fridge.
Can I use pumpkin pie filling instead of pure pumpkin?
I don’t recommend it. Pumpkin pie filling already has sugar and spices added, which will make your pie too sweet and over-spiced. Pure pumpkin gives you control over the taste. If you must use pie filling, reduce the maple syrup and pumpkin spice in the recipe significantly.
Why is my filling runny?
Usually, this happens because the cream cheese wasn’t fully softened, or the pumpkin was too watery. Make sure your cream cheese is smooth before mixing, and drain your pumpkin puree if it looks thin. Also, ensure you chill the pie for at least 4 hours.
Can I use a different cookie for the crust?
Absolutely. Graham crackers, vanilla wafers, or even shortbread cookies work well. Gingersnaps add a nice spice, but any cookie that crushes into crumbs and binds with butter will work. Just adjust the sugar if the cookies are very sweet.
How do I store leftover pie?
Keep it covered in the refrigerator for up to 5 days. You can also freeze it for up to 1 month, though the texture may change slightly upon thawing. Thaw in the fridge overnight.
Is this pie gluten-free?
Not with standard gingersnaps. But you can easily make it gluten-free by using gluten-free gingersnap cookies or gluten-free graham crackers. The rest of the ingredients are naturally gluten-free.
Pin This Recipe!
No-Bake Fall Pumpkin Pie with Gingersnap Crust
- Total Time: 4 hours 18 minutes
- Yield: 8 servings 1x
Description
A reliable, forgiving no-bake dessert featuring a spicy gingersnap crust and a creamy, fiber-rich pumpkin filling. It requires minimal cleanup and can be made ahead of time.
Ingredients
- 300g (about 2.5 cups) crushed gingersnap cookies
- 115g (1/2 cup) unsalted butter, melted
- 2 tbsp granulated sugar
- Pinch of salt
- 565g (2 blocks) full-fat brick-style cream cheese, softened
- 425g (1 can) 100% pure pumpkin puree
- 240ml (1 cup) heavy whipping cream, cold
- 2 tsp pumpkin pie spice
- 1 tsp vanilla extract
- 3 tbsp pure maple syrup
Instructions
- Preheat oven to 350°F (175°C).
- In a medium bowl, combine crushed gingersnap crumbs, melted butter, sugar, and salt. Stir until the mixture resembles wet sand.
- Press the mixture firmly into the bottom and up the sides of a 9-inch pie dish. Bake for 8-10 minutes until fragrant.
- Let the crust cool completely on a wire rack.
- In a large bowl, whip the cold heavy cream on medium-high speed until soft peaks form. Set aside.
- In a separate large bowl, beat the softened cream cheese on medium speed until smooth (about 2 minutes).
- Add pumpkin puree, maple syrup, pumpkin pie spice, vanilla extract, and a pinch of salt to the cream cheese. Beat on low until just combined.
- Gently fold the whipped cream into the pumpkin mixture in three additions using a spatula, rotating the bowl to keep the mixture airy.
- Pour the filling into the cooled crust and smooth the top.
- Cover loosely with plastic wrap and refrigerate for at least 4 hours, preferably overnight, until set.
Notes
[‘Ensure cream cheese is fully softened to avoid lumps.’, ‘Drain watery pumpkin puree in a cheesecloth for 10 minutes if necessary to prevent a runny filling.’, ‘Do not overmix the pumpkin filling once added to avoid incorporating too much air.’, ‘Fold whipped cream gently to maintain a light, airy texture.’, ‘Slice with a hot, dry knife for clean cuts.’, ‘Can be made gluten-free by using gluten-free gingersnap cookies.’]
- Prep Time: 10 minutes
- Cook Time: 8 minutes
- Category: Dessert
- Cuisine: American
Nutrition
- Serving Size: 1 slice (1/8 of the
- Calories: 320
- Sugar: 22
- Sodium: 280
- Fat: 18
- Saturated Fat: 10
- Carbohydrates: 35
- Fiber: 5
- Protein: 4
Keywords: no-bake pie, pumpkin pie, gingersnap crust, fall dessert, easy dessert, make-ahead dessert, gluten-free option


