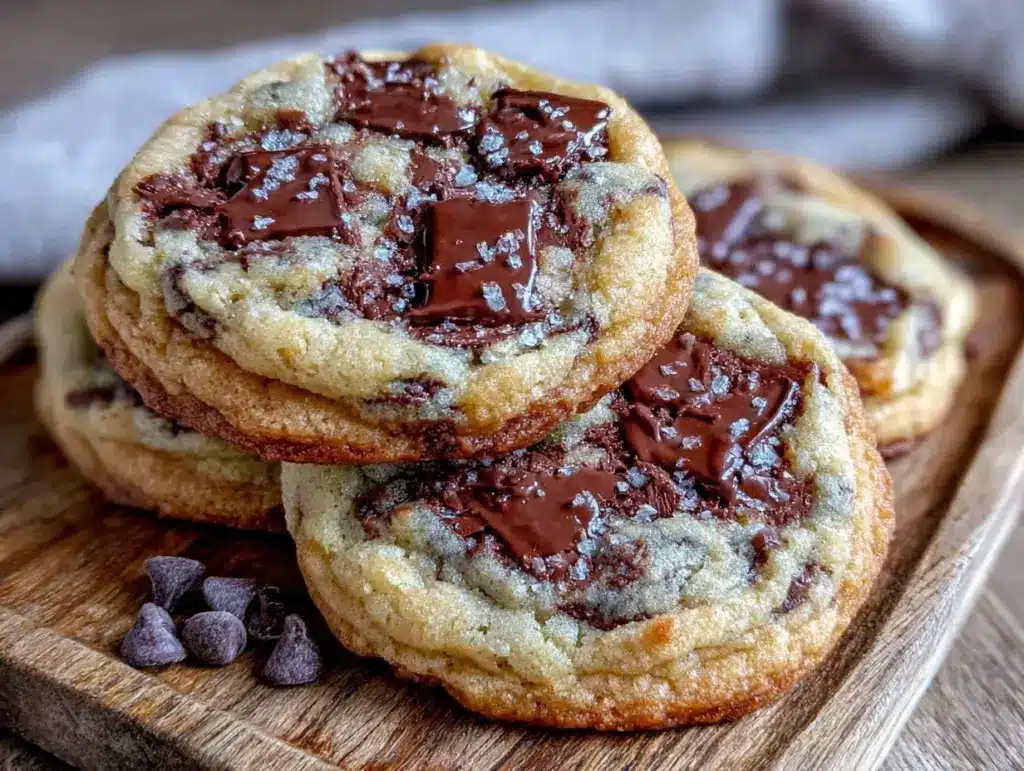
I have a confession to make. For years, I thought I was a decent baker. I could make bread that didn’t taste like bricks. I could roast a chicken that didn’t dry out. But cookies? Cookies were my kryptonite. I’d follow every Pinterest pin, every “best-ever” recipe, and end up with one of two disasters: flat, greasy puddles that spread into oblivion, or dry, chalky discs that shattered my molars.
Then came the Great Cookie Failure of last July. I was hosting a small dinner party, and I decided to make cookies from scratch. I followed a recipe that promised “thick and chewy.” What I got was a tray of thin, crispy shards that tasted like burnt sugar. My guests were polite, but I saw the way they reached for the game-day loaded brownie sundae instead. It stung. I couldn’t believe I was getting beaten by a skillet dessert made in five minutes.
That night, I did what any self-respecting kitchen nerd does: I didn’t just throw the tray away. I analyzed. I looked at the difference between those sad cookies and the ones from my favorite local bakery—the ones with the crisp edges, the gooey centers, and the sheer structural integrity to hold a scoop of ice cream without collapsing. It wasn’t about the chocolate. It wasn’t even about the butter. It was about time.
Specifically, it was about chilling. I’ve been making this Bakery-Style Chocolate Chip Cookies Thick & Chewy recipe for months now, tweaking it until it’s foolproof. I’ve tested it with different flours, different sugars, different chocolates. But the one variable that consistently delivers that bakery-quality texture? Chilling the dough. Seriously. It’s the difference between a snack and an experience. Once I embraced the wait, these cookies became my go-to. They’re thick, they’re chewy, and they taste like pure comfort. If you’ve ever struggled with spread or texture, this is the one trick that changes everything.
Why You’ll Love This Bakery-Style Chocolate Chip Cookies Thick & Chewy Recipe
Real talk: homemade cookies beat store-bought any day, but only if they actually taste good. A lot of “homemade” cookies are just sweetened flour. This batch is different. It’s dense, rich, and deeply caramelized. Here’s why this Bakery-Style Chocolate Chip Cookies Thick & Chewy recipe has taken over my kitchen (and my heart):
- Zero Spread Anxiety — I hate when cookies turn into pancakes. By chilling the dough, the fat solidifies before it hits the oven. The cookies hold their shape, giving you that tall, bakery-style dome instead of a flat disc.
- Deep Caramel Flavor — Using brown sugar isn’t just for color. It adds moisture and a toffee-like depth that white sugar just can’t match. The result is a cookie that tastes complex, not just sweet.
- Perfect Texture Contrast — Crisp edges that give way to a soft, chewy center. I love the crunch of the sea salt flake on top, which cuts through the richness of the chocolate.
- Make-Ahead Friendly — This recipe is a lifesaver for busy weeknights. You can mix the dough on Sunday, chill it all week, and bake fresh cookies on demand. No last-minute panic.
- Simple Ingredients — You don’t need fancy flour or exotic spices. Just butter, sugar, eggs, flour, baking soda, salt, and good chocolate. If you have these in your pantry, you’re golden.
This is my go-to when I need to impress guests without spending hours in the kitchen, or when I just need a hug in cookie form. It’s reliable, delicious, and honestly, harder to mess up than you’d think.
Key Ingredients for Bakery-Style Chocolate Chip Cookies Thick & Chewy
Before we get to the mixing bowl, let’s talk about what goes in. Precision matters here. I’m giving you exact measurements because baking is chemistry. Mess with the ratios, and you mess with the texture.
Unsalted Butter (1 cup / 226g) — I use unsalted because it gives you control over the salt content. You want it softened to the touch—dents easily but not greasy. If it’s melted, you’ll get flat cookies. If it’s too cold, it won’t cream properly. Aim for 65-67°F (18-19°C).
Dark Brown Sugar (1 ½ cups / 300g) — This is non-negotiable for chewiness. The molasses in brown sugar attracts moisture, keeping the center soft. Don’t use light brown sugar if you can help it; dark brown has a deeper, more caramel flavor that stands up to the chocolate. Pack it firmly into the cup.
Granulated White Sugar (½ cup / 100g) — This sugar helps with crisp edges. It spreads more than brown sugar and creates that thin, crunchy crust around the soft center. It balances the sweetness so the cookie isn’t cloying.
Large Eggs (2 large / ~100g without shell) — Room temperature eggs emulsify better with the butter and sugar. Cold eggs can cause the butter to seize. Crack them into a small bowl first to check for freshness, then add them.
Vanilla Extract (2 tsp / 10ml) — Use pure vanilla extract, not imitation. The flavor is crucial here. I love using a high-quality Madagascar bourbon vanilla for its creamy notes.
All-Purpose Flour (2 ¼ cups / 280g) — Don’t scoop and pour! That packs the flour in, leading to dry cookies. Spoon the flour into your measuring cup and level it off with a knife. If you weigh it, 280g is your target.
Baking Soda (1 tsp / 5g) — This provides lift and encourages browning. Make sure it’s fresh. If your baking soda is older than six months, it might not have enough power, and your cookies won’t rise.
Salt (1 tsp / 6g) — Salt isn’t just for taste; it enhances the chocolate flavor. I use fine sea salt in the dough. For the topping, use flaky sea salt like Maldon for that professional bakery finish.
Chocolate Chips or Chunks (2 cups / 340g) — I prefer a mix. Use high-quality semi-sweet chocolate chips for structure and chopped chocolate bars for pockets of melty goodness. Avoid pre-chipped grocery store brands if you can; they often contain stabilizers that prevent melting.
Tools Needed for Bakery-Style Chocolate Chip Cookies Thick & Chewy
You don’t need a fancy stand mixer or a kitchen scale, though a scale is nice for precision. Here’s what I actually use:
Large Mixing Bowl — A 5-quart bowl is perfect. It needs to be big enough to incorporate the flour without making a mess.
Hand Mixer or Stand Mixer — I use a hand mixer because it’s quick to clean. A stand mixer works fine too, just watch the speed. You want to cream the butter and sugar, not whip air into it like a meringue.
Silicone Spatula — Essential for scraping the bowl and folding in the chocolate chips. I have a few, but one large, flexible one does the job.
Baking Sheets — I use heavy-gauge aluminum sheets. Thin, flimsy sheets cause uneven baking and burning. If your sheets are warped, replace them. It’s worth it.
Parchment Paper — Line your sheets. It prevents sticking and makes cleanup a breeze. It also promotes even browning on the bottom.
Cooling Rack — You need to transfer cookies to a rack after baking. If you leave them on the hot sheet, they’ll continue to cook and get crispy instead of chewy.
Ice Cream Scoop — This is a game-changer for uniform size. I use a 2-tablespoon scoop. It ensures every cookie bakes at the same rate.
How to Make Bakery-Style Chocolate Chip Cookies Thick & Chewy
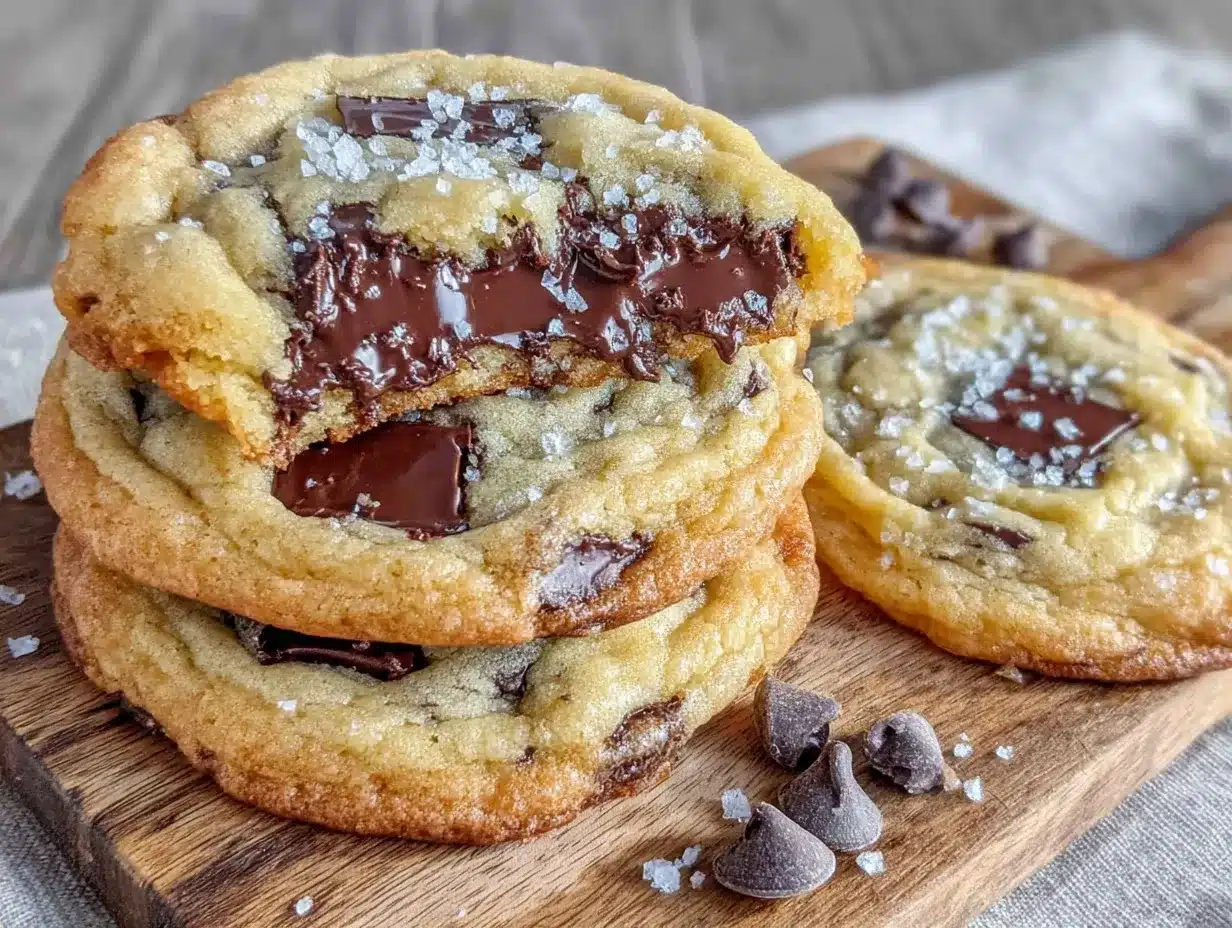
Let’s get into the actual baking process. This is where the magic happens. Pay attention to the steps, especially the chilling part.
Step 1: Cream the Butter and Sugars (3-4 minutes)
Start by beating the softened butter, brown sugar, and white sugar together on medium-high speed. This is crucial. You’re not just mixing; you’re incorporating air. The mixture should look pale, fluffy, and increased in volume. This usually takes about 3-4 minutes. If you rush this, your cookies will be dense and greasy. Scrape down the sides of the bowl halfway through to ensure even mixing. The texture should be like wet sand that holds its shape when squeezed.
Step 2: Add Wet Ingredients (1 minute)
Reduce the mixer speed to medium. Add the eggs one at a time, mixing just until incorporated after each. Then add the vanilla extract. Mix for another 30 seconds. The mixture might look slightly separated or curdled—that’s okay. It will come together once you add the flour. Don’t overmix here, or you’ll develop gluten and get tough cookies.
Step 3: Mix Dry Ingredients (30 seconds)
In a separate bowl, whisk together the flour, baking soda, and salt. Then, gradually add the dry ingredients to the wet mixture on low speed. Mix until *just* combined. You should still see streaks of flour. Stop mixing now. Overmixing is the #1 cause of tough cookies. The dough will be thick and stiff.
Step 4: Fold in Chocolate (1 minute)
Switch to your silicone spatula. Gently fold in the chocolate chips or chunks. Be gentle. You want to distribute them evenly without crushing them or overworking the dough. If you’re using chopped chocolate, make sure you get pieces of all sizes.
Step 5: The One Trick — Chill the Dough (At least 24 hours)
This is the step most people skip, and it’s why their cookies fail. Cover the bowl tightly with plastic wrap or transfer the dough to an airtight container. Refrigerate for at least 24 hours, up to 72 hours. Why? Chilling allows the flour to fully hydrate, which improves flavor. More importantly, it solidifies the butter. When cold dough hits the hot oven, the butter melts slower, allowing the cookies to set before they spread. This creates that thick, chewy texture. I know it’s hard to wait, but trust me. If you’re in a rush, you can freeze the dough balls for 30 minutes, but the flavor develops best with a long chill.
Step 6: Preheat and Scoop (5 minutes)
Preheat your oven to 350°F (175°C). Line two baking sheets with parchment paper. Scoop the dough into balls. I use a 2-tablespoon scoop, which yields about 24 cookies. Place them on the sheets, leaving at least 2 inches of space between them. They will spread, but not too much.
Step 7: Bake (10-12 minutes)
Bake one sheet at a time in the center of the oven for 10-12 minutes. You want the edges to be golden brown and set, but the centers to still look slightly underbaked and soft. They will firm up as they cool. If you bake them until they look done in the oven, they’ll be dry. Rotate the pan halfway through for even browning.
Step 8: Cool and Salt (5 minutes)
Let the cookies sit on the hot baking sheet for 5 minutes. This allows them to finish cooking gently. Then, transfer them to a wire rack to cool completely. While they are still warm, sprinkle with flaky sea salt. The salt melts slightly into the cookie, adding that savory-sweet finish. Enjoy warm for the best texture, or store for later.
Total Time Breakdown: Prep: 15 minutes | Chill: 24+ hours | Bake: 12 minutes | Cool: 5 minutes
Expert Tips for Bakery-Style Chocolate Chip Cookies Thick & Chewy
Here’s everything I learned from making this too many times. These tips will save you from common pitfalls.
Don’t Skip the Chill
I cannot stress this enough. I once made these without chilling because I had guests arriving in an hour. The cookies spread into flat, greasy messes. They tasted okay, but the texture was wrong. The chill is what gives them that bakery-style height and chewiness. If you’re impatient, freeze the dough balls for at least 1 hour. Do not bake warm dough.
Weigh Your Flour
If you’re using cups, spoon and level. If you have a scale, use it. 280g of flour is significantly different from 2 cups scooped directly from the bag. Too much flour = dry, crumbly cookies. Too little = flat, greasy cookies. Precision is key.
Use High-Quality Chocolate
Your chocolate is 50% of the flavor. I buy a bar of high-quality semi-sweet chocolate (like Ghirardelli or Valrhona) and chop it myself. It melts better and tastes richer than chips. If you use chips, look for ones with a high cocoa butter content.
Underbake Slightly
Take the cookies out when the edges are golden but the centers look soft and puffy. They will continue to cook on the hot pan. If you wait until the center looks set, you’ll overbake them. Chewy cookies come from a slightly underbaked center.
Recipe Variations for Bakery-Style Chocolate Chip Cookies Thick & Chewy
Once you’ve nailed the basic version, here’s how to mix it up. This recipe is a blank canvas.
Peanut Butter Chip Cookies
Swap half the chocolate chips for peanut butter chips. The flavor combination is incredible. You can also add ½ cup of creamy peanut butter to the dough for extra richness.
Oatmeal Raisin Cookies
Add 1 cup of old-fashioned oats and ½ cup of raisins. The oats add chewiness and heartiness. This is a great way to use up oats you have lying around.
Double Chocolate Cookies
Replace ¼ cup of the flour with cocoa powder. Add dark chocolate chips and white chocolate chips. It’s rich, intense, and perfect for chocolate lovers.
Gluten-Free Option
Use a 1:1 gluten-free flour blend that contains xanthan gum. The texture will be slightly different but still delicious. Make sure to chill the dough thoroughly.
Vegan Variation
Use vegan butter and a flax egg (1 tbsp ground flaxseed + 3 tbsp water per egg). The texture might be slightly crisper, but the flavor is still great.
Macadamia Nut Cookies
Add 1 cup of chopped macadamia nuts and use white chocolate chips. This is a tropical twist that’s surprisingly sophisticated.
Serving & Storage for Bakery-Style Chocolate Chip Cookies Thick & Chewy
Serving:
These cookies are best enjoyed warm. I love serving them with a cold glass of milk or a scoop of vanilla ice cream. They also pair beautifully with fresh watermelon agua fresca if you’re having a summer gathering. For a dessert board, arrange them with other treats like labor-day blueberry peach crisp bars for a colorful spread.
Storage:
Store cooled cookies in an airtight container at room temperature for up to 5 days. Place a slice of bread in the container to keep them soft. The bread will dry out, but the cookies will stay chewy.
Freezing Dough:
This recipe freezes perfectly. Scoop the dough into balls and freeze them on a baking sheet until solid. Then transfer to a freezer bag. They will keep for up to 3 months. Bake directly from frozen, adding 1-2 minutes to the bake time.
Freezing Baked Cookies:
Baked cookies also freeze well for up to 3 months. Thaw at room temperature. They might lose a little chewiness but are still delicious.
Nutrition Information for Bakery-Style Chocolate Chip Cookies Thick & Chewy
I’m not a nutritionist, but here’s the breakdown per cookie (makes 24 cookies):
| Nutrient | Amount |
|---|---|
| Calories | 220 |
| Protein | 3g |
| Carbs | 32g |
| Fiber | 1g |
| Sugar | 22g |
| Fat | 10g |
| Sodium | 180mg |
My Take: These are indulgent cookies. They have sugar and butter. They’re not a health food. But they’re better than store-bought because you control the ingredients. Enjoy them as a special treat, not a daily snack. Balance is key.
Final Thoughts on Bakery-Style Chocolate Chip Cookies Thick & Chewy
Making cookies from scratch is a labor of love, but it doesn’t have to be a labor of frustration. This Bakery-Style Chocolate Chip Cookies Thick & Chewy recipe is my answer to every bad cookie experience I’ve ever had. It’s reliable, delicious, and incredibly satisfying to make. The chilling step is the secret weapon, but the rest is simple, honest baking.
If you make this, drop a comment! I love hearing how it turns out in your kitchen. Did you add extra chocolate? Did you use the chill trick? I want to know. And if you need more dessert inspiration, check out my cookie dough stuffed brownies for another sweet treat.
Happy cooking!
FAQs About Bakery-Style Chocolate Chip Cookies Thick & Chewy
Q: Can I skip the chilling step?
A: You can, but I don’t recommend it. Without chilling, the butter will melt too quickly, and the cookies will spread flat. They’ll taste good, but they won’t be thick and chewy. If you’re in a rush, freeze the dough balls for at least 1 hour.
Q: Why did my cookies spread too much?
A: This usually happens if the butter was too soft or melted, or if the dough wasn’t chilled. Make sure your butter is softened but still firm. Also, check your baking soda. If it’s old, it won’t provide enough lift.
Q: Can I use brown butter instead of regular butter?
A: Yes! Brown butter adds a nutty, toffee-like flavor that is amazing in cookies. Let it cool completely to room temperature before creaming with the sugar. If it’s warm, it will melt the sugar and change the texture.
Q: How do I store leftover dough?
A: Wrap the dough tightly in plastic wrap and refrigerate for up to 3 days. Or, freeze it for up to 3 months. Thaw in the refrigerator overnight before scooping and baking.
Q: Can I make these cookies gluten-free?
A: Yes. Use a 1:1 gluten-free flour blend that contains xanthan gum. The texture might be slightly different, but they will still be delicious. Ensure all other ingredients, like the chocolate chips, are certified gluten-free if you have a severe allergy.
Q: Why do my cookies taste bland?
A: Salt is crucial. Don’t skip it. Also, make sure you’re using real vanilla extract, not imitation. The quality of your chocolate also plays a big role in the overall flavor profile.
Pin This Recipe!
Bakery-Style Chocolate Chip Cookies Thick & Chewy
- Total Time: 24 hours 27 minutes
- Yield: 24 servings 1x
Description
These bakery-style chocolate chip cookies are thick, chewy, and rich with deep caramel flavor. The secret to their perfect texture is chilling the dough for at least 24 hours, which prevents spreading and enhances flavor.
Ingredients
- 1 cup (226g) unsalted butter, softened to 65-67°F (18-19°C)
- 1 ½ cups (300g) dark brown sugar, packed
- ½ cup (100g) granulated white sugar
- 2 large eggs, room temperature
- 2 tsp pure vanilla extract
- 2 ¼ cups (280g) all-purpose flour, spooned and leveled
- 1 tsp (5g) baking soda
- 1 tsp (6g) fine sea salt
- 2 cups (340g) chocolate chips or chunks (mix of semi-sweet chips and chopped chocolate bars)
- Flaky sea salt (like Maldon) for topping
Instructions
- Cream the softened butter, brown sugar, and white sugar together on medium-high speed for 3-4 minutes until pale, fluffy, and increased in volume. Scrape down the sides of the bowl halfway through.
- Reduce mixer speed to medium. Add eggs one at a time, mixing just until incorporated. Add vanilla extract and mix for 30 seconds.
- In a separate bowl, whisk together flour, baking soda, and salt. Gradually add dry ingredients to the wet mixture on low speed, mixing until just combined (streaks of flour should remain).
- Switch to a silicone spatula and gently fold in the chocolate chips or chunks until evenly distributed.
- Cover the bowl tightly with plastic wrap or transfer to an airtight container. Refrigerate for at least 24 hours (up to 72 hours) to solidify the butter and hydrate the flour.
- Preheat oven to 350°F (175°C). Line two baking sheets with parchment paper.
- Scoop dough into 2-tablespoon balls (yields about 24 cookies). Place on sheets leaving 2 inches of space between them.
- Bake one sheet at a time in the center of the oven for 10-12 minutes. Edges should be golden brown and set, but centers should look slightly underbaked and soft. Rotate pan halfway through.
- Let cookies sit on the hot baking sheet for 5 minutes to finish cooking gently. Transfer to a wire rack to cool completely.
- While still warm, sprinkle with flaky sea salt. Enjoy warm or store in an airtight container.
Notes
The most critical step is chilling the dough for at least 24 hours. This solidifies the butter, preventing the cookies from spreading too much and ensuring a thick, chewy texture. If you are in a rush, you can freeze the dough balls for 30 minutes to 1 hour, but the flavor develops best with a long chill. Weigh your flour for precision; too much flour leads to dry cookies, too little leads to flat cookies. Underbake slightly for chewiness; the cookies will firm up as they cool. Store in an airtight container with a slice of bread to maintain softness.
- Prep Time: 15 minutes
- Cook Time: 12 minutes
- Category: Dessert
- Cuisine: American
Nutrition
- Serving Size: 1 cookie
- Calories: 220
- Sugar: 22
- Sodium: 180
- Fat: 10
- Saturated Fat: 6
- Carbohydrates: 32
- Fiber: 1
- Protein: 3
Keywords: chocolate chip cookies, bakery style cookies, thick and chewy cookies, chilling cookie dough, homemade cookies, dessert recipe


